Showing posts with label Finished Quilt 2019. Show all posts

Monday, December 30, 2019

Design Wall Monday

It has been quite busy around here with cleaning up after the Christmas extravaganza, and getting our home reorganized.
I was able to accomplish my 20th finished quilt for 2019 this weekend, which is very satisfying! Here I am hand stitching the binding on Slow Sunday Stitching while watching Arthur Christmas on my laptop. It was such a fun movie and I was delighted with the Toronto reference (which is close to where I live). The dialogue said "Santas always come through Canada. Nobody lives there. It's nice and quiet!" 
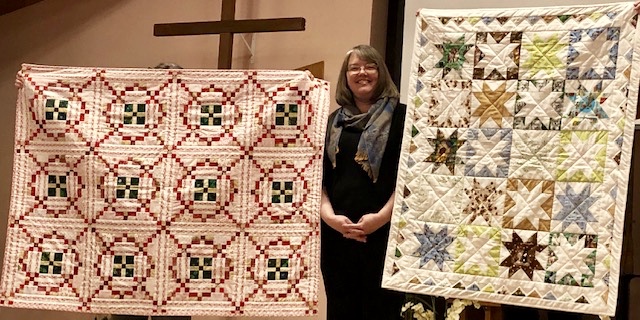
LOL... I live here and it's not quiet at all!

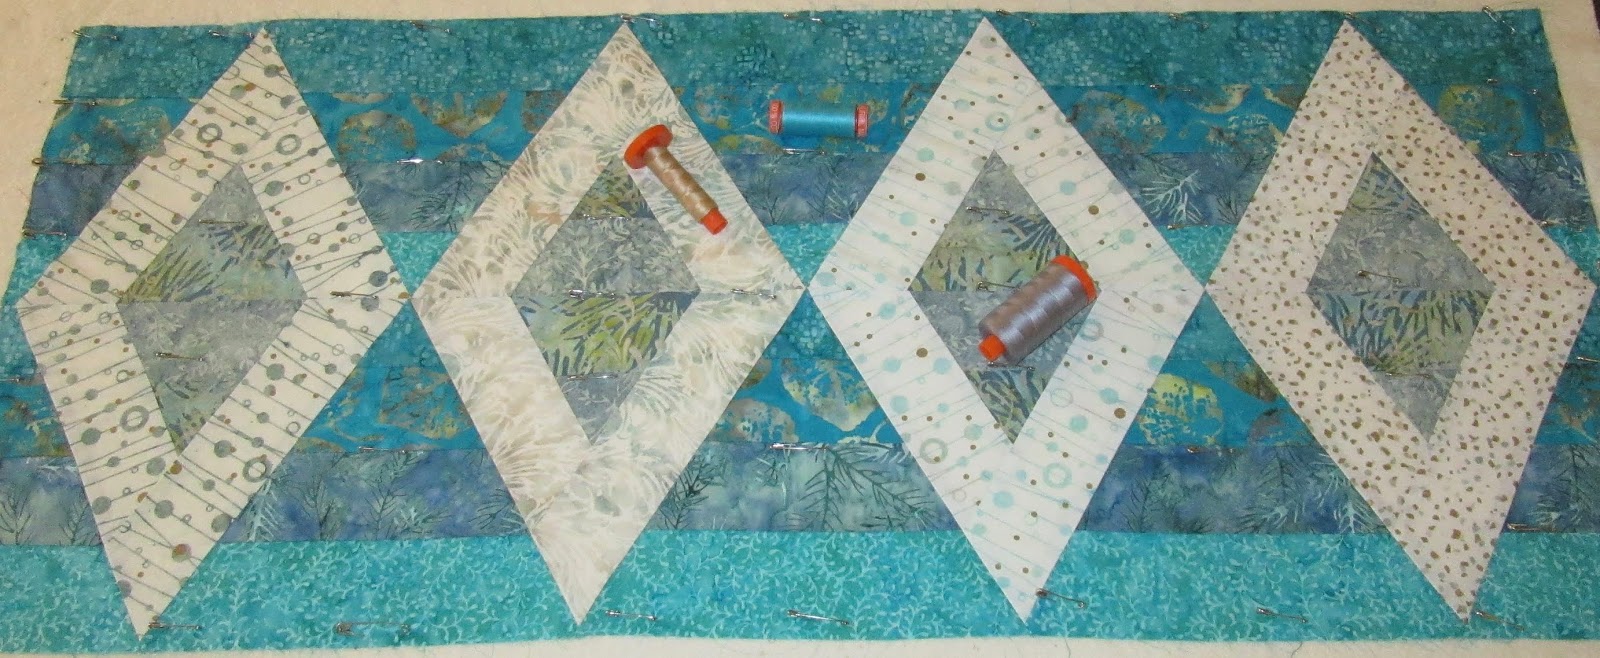
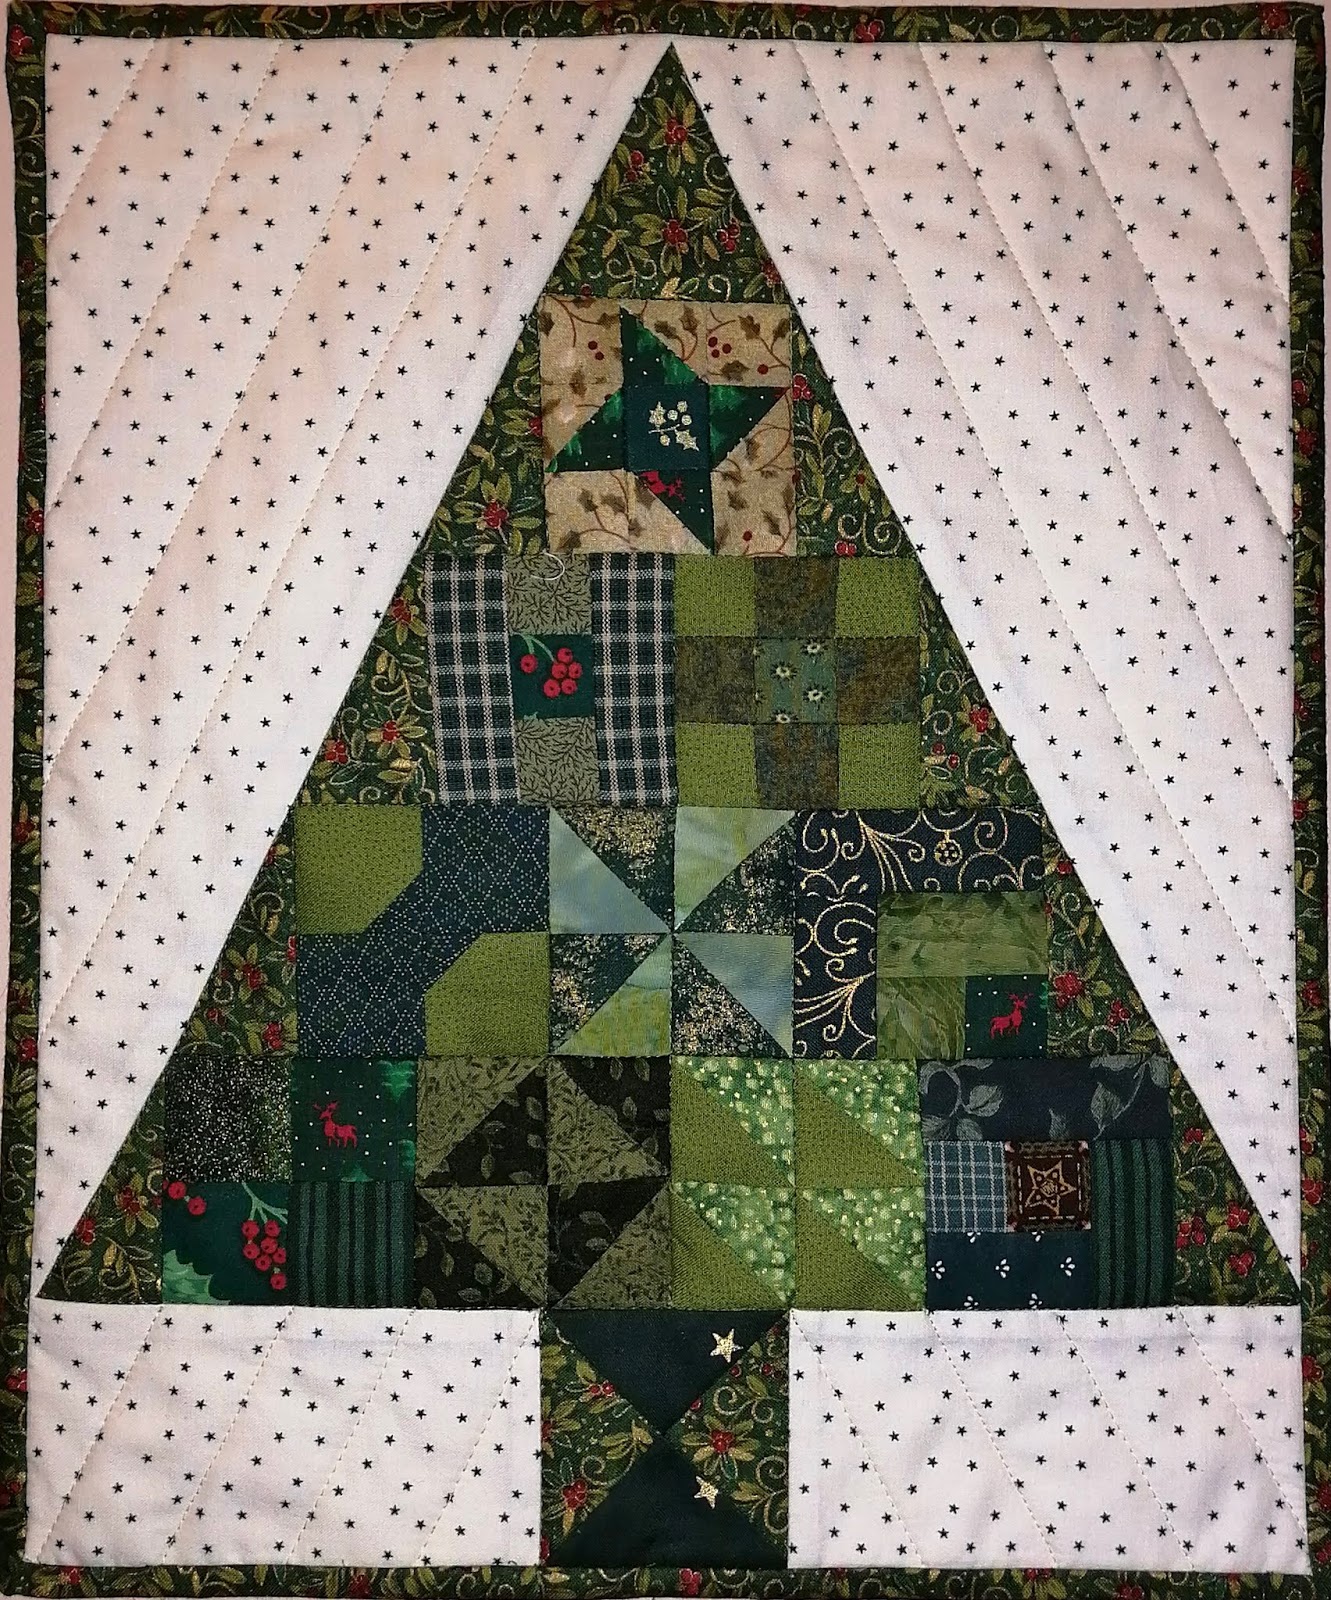
Today there is a finished miniature quilt on the design wall  ... a "Temecula Tiny Tree". Quilting was simple... straight lines through the tree in green thread, and quilted lines parallel to the tree in neutral thread in the background. So cute, and a perfect way to end the year!


I have also been catching up with the Quiltville mystery
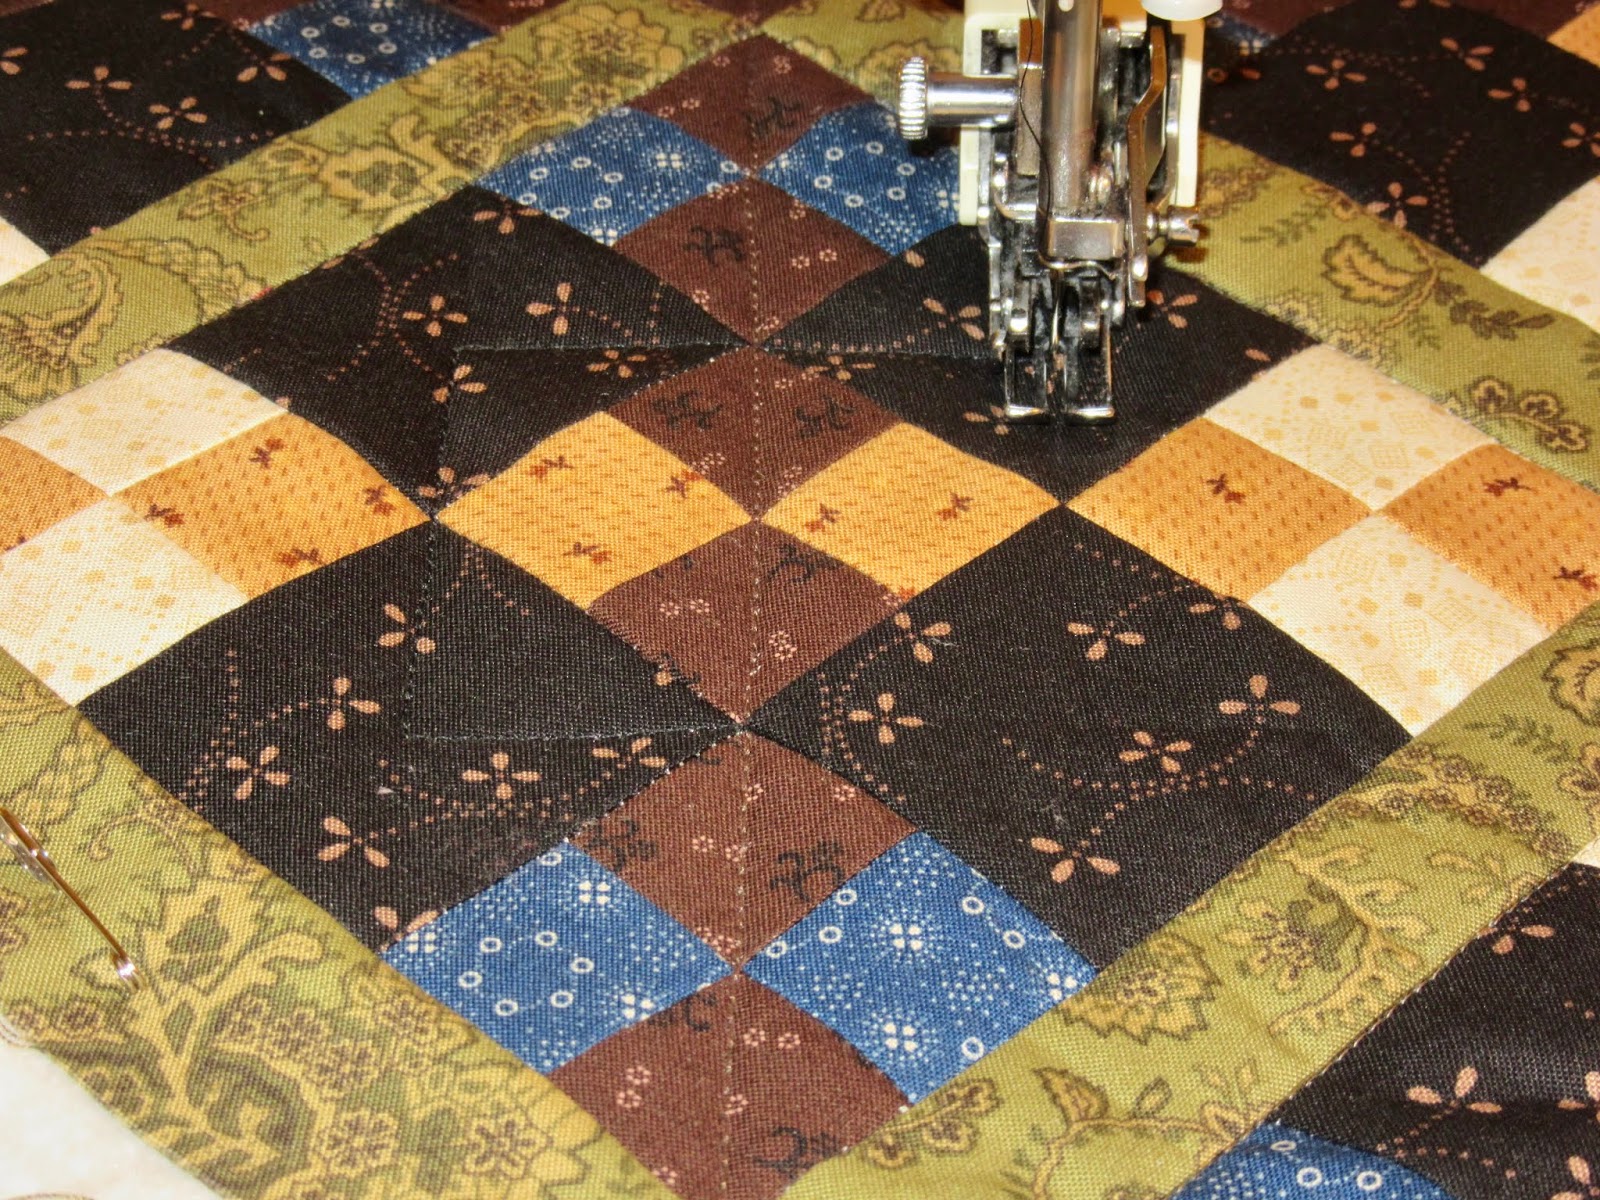
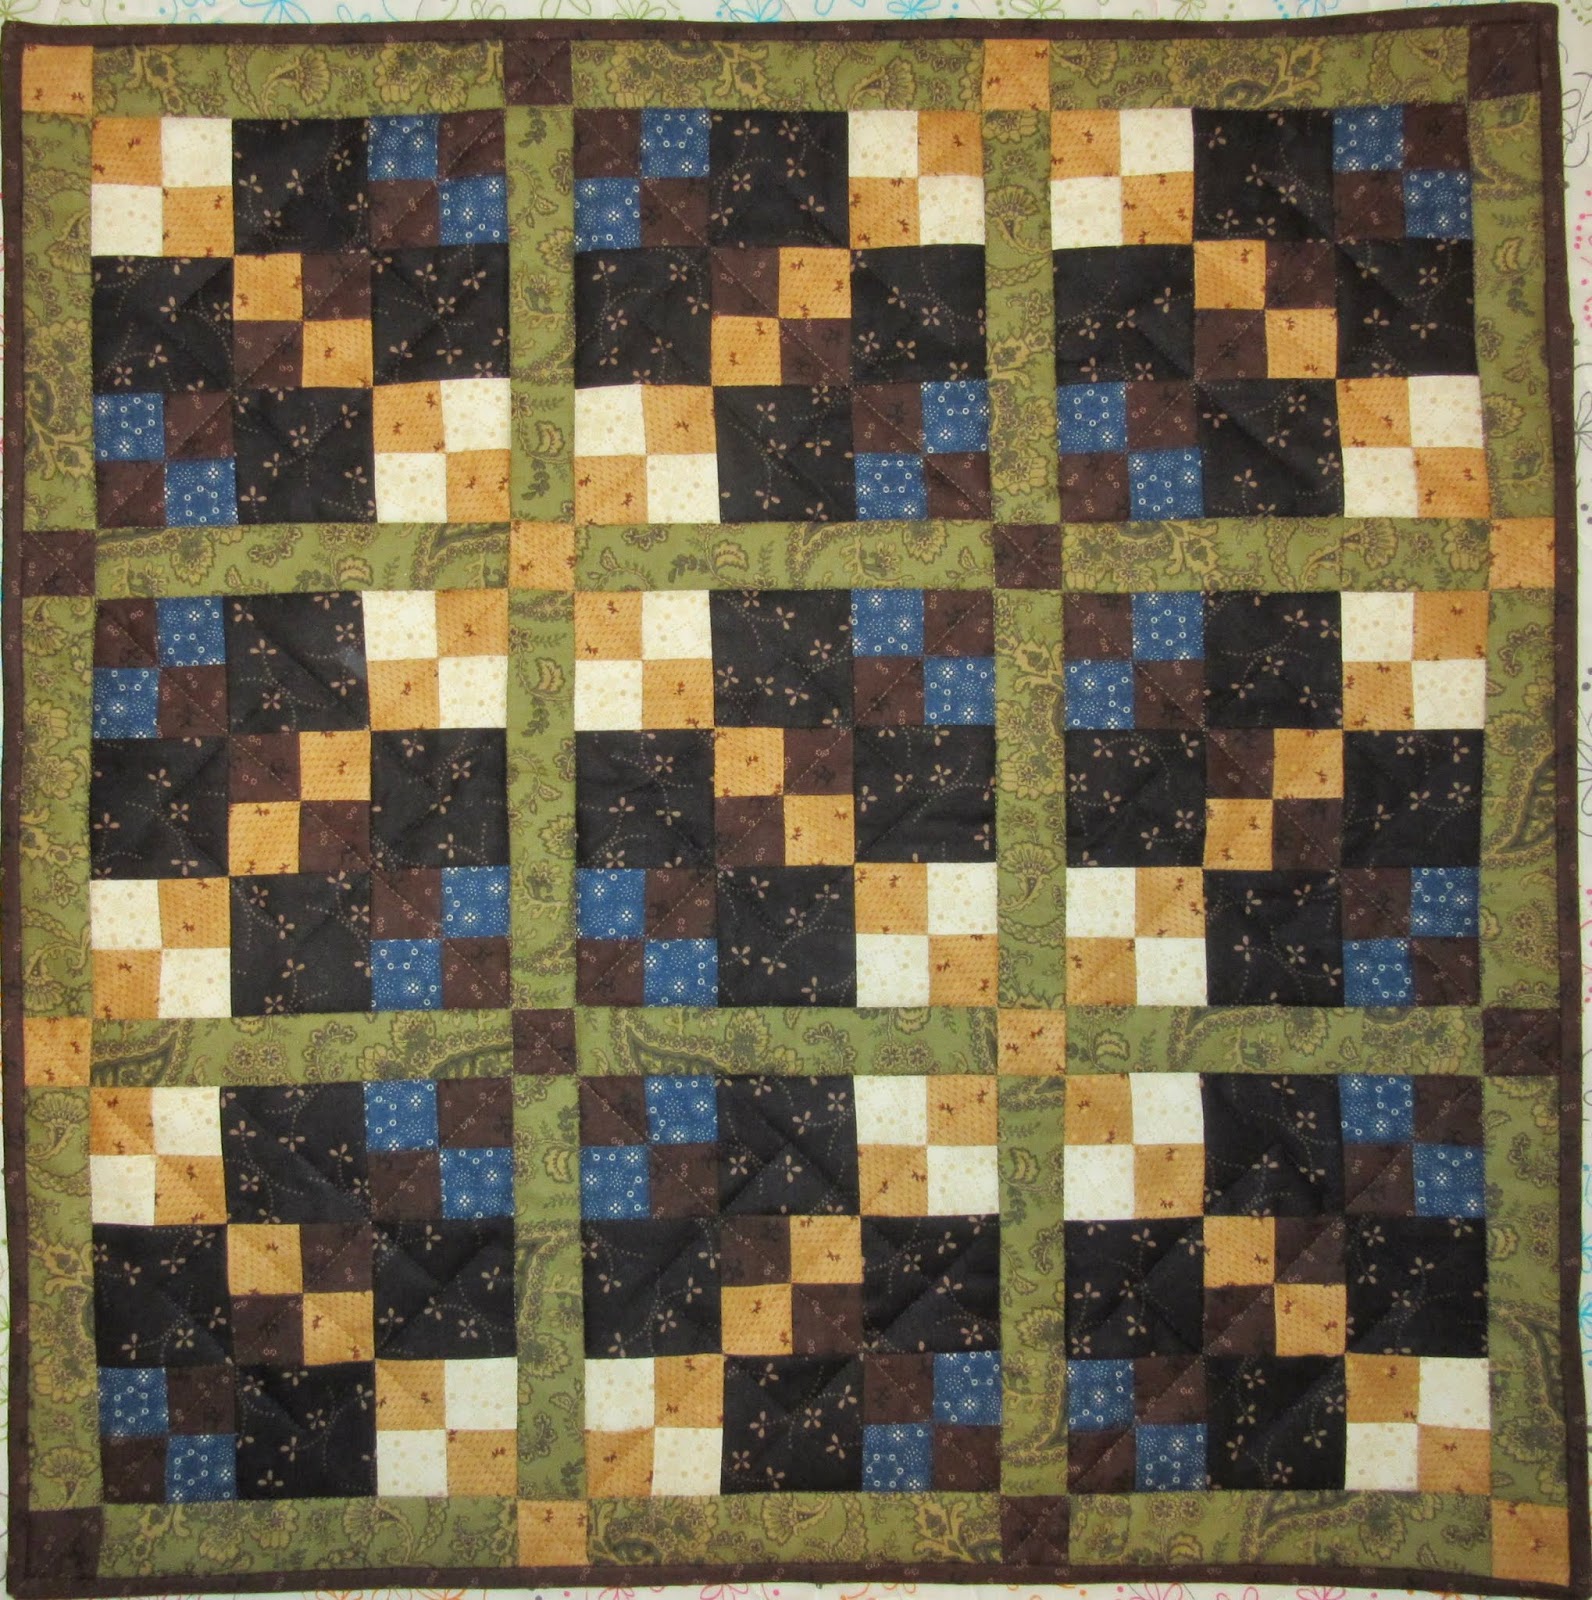
Here is the container full of parts and pieces sewn so far.
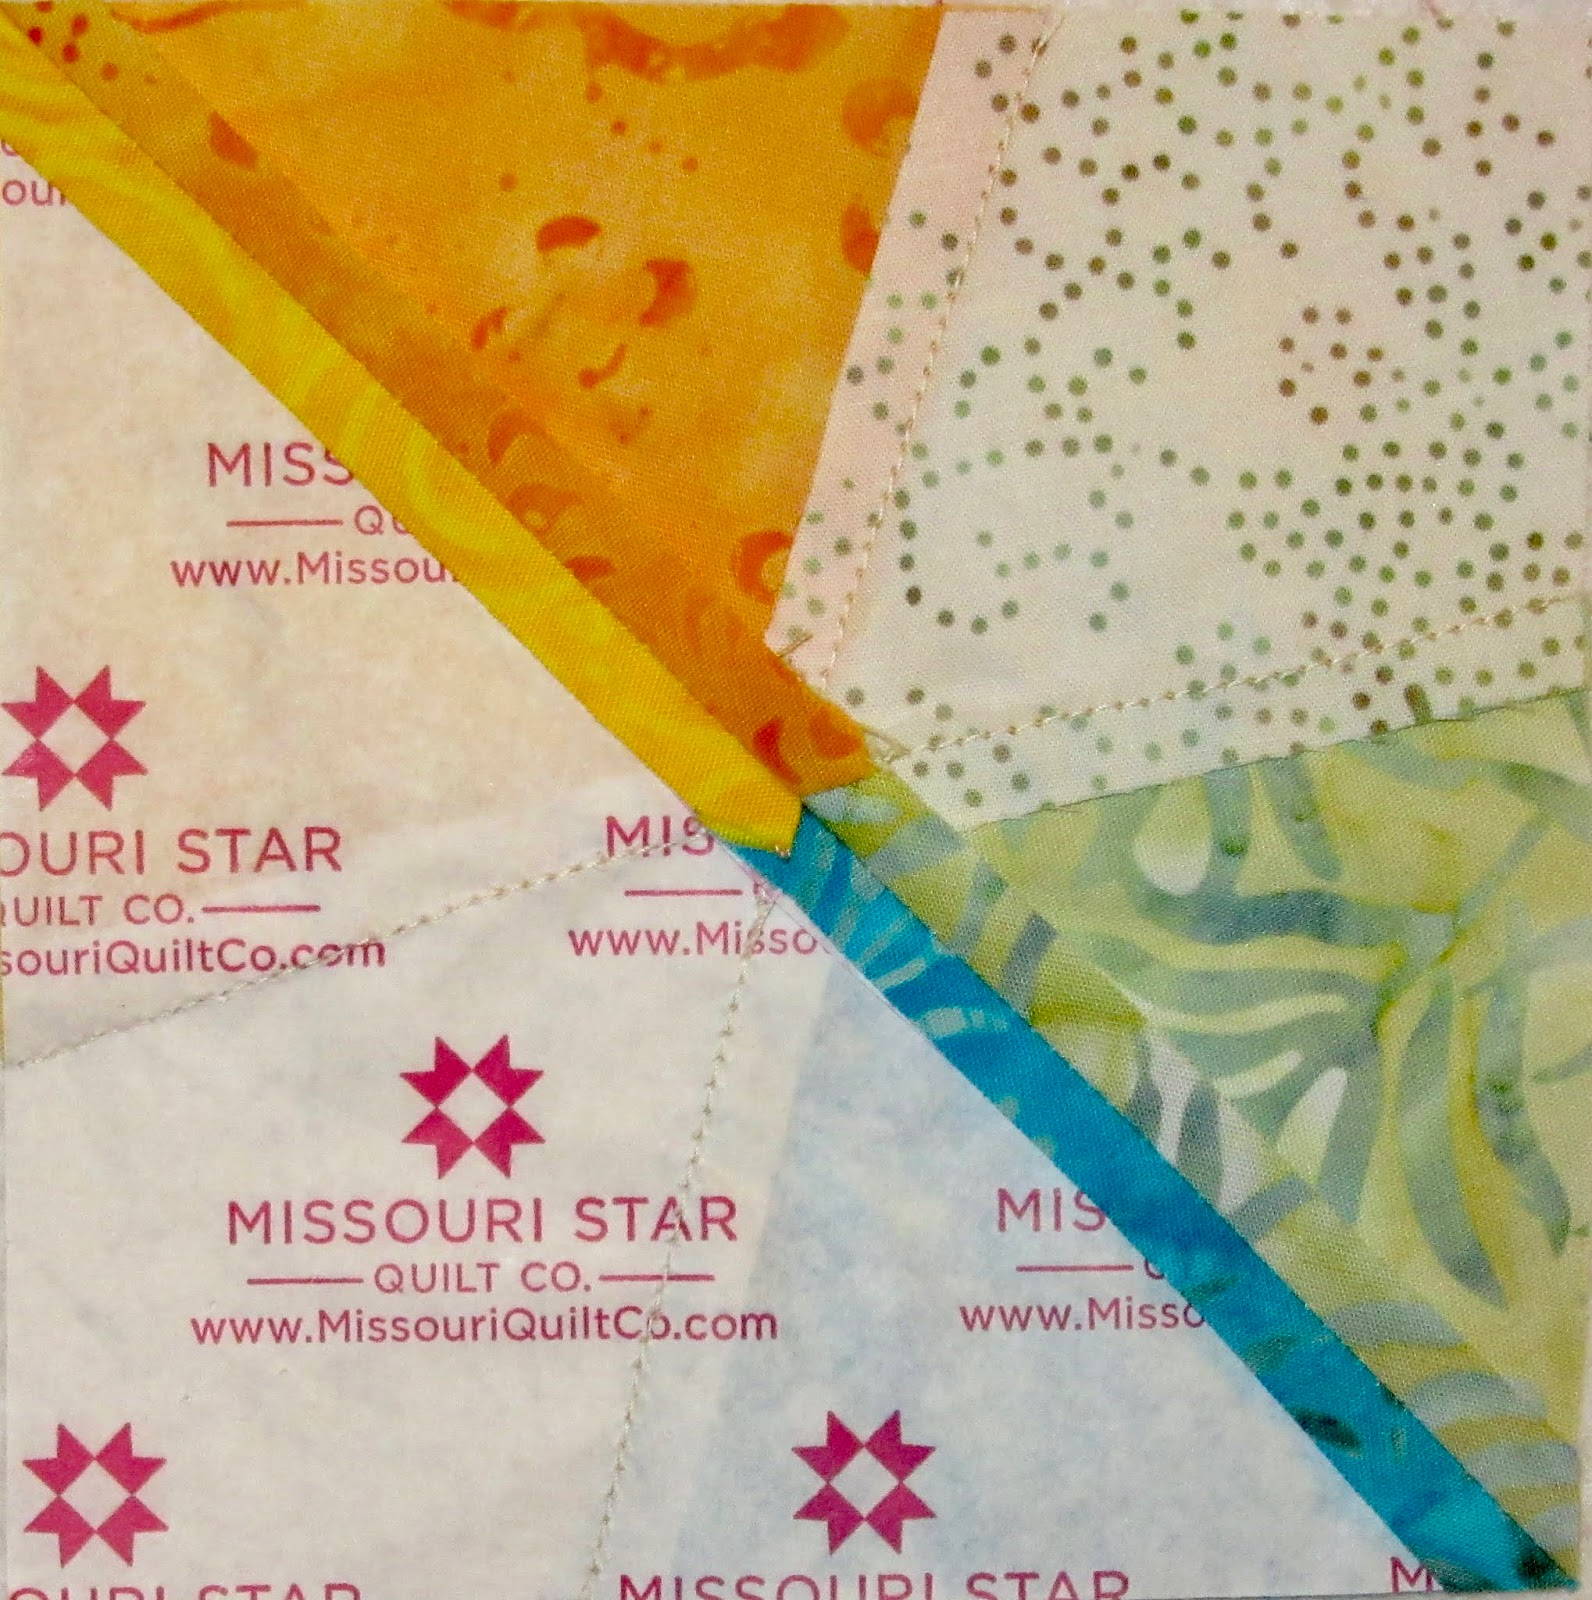
Step #4 was a big mess for me. I forgot that I had made colour substitutions from Bonnie's original colours. I substituted pink for aqua, and then started using my light blue for aqua. Wrong!
I'm blaming the craziness of Christmas chaos.
Beautifully organized WRONG pieces!
Thankfully I was only about 1/4 of the way through sewing that step when I discovered my error, so I just started over. I had to recut the pink/"aqua" QST pieces, and will eventually resew all the step #4 HSTs. Some blocks are already done and in the container show above. I have at least a few parts sewn for each step and hope to catch up by Friday's reveal of step #6.
Linking up to Small Quilts.

Sunday, November 17, 2019

Slow Sunday Stitching Finish

Welcome to the weekly hand stitching party!
I'm proud to share a finished quilt today!
This finish is very exciting because it is a hand pieced, hand quilted project and it took a long time to complete. 
This is the hand pieced quilt along by Elm Street Quilts, started in January 2019 using the Moda fabric line called "hello luscious". The sampler blocks were hand pieced and stitched together by the end of April. It then became my take along project to quilt during the summer months. 


Friendship Album back
The backing was made from some left over charm squares, but I discovered that was not a good idea for a backing on a hand quilted project. There were so many seams in the quilt top, added to the extra seams in the pieced backing and it made the quilting a real challenge. I won't do that again!


I'm calling my quilt "Friendship Album" since I listened to an audio book by the same name while I was stitching this quilt.


Linking up to Meadow Mist Favorite Finish linky party.


What are you hand stitching today? Share your progress with us and link up your blog post below.


You are invited to the Inlinkz link party!
Click here to enter

Friday, November 08, 2019

Finally... A Finish!


auditioning threads for the bobbin
When you are a quilt addict and have so many quilts on the go (because you can't say "no" to more new projects) it is a terrific feeling when you can finally focus your efforts and finish one of them! 

walking foot straight line quilting

This is Lori's most recent mystery quiltalong called "Almost Amish". My version is in civil war reproduction fabrics, so I'm calling it "Almost Reproduction"! 
That title makes me smile :)


The quilting is all straight lines using the walking foot. I used a hera marker to mark a square shape to stitch in the black fabrics as I thought it needed a few extra stitches there.

This is finished quilt #18 for 2019 ... woohoo!


"Almost Reproduction"
Linking up to Alycia's Finished (or not) Friday

Thursday, October 31, 2019

Scrap Dance Tango Finish

Scrap Dance Tango
This quilt started as a mystery project by Carole at From My Carolina Home. I started working on the quilt in February of 2016 because my friend Gillian gifted me with over 200 scrappy HST blocks which were the perfect seeds to grow this quilt. What a goldmine! I loved making the first blocks and had fun photographing them in the middle of winter.
Although the blocks were sewn together by the end of that year, the quilt top needed to sit in storage to be curated. Just like cheese needs "affinage" and wine needs "maturation" to become their most delicious versions, (my) quilts need to be ripened to perfection over time. They rest in the "temperature controlled UFO closet" until they are adequately cured for the next step! *snort*
This quilt required about 3 years of aging to be ready for the quilting to begin! 


 prepping the binding
I spent hours and hours on machine quilting this project, starting with a grid and then free motion quilting the blocks and the border. I quilted feathers in the border because I'm teaching a quilting class in December and wanted some  practice. The feathers stitched with red thread on the red border almost made me blind. Even though it was a challenge, I stuck with the red thread because I didn't want the border quilting to detract from the great border print design.

Note to self... I used 2" binding strips on this quilt to ensure I had enough fabric, but I don't like the look as much as when I use a 2.25" strip.

Drum roll please... a finished quilt!

Some quilty details...
*this quilt has Warm and Natural batting, which is my favourite for machine quilting (but is NOT fun to hand quilt)
*thread for piecing and quilting is always 50 weight Aurifil (no affiliation, just an avid fan)
*total number of scraps used - 2,264!
*finished size is 54" x 65.5"

Linking up to One Monthly Goal... yippee! 
So excited to meet my goal this month!

Also linking up for the first time to Cheryl's celebration called Favourite Finish!

Tuesday, July 30, 2019

July UFO

Dots and Dashes is finished!

The Dots and Dashes improv quilt is finished!
This quilt started last June using up leftover parts from other projects, such as it's sister quilt called Starburst. You can read about the piecing here, and the machine quilting here.

I don't like how one of the white on white fabrics has such a yellow tinge in this photo, but I guess under certain lighting conditions that's how it's going to look.
C'est la vie!


Dots and Dashes quilt back
This photo shows the quilting and the fabrics on the back. White is hard to photograph!
This was such a fun summer project to work on, with the improv piecing, relaxing machine quilting, and the fact that it was a "free" quilt from stash. Nothing was purchased to finish the quilt, including the batting which was also stitched together using  leftovers.


I practiced a ribbon candy quilting design on the border because I'm teaching it as part of a machine quilting class in the fall, and I wanted the practice. A heart design is an easy way to turn a corner when machine quilting.


Look way up! Finished quilt size is 45" x 52".

Linking up to July's One Monthly Goal finishing party and Cheryl's Favorite Finish.

Wednesday, July 17, 2019

Mid Month Finish

My version of Carole's Scrap Dance Minuet is now a finished quilt! I was inspired by Carole using up some of her floral fabrics and I was very happy to clear out some very old stash.
Here is the clothesline shot.

It is a hard quilt to photograph, although I'm not quite sure why. The floral fabrics don't look nearly as pretty in the photos as in real life, but when I try to brighten the colour balance, it makes some of the fabrics look very strange... especially the one with yellow flowers.


Here is the quilt from the back. Can you see some of the machine quilting? It doesn't look nearly as bad as I had feared when I couldn't remember my original quilting design and changed it up a couple of times by mistake. I really like the curved lines I did in the last 2 borders.
Finished size: 47.5" x 59.5"
Thanks to Carole for another fun mystery adventure! 

Tuesday, June 25, 2019

Finished Quilt


The baby quilt has been finished and gifted to its new owner. 
When I see it hanging on the clothesline, I wish I would have put one of the yellow centred blocks in the bottom right corner. Oh well, it's quilted and bound now, and I'm sure the baby won't ever be as critical as I am!


The photo of the back of the quilt shows the quilting lines - a horizontal and vertical grid, and a few diagonal lines.
I love the soft grey with white stars fabric on the back of the quilt which perfectly matches his nursery theme.

Here is a photo of me showing my 3 most recently finished quilts at guild meeting. On the left is On Ringo Lake, in the middle is the memory quilt made by fellow guild member Rose and I, and the baby quilt on the right. 
Photo by MaryAnne Girouard
Linking up to Let's Make Baby Quilts!

Friday, May 31, 2019

Goal Accomplished!

It was a hard push to the end of the month to finish this quilt. It was an ambitious goal to start with but am so delighted that this quilt is now finished! 
Here it is hanging on my friend's clothesline because I finished the binding while visiting her. It is a heavy quilt using up almost 5 bobbins of thread!
On Ringo Lake


This is the Bonnie Hunter Quiltville mystery called "On Ringo Lake" started in November 2017. I'm very happy with how the design turned out since I used the blocks that were designated for the sashing as the border blocks instead. I love that zigzag border!
Finished size: 62.5" x 80"
Linking up to One Monthly Goal and Favorite Finish!

Friday, May 17, 2019

Another Quick Finish

I enjoyed picking out the thread colours for quilting
This project was started at quilt retreat last fall and is a pattern from Krista Moser called "Aztec Diamond".  
had fun using the 60 degree ruler and pieced the runner as soon as I got the pattern and fabric at last year's retreat. 
But then it waited patiently until this year to be quilted.

I machine quilted straight lines using the walking foot following the diamond design. I used the Hera marker to mark the stitching lines. Can you see the line it made right at the tip of the marker? It's quick and easy and one of my favourite methods of marking quilting lines.

Perfect place for hand stitching!

This is where I sat with my morning coffee and hand stitched the binding on the last morning of quilt retreat. It is still a little cool to sit outside, so you can see that I was joined by no one!


It was so peaceful and beautiful there. You can see that finally the green is returning in my part of the world.

Here is the glamour shot of the finished table runner on the bench by the fountain.

So happy to have another UFO finished!

Thursday, May 16, 2019

Finished Memory Quilt

pin basting and picking the coral thread colour
This quilt project started in January when I adopted a bag of 128 HST blocks that were abandoned in the scrap bin at guild meeting. The little HSTs were perfectly made and I had a lot of fun making the blocks and creating the quilt layout. Once the quilt top was together I couldn't wait to get quilting!


Using the walking foot I quilted straight lines in the middle of the quilt. Then I switched to the free motion foot and made some squiggly lines in those long white spaces.

I quilted free motion swirls in the borders. This photo shows the quilting design which is much easier to see on  the back of the quilt.
I hand stitched the binding which is my most favourite part of quiltmaking. I love these Black Gold Clover applique needles that are so sharp and thin that I can easily push the needle through many layers of fabric to attach binding without using a thimble. Although these needles are pricey compared to others (here in Canada I paid $9 plus tax for 6 needles) they are totally worth it! 

This quilt finishes at 24" square and will be donated to the memory quilt collection at my quilt guild. These small quilts are given to our local hospital for distribution to families experiencing the loss of a baby.

Friday, May 10, 2019

Finished Baby Quilt

It's finally done! The baby arrived in February and I really wanted to get this quilt to him before he got too big for it!
This quilt was made with fabrics that I received from the estate of the baby's great grandmother when she died. I used the bonus HST blocks cut off from the star points to make the flying geese border. I really like the effect of the border and am happy with how the quilt turned out. 
You can read more about the machine quilting here.
The pattern is called Shadow Stars and I highly recommend it.


This is the label I made for the quilt. I found a brand new baby robin's egg when I was out for a walk on the day I gave the baby quilt to it's new owner!


Here is a photo of me at  guild meeting showing my March UFO finish and the baby quilt. Thanks MaryAnne for taking the photo and sending it to me!

Monday, April 22, 2019

Be A Diamond Blog Hop and Giveaway

Hi blog hoppers!
Carol has organized another fun blog hop for us! This time the blog hop is for projects featuring the diamond shape.


See the shape of this golden yellow diamond template? That's called a "round brilliant cut" shaped diamond, which provides the maximum reflection of light. I thought it was a perfect project to work on for the Be A Diamond blog hop.  Although some quilters (including me) are wary of using templates, I cut my template diamonds using 2.5" strips and it was quick and easy. 

Me, Susan, Marj and Barb all working with the diamond template
This project was started during a quilt retreat last winter. What a surprise it was to find that there were 4 of us at retreat who brought the diamond templates to start working on this quilt pattern. Two of us had a large template and two had the mini size. 

working with the layout

Susan and I used the small template and made our projects in reverse. She put the colour in the template position, and I put the colour on the edges of the template. It was fun at first, but then I realized how challenging it was to do the layout and needed to have the project laid out beside the machine as I sewed the blocks. I could have made the quilt construction much easier on myself to use one background fabric, but I didn't of course!


wrong side of a block which uses 2 foundation papers
Using this layout, a block is two foundation papers sewn together on the long diagonal side. This is how the block looks from the back. One side has the paper still on and one side has the paper removed. It was very easy to remove the papers as they are just a wee bit stronger than tissue paper. 
This project is an interesting blend of using templates and paper foundation piecing. You can watch a video on how to piece the blocks using foundation papers here


All the machine quilting was done with the walking foot. I stitched vertical, horizontal, and diagonal lines, and then stitched 1/4" inside the light diamond shapes.

Here is the finished quilt! 

This bright and happy wallhanging wanted to called "Umbrellas". It has 144 pieces and measures 16.5" square. 
Linking up to Alicia's Finished Friday and the One Monthly Goal Finish party because this project is my April UFO.


right side of a block which uses 4 foundation papers
Because I still had many leftover foundation papers, I started another project using the easier layout with reverse values that Susan had made. In this quilt design the template is used to cut the coloured fabric and the pieced sides are the background fabric. I am using up the little scraps left over from the Tula Pineapple quilt. Four foundation papers make a block in this design and are joined on the short diagonal side.


Here are the diamond blocks I made from the leftover scraps. The plan of the moment is to sew these blocks into the backing of the Tula pineapple quilt. You can see the quilt top in progress here.


Here's the "Be a Diamond"  giveaway... a lucky blog hopper will win the diamond template and 150 of the foundation papers!  If you would like to give this pattern a try, leave a comment below. The random winner will be drawn at the end of blog hop on April 26th. The draw winner was randomly chosen... comment # 35!


A big thank you to Carol who organizes these wonderful blog hops for the online quilting community to enjoy! You can find all the Be a Diamond projects on the Pinterest page here.
Here's the list of bloggers to visit today:


Kathy’s Quilts (that's me!)


Happy Earth Day!

Earth Day - Say no to plastic pollution

Thursday, March 28, 2019

March Finish

My March UFO is finished well before the end of the month. This is called "Secret Santa" and is a mystery quilt that was offered last fall by Temecula QuiltsI'm so glad I had enough of that striped sashing fabric for the binding.

Thanks to my blog reader Dotti in CT who checked in with me to make sure that I had fixed the mistake block before I quilted it. You can read about that here and see links to other bloggers who finished this fun mystery. I sure do hope there are no mistakes to be found cause it's quilted now! The backing fabric is one of my favourites from the Sweetwater "Mama Said Sew Revisited" line.  

The finished size is 42.5" x 56" and has 1,375 pieces (yes, I counted!)  And it is even ready in plenty of time for next Christmas! 
Linking up to the March finishing party over at One Monthly Goal.

Sunday, March 10, 2019

Slow Sunday Stitching - A Finished Middling

Welcome to the weekly hand stitching link up!
Today I'm a little sleep deprived because Daylight Savings Time started last night and that means 1 hour less sleep in the night, and I'm looking forward to an afternoon nap today.

This week I finished up my 70273 project which has a lot of hand stitching in it, so I thought I'd share it in my Sunday blog post. 


pieced and embroidered X's

I was inspired to participate in this project 2 years ago (read about the inspiration here) and had sent in some blocks for the project (you can read more about it here). 
But I couldn't let it go after that. I made a little quilt that Jeanne calls a "Middling". More details about what a middling is can be found here.


hand quilted 1/4" around each pieced X
To create the quilt I pieced some improv X blocks and added sashing and borders until it came to the required size of 18" x 22". I hand quilted around each of the large X blocks and it was tough going because that "white on white" fabric was stiff and thick. I've never hand quilted that kind of fabric before... and won't again!

hand embroidered rows of XX


I didn't plan out where I would hand embroider the double X's, I just started stitching in the open areas and stitched wherever I felt inspired to do so.


Here is my finished Middling which has 5 large double XX blocks and 48 hand embroidered double XX's.
I'll be sending this away in the mail this week to become part of the 70273 Project. 

What are you hand stitching this week?  Link up your blog post and share your project with us.

   
    An InLinkz Link-up