Showing posts with label Kit Quilts. Show all posts

Monday, March 11, 2024

Design Wall Monday

My local quilt guild hosted a zoom sew day on Saturday and I made a lot of progress on my Hexagonal Spiral project.


This is from a John Flynn kit I bought in Paducah in 2009 and started last November. It is a brainteaser puzzle and was a challenge to get started. But now I'm at the point where the sewing is mindless. However accuracy is crucial in order to avoid a 3D curvy block. All the block edges are bias, so must be handled with care!


Each spiral block has 42 pieces and with 7 blocks in the design that's a total of 294 pieces sewn for each round. On Saturday I sewed an entire round on the 7 blocks and I still have these pieces to add.

This kit is no longer available but I have sewn 3 other kits from the John Flynn company (all laser cut from batiks) and have loved every one of them - highly recommend! Check them out - Carnival, Storm At Sea, and Wheel of Mystery. They have many other quilt designs available and if you dislike cutting fabric but enjoy sewing, you might like to try one of their kits. (I have no affiliation to this company, I'm just a happy customer!)

Linking up to Design Wall Monday

Monday, November 13, 2023

A new old project

Every year when I go to a retreat I pull out a kit that I bought in Paducah in 2009. Yes - it's that old and never started. I open it up and read the directions, feel overwhelmed and put it back in the package.


This year when I was visiting with my friends Barb, Louise and Deanna, they encouraged me to just take out the fabrics and do the first step. So I did. And here are the pieces from my John Flynn lazer cut kit.


I sorted all the pieces and sewed the first step, which are the centre blocks with kite shapes. I was 3 kite pieces short of what the colour layout on the instructions showed, and had 3 different colours leftover. So I reworked the colour layout and kept on sewing and hoping everything will work out.

This is where things are today.I love how it is coming along and so far I have had enough of the right coloured triangles to continue the spirals around the 7 blocks. There are many more rounds of triangles to sew on - I have done 2 rounds and there are 10 in total. The challenge now is that the seam allowance must be exact or the next round of triangles will not fit.

It felt great to push through these challenges and make some progress. I am so grateful to my friends who encouraged me to tackle this and with their support I actually think this old kit might become a quilt someday! 

Linking up to Design Wall Monday

Wednesday, September 05, 2018

Quick Small Finish


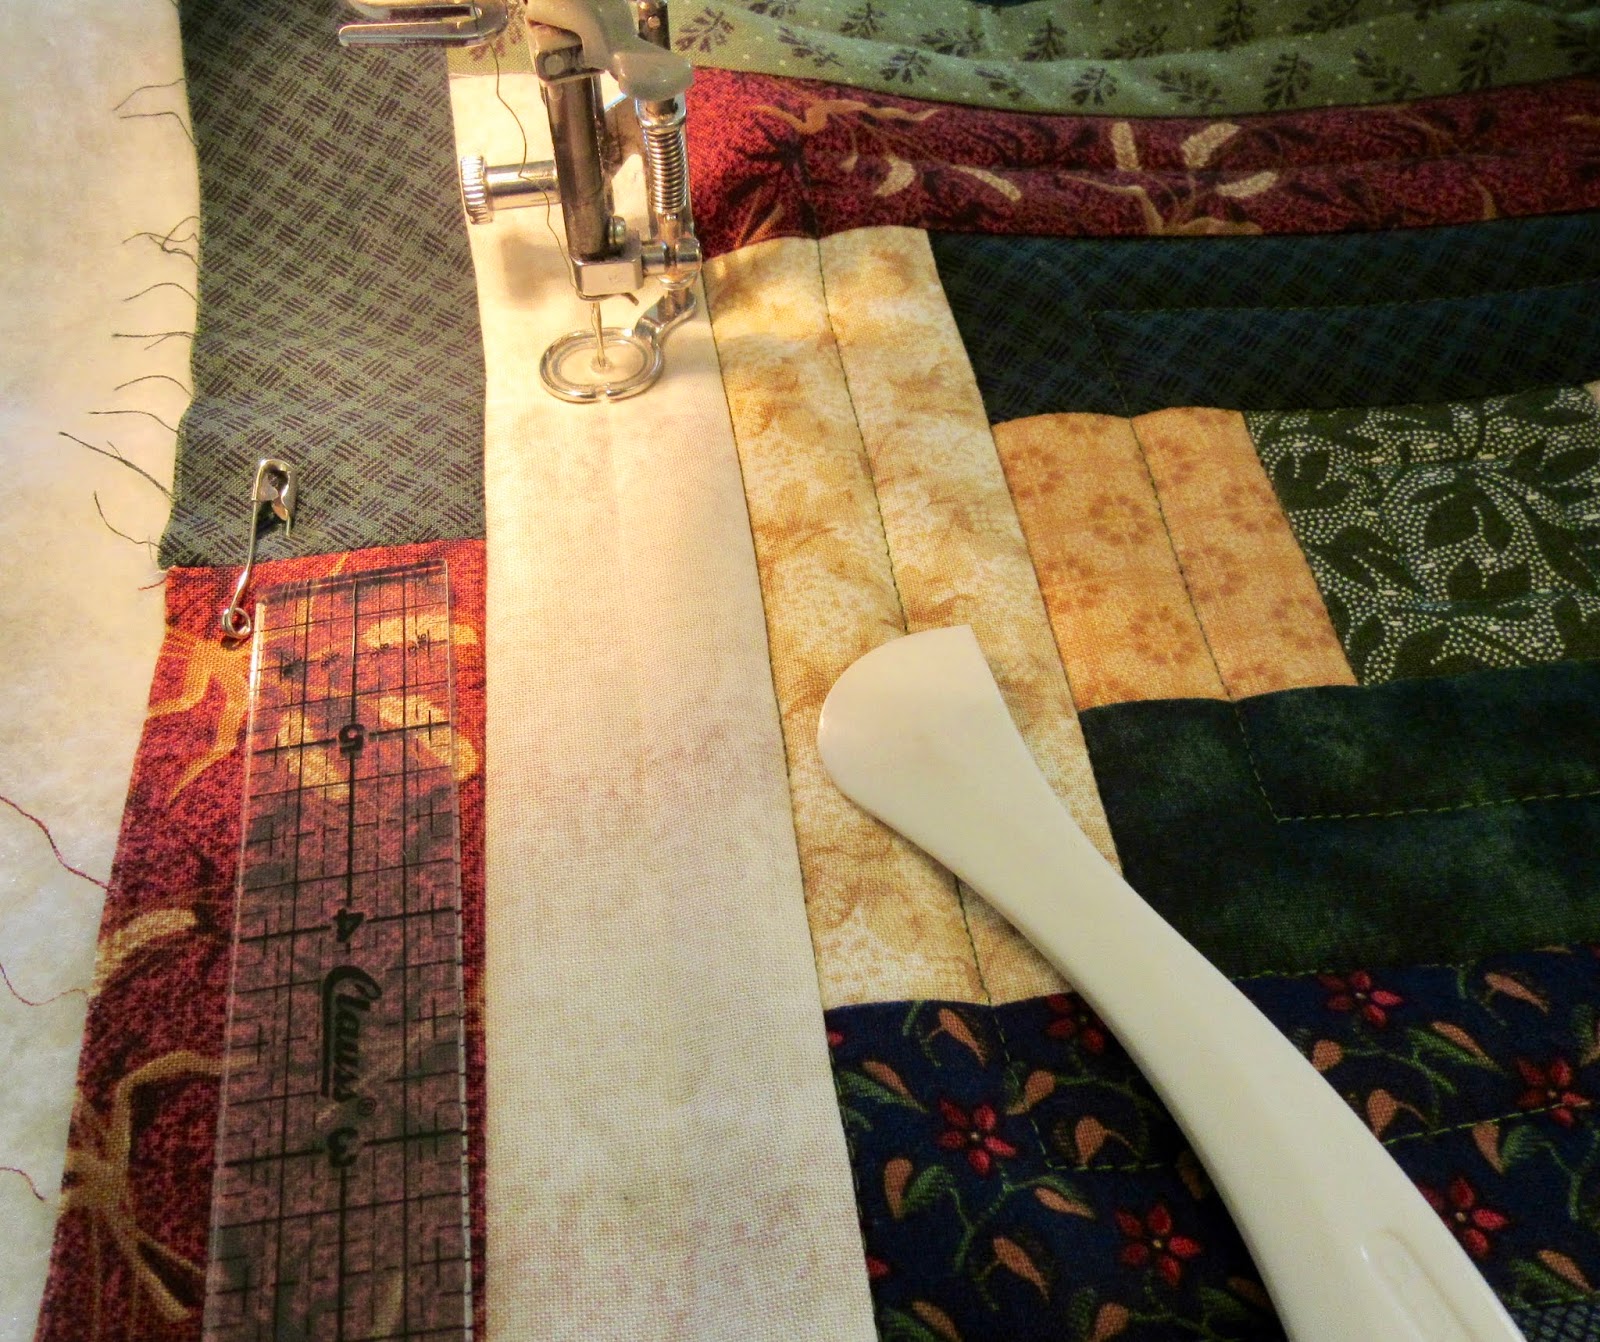
Helen's tablerunner kit  provided some wonderful instant gratification and I finished it in record time! It was fun to quilt concentric lines radiating from the centre of the courthouse step blocks. Since I used a free motion foot for the quilting, I could easily stitch in any direction (feed dogs dropped, stitch length on zero). I used a hera marker to mark some lines to stitch on, which  helps me to make those longer lines a little bit straighter.


All of the fabric for this project was from the kit, except the backing which came from the gift box I received from Helen's family. I plan to gift this to Helen's son and family at Christmas. I am also planning to sew a baby quilt to give to Helen's granddaughter (baby due in February) made from her fabrics. 

This photo was taken in my friend's garden on the day I finished the binding. It was a lovely afternoon of outdoor hand stitching!
Linking up to Sew Fresh Quilts.

Friday, October 27, 2017

Quick Friday Finish!

Do you buy quilt kits?
I very rarely do because it takes away the fun task of looking at all the fabrics and choosing pieces to coordinate for a specific project. But I spotted this tabletopper kit at the Hobby Horse  and liked all the fabrics they included. It was a great beginner project and/or a "no brain power required" project for the experienced quilter. The pattern was easy to piece with four patch blocks in the corner of the sashing. 

And when it was finished, it looked terrific hanging in the tree in my backyard. Aren't the leaves so beautiful this year?!?


This was the perfect October project to work on. I free motion quilted around all the interesting motifs in the centre fabric. This is a classic Patrick Lose fabric called Happy Halloween. 


I even love the selvage with the little spiders!


And then, while watching (more listening than watching) Bonnie Hunter on QuiltCam, I machine quilted back and forth across the black lines in the border fabric using black thread. So quick and easy...left to right, right to left, repeat.


I even love the backing of this project which I pieced together using pieces from my orange scraps bin. The binding was also made from leftovers.
Thanks to Hobby Horse for this fun halloween project! Linking up to Friday Finishes at Crazy Mom Quilts and TGIFF.

Wednesday, October 12, 2016

New Halloween Project

I don't very often buy kits because I really like the process of choosing my own fabrics for a quilt. But I saw this kit at Kalidoscope Quilts and couldn't resist. I like how the kit was organized and labelled so I didn't have to guess about which pieces go where.


This it just the right project to work on when my brain is sore from building the bear. It starts with easy rail fence blocks for the border. I am piecing this quilt on Lucy the long bed Singer 301.


This is the perfect time of year to be sewing with these wonderful Halloween fabrics. The question is... will it be finished in time to enjoy it on Halloween?!?


Monday, July 14, 2014

Design Wall Monday - Triangle Stars

The stars are back on the design wall! 
To read about how I got started on sewing this quilt back in May . click here.
The quilt is coming along quite well now, and I am more familiar with how to sew the triangles together in order to get the points to be MIA. I like how the tumbling blocks appear in the center of the stars.... except the green yellow one on the bottom left.
Oh dear... the star appears to be upside down! 
Where's the seam ripper?!? 
The quilt is now in three long panels, and I need to sew a plain white triangle border for each side. It's very close to joining the "to be quilted" pile!
To see more design wall postings, hop over to Patchwork Times.

Friday, June 27, 2014

UFO Finished!

The Miniature Storm at Sea quilt is finished! Woohoo!
Let the celebrations begin!
I bought the laser cut kit from John Flynn at Paducah in 2009. I started piecing the blocks in February 2011. To see how small these blocks are -  click on this blog post. I love making miniature quilts, so I enjoyed every step of making this quilt. The only drawback is that it takes a long time... and I have a lot of patience, so we make a good combination :)

I machine quilted bubbles in the border and hand stitched the binding. Hopefully you can see the bubbles in this altered photo. This is a very fun design to machine quilt... thanks for the idea Missy!

The finished size of the quilt is 19.5" x 23" ... a finished quilt after all these years!!

To see more finished UFO's finished this month, hop over to A Lovely Year of Finishes.

Now that I have finished another quilt, George and I will be at the fabric store buying some fabric to start a new quilt!

Happy Friday!

Monday, May 26, 2014

Design Wall Monday - New Project!


On my design wall today is a new project... woohoo!


These are triangles that were the Shop Hop project from Goose on the Loose. I just started working on this quilt and was finding the design process a little overwhelming, especially since the whole quilt will not fit on my design wall. 


So I made two decisions to give me some direction to get started...
1) I decided to work with only one package of triangles at a time instead of tackling the whole quilt design and 
2) I decided to try to make tumbling blocks appear in the star centers. 
So far so good. I am just starting to do some sewing of the triangles and it's not terrible, but also not a lot of fun yet!
To see more design wall postings, hop over to Patchwork Times.

Monday, June 06, 2011

Design Wall Monday #21

I am so excited to have finished piecing my Flynn Storm At Sea kit!
I am very happy with how it turned out and love the watery look of the batik fabrics. It measures about 15" x 18" without the border (which I haven't picked out yet). I will enjoy admiring it on my design wall while I figure out how to quilt it.
Hop on over to Judy's blog to get lots of design wall inspiration - Patchwork Times.
This is the third Flynn kit that I have pieced and I have enjoyed each one - click here and here to see the other ones. I have a 4th much more complex kit that I need to consult with the reps about how to sew the blocks. I see on their blog that they will be at the Vermont Quilt Festival in 3 weeks...I intend to lose a bundle of my hard earned cash getting more kits at their booth! Anyone else in blog land going to Vermont?!?

Tuesday, April 19, 2011

UFO Challenge Report

In spite of having a headache yesterday, I have finally finished my March UFO!
I realized as I looked at it today that once I am able to forget about the machine quilting struggle I had, I will fondly remember this quilt, because it does hold many happy memories. I bought the kit at Hancock's on a fabulous once-in-a-lifetime trip to Paducah in 2009, I pieced the first blocks on my 25th wedding anniversary getaway in 2009, and finally finished the quilt top in July 2010.

I started the free motion quilting in March as part of Judy's UFO Challenge and 6 weeks later...it's done!

This was a fun block to sew and I can totally see myself making a scrappy version some day. If you'd like to try that, you can still download the free pattern from the Robert Kaufman website - click here.
Here is a photo of the very boring, quickly pieced (from stash fabric) backing...you can see the hanging sleeve at the top and the label at the bottom, so it is truly finished...woohoo!

Wednesday, April 06, 2011

Moody Quilter

Are you a moody quilter??
I find that I have to be in a certain frame of mind to be able to tackle some quilty tasks, such as anything requiring math, attaching borders, making design or layout decisions, or learning new skills. This week I have not been able to do any of these things. Work has taxed my brain and I needed something really easy to sew.
So I got out my mini storm at sea project (Flynn laser cut kit) that I had put away in March (click here to read about that). This week I finished all the 1" (finished) square in a square blocks and can now move on to the rectangles and the larger 2" (finished) blocks.
That was just what the DR. ordered... some relaxing, easy, meditative sewing.
Ahhhh, I feel better already!

Friday, March 04, 2011

Distractions

Did you see the mini storm at sea project that I started at retreat? It's a lazer cut kit by Flynn Quilt Company and I am loving it! I sewed one of their Wheel of Mystery kits 2 years ago and it turned out great, so I was excited to try another one in a smaller size. And small it is! Here are the pieces feeding through my sewing machine, held down by my handy awl, which ensures they don't stray from their course.
Here are a few blocks photographed on my hand to give another perspective on how small they are.
They are just adorable! I am just ooooing and ahhhhing over them like they are newborn puppies! Someone watching me might think I've lost my mind! But really...aren't they cute?!?
I have to put them in the box and put the box in another room so I can't hear them calling to me, and I can focus on other projects that need to be finished! I am making major progress on my Indian Orange Peel arcs and I will post an update about those on the weekend. TGIF!

Saturday, August 28, 2010

Blocks sewn together

I got sidetracked this week with my Carnival blocks.  There is no rhyme or reason to what I will work on when I have a block of time for quilting. I should be machine quilting this quilt since I wanted it to be finished for the first UFO meeting in September, but it's still too hot to work under a quilt most of the time. Or I could finish piecing the myriad of UFO's I have in various states of unfinishedness. But nope!
The Carnival project was calling to me and I put up the pieces on the design wall thinking that when I got the pieces up there I would spend a lot of time rearranging them until I was happy with the layout.
But I got into some kind of weird piecing trance, listening to my "Wicked" soundtrack (my favorite song is "For Good") and I started sewing, and somehow I finished sewing the whole thing!
I was aware of trying to balance out the red and the dark green, but other than that, I just sewed random pieces together. I am happy with how it turned out and am amazed at how quickly it came together, especially since it was all curved piecing. Now I need to think if I want to add borders from my stash (the kit didn't come with any fabric for borders).

Tuesday, June 16, 2009

A Finish!

I finally have a finish to announce! These are relatively rare for me, since I do love starting quilts more than finishing them. But I must say how much I enjoyed working on this quilt. You can read about the beginning of it here and although I didn't enjoy piecing the blocks at first, I learned the tricks as I went along, achieved nicer looking blocks and started having fun. One of the trickier things about this pattern is which way the seams should be pressed to get a flat block, and then quilting in the ditches, which always switch direction half way along. Don't know if you can see it in this close up block, but again, once I got used to this, the quilting was easier. 
It was also fun deciding where to quilt, sorting out which quilting lines I like the look of, which ones I didn't like and needed to unstitch, and when is there "enough" quilting. 
I tried to control my tendency to "overquilt" and here you 

can see the quilting from the back. 
And when I say "finished" I really mean completely done...l
abel and all!! Woohoo!
I really want to open up one of my other John Flynn kits and start piecing, but I am a little motivated today to get a

 couple of other UFO's finished, and clear off my work table. We'll see how long the self discipline lasts!

Thursday, May 28, 2009

Quilting the Wheel of Mystery

I had my sister over for a quilting lesson and she said something really funny...
Sister said: "Are you starting something new again"?
I said "Did you think I was going to work on one of my 10 unfinished projects I can see from where I'm sitting?!?!"
Sister said: "I think you should"! Now picture me laughing out loud!
I was all ready to cut into some fabric and start the new paper piecing mystery block at Paper Panache. 
She kept giving me the evil stare, so then I felt guilted into working on a UFO! 

I had been fussing around about my wheel of mystery borders and had been unsure which fabric to pick. Since I finished piecing the quilt top on May 13th (see quilt top here)  I have literally auditioned hundreds of possible border fabrics - both from my stash and at quilt stores.
Today I decided that the problem must be that I don't really want it to have a border, so I went ahead and basted it using one of the fabrics I had bought for a possible border, as the backing. 
And then just jumped into quilting it. I quilted all the curvy seams and then decided to do some other quilting lines - I tried a second line

 right by the seam to emphasize the circles but I hated the look of that. See where my awl is pointing?? That quilting line had to go. 
And I tried quilting about 1/2" away from the seam and hated 
that...look how wavy that line is!!!! 

I must have been distracted by my new project sitting on the edge of the table - calling to me, waiting for me to cut into new fabric!
I like to post photos of these kinds of mistakes because some people think that when you are an experienced quilter, it comes easy and it always works out...not so!! Having experience just means you don't give up and you have a few more ideas or solutions to try.

I kept at it and unsewed a few more quilting lines and finally decided that I prefer the echo curves to be 1/4" away from the seams. Then I had several lines of holes on the batik fabrics where those quilting lines used to be...ugh! With a lot of rubbing of my fingers nails I think (hope) it is not as noticeable now.
As I was leaving the quilt session, I got another idea of quilting lines to make and I'll try that tomorrow. Or maybe I'll work on my new paper pieced block if my sister isn't there to give me the evil stare!!

Saturday, May 16, 2009

Permission to Play

Don't you just love starting a new project?!? I couldn't resist cutting into one of the kits I bought at Hancocks in Paducah. I opened up the kit called "Permission to Play: Kaleidoscope" to find that the fabrics in my kit were not really like the fabrics in the photo or the sample quilt I saw there.  I have mostly green fabrics, no dark blues at all, mostly light, yellowy greens and blues and a bit of medium green. I know that there is often a lot of colour variation in batiks, but I am sure this is not the "right" fabric. I guess that is the downside to buying kits...you don't always get the fabrics you think are are getting. 
The colours do remind me of spring with all the different greens that I would never ordinarily put together in a quilt, but it seems to work for Mother Nature!
So, I started cutting and sewing the blocks together, hoping for the best!  My first block was like a little bowl, so I started checking the angles after each seam and shaving off bits as I went along and it worked much better.  You wouldn't think that these tiny shavings would be so important, but they sure made a big difference in getting my blocks to lay flat!
And then, of course, I made the usual piecing errors and sewed a few pieces together that didn't go together. It's always a reminder to pay closer attention to what I am doing!
Here are my pieced blocks lined up for pressing...I thought they looked so cool lined up like that!
Anyway, I am enjoying sewing the blocks together and am already planning to make another Kaleidoscope - in miniature of course! 
The seam matching has been a challenge, but I am satisfied with the first few blocks, so I'll keep on going!
To view the quilt in it's proper colours and/or to download the free pattern - click here.

Sunday, May 03, 2009

Poor self control...new project started!

Okay I tried to work on a project from before Paducah (otherwise known as "BP"),  but I could barely remember what I was working on "BP"!!!
I was innocently putting my fabric purchases away and cleaning up my sewing area, and then a strange thing happened...
I started making another Wheel of Mystery quilt! I know, I have poor self control!  But seriously, who could resist opening up these cute little John Flynn pre-cut kits from Paducah?!? Not me!

I was so excited and took out all the little pieces and started to wonder why I had chosen a kit with such small pieces!
Still, it looked like fun. 
It wasn't!
I could not, for the life of me get the centre seams to match up. This is how most of the blocks are looking after unsewing and resewing each block 3 times. I have a "3 times and you're out" policy...after the 3rd time, however it turns out is final!
The other thing I did not like is that when you press these fabrics, there is a strong smell of smoke due to the lazer cut edges...not pleasant. I usually love pressing batik fabrics because of the smell of wax that most batiks have, which I enjoy. So this smokey smell took some getting used to.

Anyway, these blocks are painstaking...each block is taking me about 30 - 40 minutes to sew.
And the pressing of the seams is trickey too. Here is the back of one of the blocks. All seams are split pressed with a swirl in the centre.
I must say that I am delighted that my blocks are laying flat after pressing, because that is a lot of curved seams in a small area, and I was beginning to wonder if they would all turn out like little round cereal bowls with all the handling they have endured!
I will stick with it though because I am anxious to see how this thing will turn out.
Well, that is if I don't get distracted and start sewing something else in the mean time!

Wednesday, April 09, 2008

A Finish!

It is always cause for rejoicing when a UFO is finished! At guild meeting several members brought finished UFO's to celebrate and I was happy to do the same, and also happy that comparatively speaking (not mentioning any names!), my UFO wasn't that "old"! As you probably know from previous posts, this was made from a kit I bought at a New York quilt store called Calico Gals, which I visited during Christmas vacation in 2006. I pieced the blocks in 2007 and finally finished the quilting this week. The fact that the whole thing is now hanging FLAT against my dining room wall is a bonus!
Don't forget to enter your name in my 200th blog entry draw - see this post.