This month's UFO was #11 (click here or here for more details about this month's quilt). Here is the finished quilt hanging on the clothesline. I think it's just a weird looking quilt!
It was a tough finish for me because I don't like it! And if I don't like a quilt, it's very easy for me to leave it (indefinitely) in the UFO closet! Sometimes I do get an inspiring idea that transforms a UFO into a quilt that I could appreciate more, and sometimes I feel motivated to finish a quilt to donate.
But this month, this quilt is finished only because it was the UFO of the month!
I stitched in the ditch for the horizontal and vertical seams, and on the diagonal seams. Then I free motioned the large and small circles.
 I finished with a meander stitch on the borders, which was quick and easy.
This photo clearly shows that the top and bottom borders are a bit bigger than the sides, due to an error when cutting the border fabric!
I finished with a meander stitch on the borders, which was quick and easy.
This photo clearly shows that the top and bottom borders are a bit bigger than the sides, due to an error when cutting the border fabric!
Oh well...it's a finished quilt and it lays flat, so I can't complain!
Today is the posting for the crumb along and I have been enjoying that project, so wish I could work on that. But I have to force myself to work on my UFO because the end of September is here in 3 more days! Having a blog with a public commitment to finish my UFO's seems to be very motivating to me... I'd be mortified to have to report that I started 'X' number of new projects this month but didn't fulfill my commitment of finishing my UFO!
Okay, so I'm machine quilting my September UFO (not reading the new crumb posting, nor am I digging around in the crumb box!) I did my usual walking foot grid of the block seam lines and now I'm free motioning around the circles.I think that might be all the quilting I do in the centre, and maybe just some quick stippling in the border. I'm not feeling the love for this quilt and think it might be a donation quilt unless a family member falls in love with it...unlikely!
I have been working on my version of Bonnie Hunter's "Roll Roll Cotton Boll" mystery quilt from last year. Rumor has it that Bonnie may be offering another mystery this fall, and of course, I will want to start the new mystery...but I haven't finished the last one yet. So I must get back to it!
 I finished step #7 in January, and made the 600 HST's as a never ending leader/ender project. I decided not to make the alternate block because I don't have enough light scraps and wanted to make the quilt from stash.
So here are my blocks finally finished and on the design wall.
Wow...that's a lot of pink!
This is the option #1 - straight layout of blocks (I have enough blocks for one more column but my design wall wasn't large enough to put them all up). I think I'll take that bright green block out (in the 3rd row)!
I finished step #7 in January, and made the 600 HST's as a never ending leader/ender project. I decided not to make the alternate block because I don't have enough light scraps and wanted to make the quilt from stash.
So here are my blocks finally finished and on the design wall.
Wow...that's a lot of pink!
This is the option #1 - straight layout of blocks (I have enough blocks for one more column but my design wall wasn't large enough to put them all up). I think I'll take that bright green block out (in the 3rd row)!
And this is option #2 showing part of the blocks with the on pointe layout. Using this layout would make a much larger quilt, which would be fine. When I looked at this layout on the computer screen, I wondered about a light colour sashing between the blocks (because it's just too much pink!) and pulled the blocks apart a bit more to see what it might look like with a sashing...

This is layout #3 - on pointe with a light sashing. And with the techniques I learned in the class with Martha on Saturday, I could totally see myself using a "quilting in sections" technique on this quilt!
Which layout do you prefer?
Hop over to Patchwork Times to see what other quilters are working on today .
I enjoyed a wonderful and inspiring day of learning new techniques yesterday! I attended a class called "Quilting in Sections" with Martha Schellingerhoud, who taught us how to machine quilt a large quilt in smaller manageable sections (on a domestic sewing machine), and then join them together using one of 3 different techniques.
 Just look at this amazing quilt that Martha made! She quilted the blocks, then joined them together with the sashing, and quilted the sashing...then added the final border!
I recently finished an old UFO that was a quilt-as-you-go, but I like Martha's techniques way better than the way I did it!

I had a little trouble at the beginning of the day with my little Janome Platinum that I only use for classes... look how it wound up the bobbin!
And then when I was machine quilting one of my blocks, the backing folded back on itself and I had to take all those stitches out! I hate when that happens!
But I caught up with the rest of the class and was able to finish the 3 samples of the ways to join quilted blocks together.
Martha was the most organized teacher I have ever taken a class with! She had step by step samples to see, and her class handouts are amazing. I am sure that I will be able to incorporate some of her great ideas into my quiltmaking! And the best news of the day is that I don't have a UFO from this class!
I try to take at least one new quilting class each spring and fall, to enjoy being a student, and to try something new. In the spring I took 2 classes - one class on hand applique with Becky Goldsmith, and one class on making the Indian Orange Peel quilt (still a UFO) with Heather Stewart, and then last fall I had two days with Bonnie Hunter (day 1 and day 2...yes, they are still both UFO's!).
 Today I am taking a class called "Quilting in Sections" with teacher Martha Schellingerhoud. My guild enjoyed Martha as a guest speaker last year and her quilts are amazing! Yesterday I got everything organized for today's class...I just love a well written supply list where I actually have everything on the list and don't have to go shopping/treasure hunting for unusual items for a class (that I may never use again). I am using up the scraps of the backing from my quilt-as-you-go quilt, the backing from this month's UFO project, AND the backing from last month's UFO! I am so happy to be using up this fabric for the class samples to practice on! Check back tomorrow to see how I made out with learning something new!
 I have been slowly working on my letters for Lynne's Red Letter Quilt Along, and have finished to the end of the alphabet. Some of the letters were so easy (T and U) and some have a few tricks to make them manageable. Between Lynne's tips and Tonya's descriptions in her Word Play Quilts book , I managed to get most of the letters done quite easily.
 I had a little trouble with the 'W', not leaving enough space on the bottom of the 'W' so that joining it to a sashing would cut off the bottom. It was fixable though, and not too many swear words were heard in my sewing room!
I will post my whole alphabet as soon as I find where I have
I had a little trouble with the 'W', not leaving enough space on the bottom of the 'W' so that joining it to a sashing would cut off the bottom. It was fixable though, and not too many swear words were heard in my sewing room!
I will post my whole alphabet as soon as I find where I have hidden safely stored them.
Now I have to decide on some spacer blocks and am reading my new book for some ideas.
I had a wee break from the civil war blocks but was anxious to not fall even farther behind on this project, so I spent some time this week catching up.
This is block #23 Illinois Roads - easy and boring.
This is block #24 Ladies' Aid Album...kind of fun and different, with my favorite fabric in the centre.
Here is block #25 Calico Puzzle - the first problem block I have encountered so far.
For some unknown reason, it didn't come out the to same size as the other blocks (8 1/2" unfinished). I think I'm just going to trim some off each side to make it fit!
Block #26 Barbara Frietchie Star - a lot of half square triangles, but it came out to the correct size.
Here are the four blocks together on the design wall...
see how the calico puzzle is larger than the other 3 blocks?
I'm starting to love the blue/brown fabric combination now. If you want to see a great quilt made with blues and browns, hop over to Thelma's blog and check out this yummy "James River Blues" quilt!
Also, today is World Alzheimer Day. Check out the Alzheimer Art Quilt Initiative, where you can buy a quilt, donate a quilt, and/or post a photo of your loved one on the Wall of Remembrance. This is my Grandma "Annie" who suffered from Alzheimer's disease and passed away 3 years ago this week. You can read a post about her death, and her quilt here.
 It's week #3 at Jo's Crumb Along and this week we're making stars and hearts.
Here are my first two stars using the flying geese blocks from last week...
It's week #3 at Jo's Crumb Along and this week we're making stars and hearts.
Here are my first two stars using the flying geese blocks from last week...
Then I tried a heart within a star, but it turned out a little odd (I think it's because the top inside corner of the left side of the heart is too dark to feature the heart shape... should I unstitch and put a lighter corner on the heart??).
Then I moved on to making more heart blocks. I like the block on the right the best...the heart on the left is a little too wonky for me!
I just love working with these little crumbs but seem to reach a tolerance plateau where I HAVE to quit, pack up the mess, and get my sewing space organized again!
On my design wall today is my quilt top from the Crazy Mom Quilts' 36 Patch Quilt Along.
This is a very fast turnaround time (for me) for this project, since I posted my first blocks on my design wall posting just 3 weeks ago. And also it was an "add on" project that I had not even intended to start (I have no self-discipline!)
 It looks better in real life than on the computer screen and I am delighted with how much I actually like it (especially since I don't really love floral prints!) I am planning to add a white border, then a scrappy border with the leftover squares, then maybe another white border. I think that this quilt top might not even make it to the UFO closet, since quilting ideas are already swirling around in my mind!
To see other design wall postings, hop over to Patchwork Times.
It looks better in real life than on the computer screen and I am delighted with how much I actually like it (especially since I don't really love floral prints!) I am planning to add a white border, then a scrappy border with the leftover squares, then maybe another white border. I think that this quilt top might not even make it to the UFO closet, since quilting ideas are already swirling around in my mind!
To see other design wall postings, hop over to Patchwork Times.
The weather here has turned cool, we've had our first frost of the fall, and the garden is almost finished. The carrots that the rabbit did not steal are still to be harvested, but everything else is done. I enjoyed the location of the cucumber plants this year...they extended themselves to climb the cedar hedges at the back of our property and it was fun to see the cucumbers hanging in the bushes.
 Perhaps because of this ideal location, I had a ton of cucumbers to deal with. I tried a new icicle pickle recipe - click here to see it. We haven't tasted them yet, since they need to sit for a while, but I obviously didn't pack them properly in the jars...look at all the empty space on the bottom of the jars!
With the remaining cucumbers I used a Bernardin recipe for relish. It's a little sweeter than I like my relish to be, but the kids love it!
And in one of my random blog tours I found a post for canning potato soup mix (click on this link for "Likewise Ye Older Women" for the recipe) that I want to try out.
Perhaps because of this ideal location, I had a ton of cucumbers to deal with. I tried a new icicle pickle recipe - click here to see it. We haven't tasted them yet, since they need to sit for a while, but I obviously didn't pack them properly in the jars...look at all the empty space on the bottom of the jars!
With the remaining cucumbers I used a Bernardin recipe for relish. It's a little sweeter than I like my relish to be, but the kids love it!
And in one of my random blog tours I found a post for canning potato soup mix (click on this link for "Likewise Ye Older Women" for the recipe) that I want to try out.
The colour for the month is black, which I guess I don't work with very often, because I don't even have a black scrap bin! At the beginning of the month I wrote that I will take the month off from the rainbow challenge, and guess what happened this week?!?
At guild meeting, I was given a big bag of black scraps all cut into triangle shapes!
The fabric donor could not remember what these were intended for! So she gave them to me to use up... and I am going to give them to the guild comfort quilt program (because I have enough projects to keep me out of trouble for years to come!)
I am putting them into baggies with instruction sheets for the guild members to sew these triangles into big black 10" pinwheels, and then we can put the blocks together into quilt tops.
To see what other rainbow quilters are making this week, click here.
The UFO pulled for September is #11, which is a quilt top called Carnival made from a Flynn kit - click here to see it. It has been aging in my UFO closet for just over a year, while I considered the border decision. It was hard to pick a fabric, but I forced myself to decide since the deadline for finishing this quilt is exactly 2 weeks away! And since I already made over 300 decisions today judging at a local fall fair (selecting 1st, 2nd and 3rd prize winners in over 100 categories) making 1 or 2 more decisions seemed very easy!
 Part of the process of moving a project from being a UFO toward becoming a finished quilt is completing the "4 big B jobs" - Border, Backing, Binding, & Basting. I went ahead and bought the border and backing fabric, matching thread and some extra basting pins. The rust is the backing fabric and the multi colour batik is the border and binding, which I just finished preparing.
Then I moved onto the border cutting and made a big mistake... I couldn't remember what size of strip I was cutting and I cut some strips 1" too small, and then didn't have enough fabric to recut the strips that were too small. Of course it was the end of a bolt purchase and I can't get more. So...the top and bottom borders are just going to be wider than the sides...such is life!!
Part of the process of moving a project from being a UFO toward becoming a finished quilt is completing the "4 big B jobs" - Border, Backing, Binding, & Basting. I went ahead and bought the border and backing fabric, matching thread and some extra basting pins. The rust is the backing fabric and the multi colour batik is the border and binding, which I just finished preparing.
Then I moved onto the border cutting and made a big mistake... I couldn't remember what size of strip I was cutting and I cut some strips 1" too small, and then didn't have enough fabric to recut the strips that were too small. Of course it was the end of a bolt purchase and I can't get more. So...the top and bottom borders are just going to be wider than the sides...such is life!!
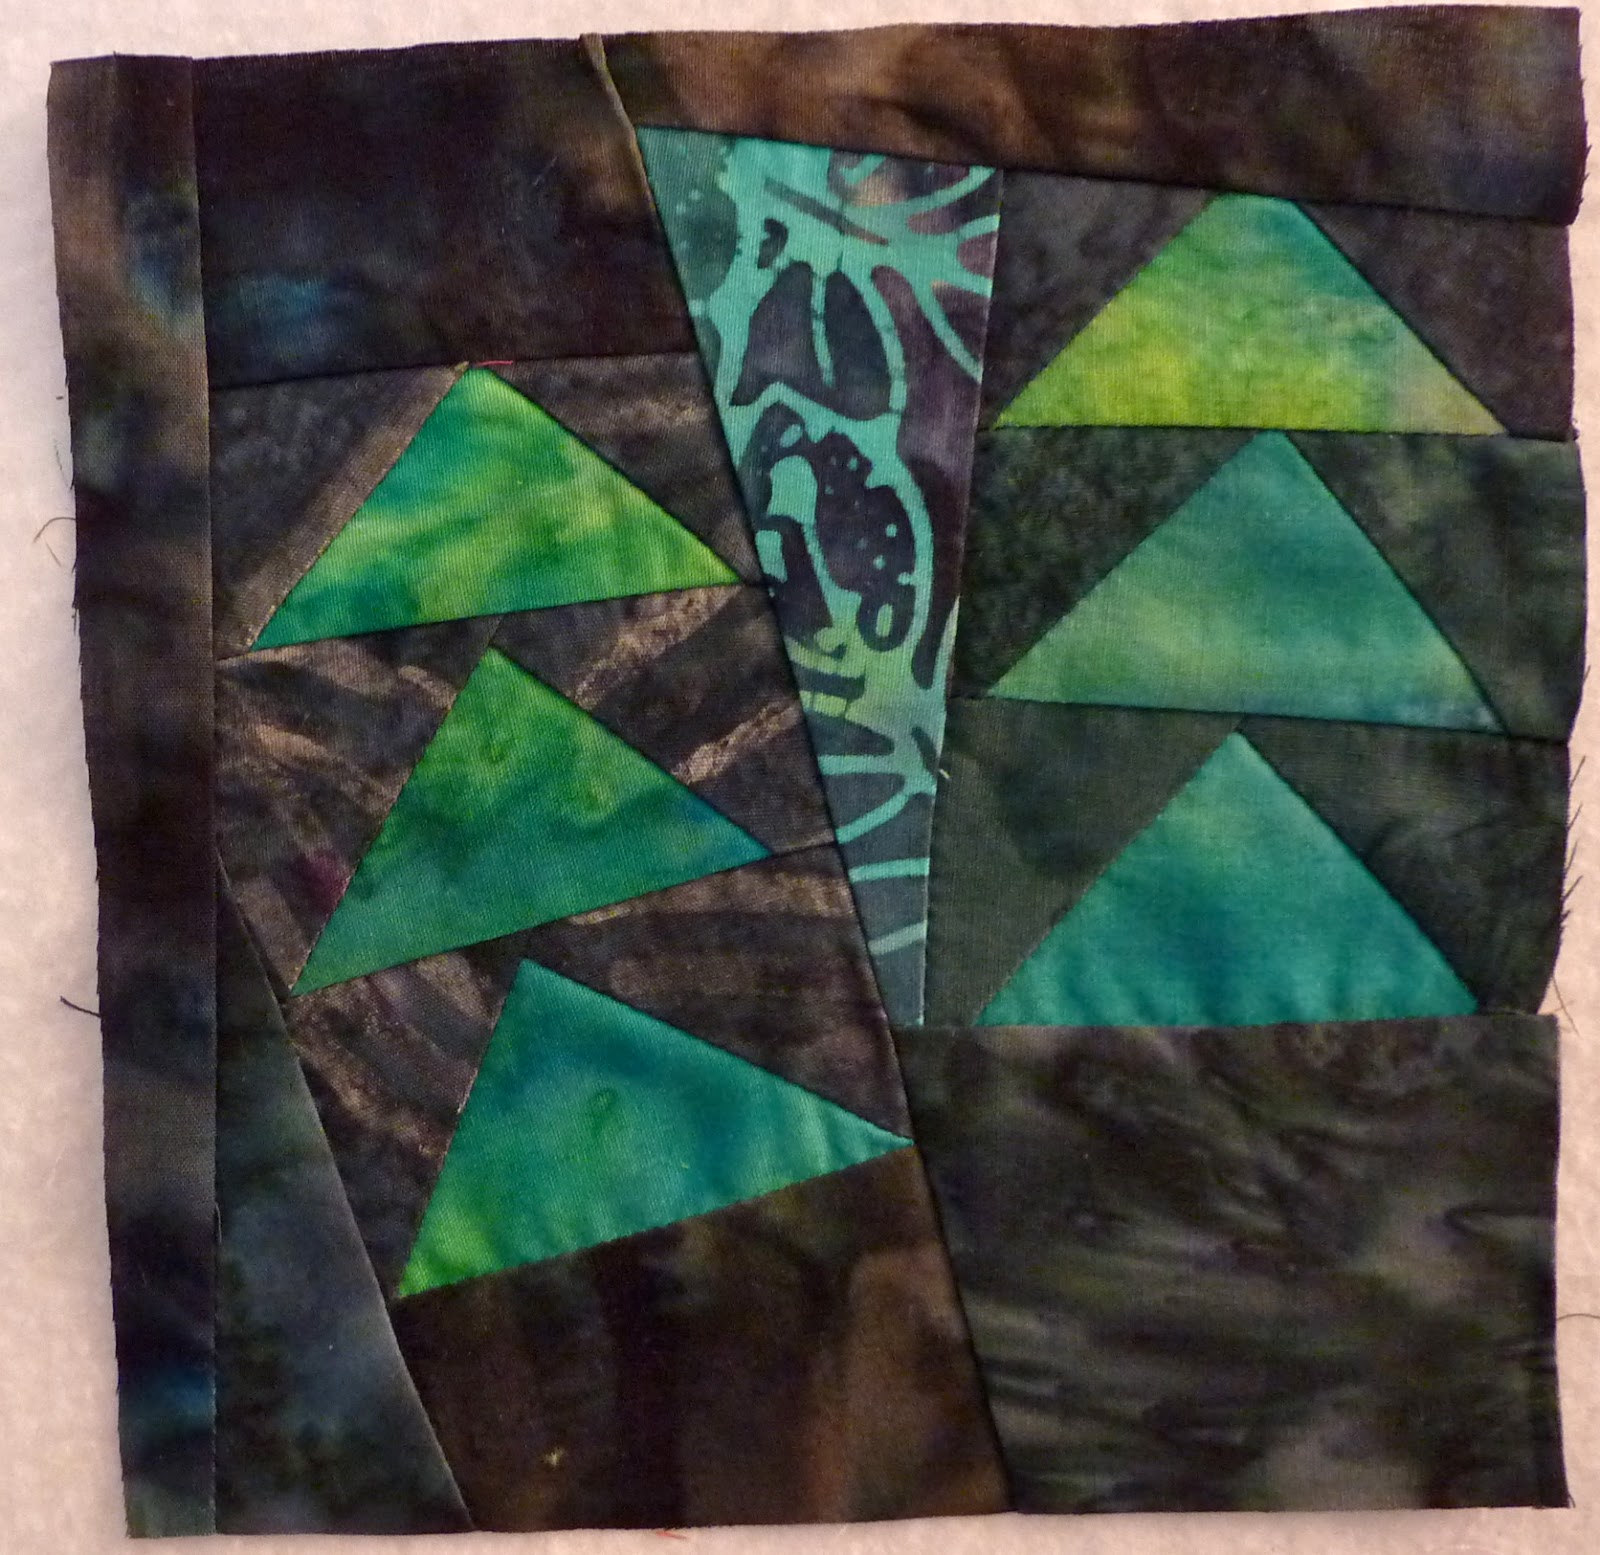
On my design wall this week is the first 4 blocks of my scrappy ticker tape quilt.
You can read about the beginning of the project on this blog post. It is coming along well and I am happy with the shapes that are evolving on the blocks...some triangles, and the rest seem to be 4 sided shapes (which Amy probably knows the proper names of!).
I think I will have enough scraps to make at least 9 blocks.
To see other design walls, hop over to Patchwork Times.
I am forcing myself to watch the 9/11 specials on TV tonight. I am amazed at how it still feels so raw for me after 10 years. The visual images are still so incredibly powerful.
I started my 36 Patch Quilt Along project in mid August and have been feeling so pleased about all the scraps it has used up. Here are some of the pink and purple floral blocks. I particularly like the scrappy backgrounds in the bottom right block.

I even fussy cut a square from my precious Dr. Suess stash to include in this block just for fun!
My project needed more yellow and green, so I dug some pieces out of the stash since I'm out of most of my 2" floral strips. I have decided that no fabric is going back in the stash from this project...
so watch my blog for a scrap giveaway soon!
I think that my quilt will be 5 blocks by 7 blocks (total of 35 blocks) with a pieced border of all the leftover squares, so I still have a few more blocks to sew!
This is such a crazy busy time of year...garden harvesting and canning, back to school shopping, and new routines. But I still make time for the Fall Fairs!
We have been regular attenders since our children were little...this is an old photo of the kids with their faces painted riding the bumper cars. The rides, the animals, and the face painting were the favorite attractions then. Now that the kids are older, we enjoy the displays and the entertainment more.
Last year I entered some quilts in a fall fair for the first time (click here to read about it). This year I entered a couple of quilts in the Paris Fair and my recently finished quilt-as-you-go project won first prize (thanks to Lyn Bell for sponsoring the fair prizes...I can't wait to spend my gift certificate!).
A new goal that I set for myself this year was to not only enter some quilts, but to enter the photography category. There were hundreds of entries, so I was very excited to win a couple of ribbons.
This was one of my winning photos in the category called "In The Snow". I was not impressed that pins were stuck into the corners of the some of the photos to hang them on the display walls! That is why the photos are mounted on a background so that they can be easily displayed without damaging the photo!
However I was very happy that my storyboard ("a collection of small prints on one subject mounted on a 16" x 20" board") of photos documenting the making my spiderweb quilt won a second place ribbon (no pin holes in the storyboard photos!)
And speaking of Fall Fairs, I see on Sandy Gervais' blog that there is a
A Country Fair Blog Hop - 26 designers offering free projects for the month of September. Check it out!
LuAnn asked some questions about the free motion quilting design on my Lil' Twister tablerunner, so I thought other people might have the same questions.
I used a continuous line free motion design that I first practiced on paper (as I always do) until I was confident that I knew how I would travel from block to block. I made the four hooked feathers in the pinwheel, and then travelled along the seam line to the next pinwheel. I quilted the pinwheels along the row, and at the end of the row, I moved down along the seam line to the next row. Maybe it helps to show the quilt from the back?
And Janet made my day by commenting that she is encouraged not only to get going on her own Twister quilt, but is also going to take a class in machine quilting. Way to go! It's the best way to learn, and to be able to turn your pile of UFO's into finished quilts!
 This month's UFO was #11 (click here or here for more details about this month's quilt). Here is the finished quilt hanging on the clothesline. I think it's just a weird looking quilt!
  I finished with a meander stitch on the borders, which was quick and easy.