Showing posts with label Finished Quilt 2015. Show all posts

Friday, December 11, 2015

Friday Finish - Scrap Tucker

Pam Buda's latest Pocket Patchwork Sewalong is called "Tucker". It was a mystery quilt adventure, so we didn't know what we were making when we started. That's my idea of fun! 
What's a "Tucker" you ask? It's a little quilt made of scraps that you can tuck into little places in your home that need a bit of colour and quilty decoration. 


I changed my version slightly and instead of having the large scrap square portion at the top of the quilt, I inserted some letters and machine stitched around the edges to keep them in place. It measures 10.5" x 15.5".

Pam will be having an "Airing of the Quilts" next week and I'll remind you then so you can see the "Tuckers" that have been made. A big thank you to Pam for another fun quilt!

Friday, November 27, 2015

Scrap Squad Starburst

My 5th Scrap Squad quilt is finished!


The original pattern is "Candy Cane Crush" by Sandra Clemons. I used the block pattern and then decided to put the blocks on point. To read more about this quilt, hop over to the Quiltmaker blog (not posted yet but stay tuned!) where I wrote about the design decisions, the construction of the top, and the machine quilting.
Even after all these years of making quilts, this one challenged me in new ways. 

These are some of the things I learned in making this quilt:
1) I learned how to painstakingly sew a border on the edge of a quilt with more than 160 blocks that need to be sewn precisely in order to not lose the points of all the squares.

2) I learned that it is a real challenge to make a quilt with so much white fabric. Every single stray thread showed on the quilt. I had to use the sticky lint roller on the backing, the batting, and both sides of the quilt top before basting. And then again after quilting. And still there were threads that were noticeable. 

3) I also learned that it is nearly impossible to photograph a white quilt and get the colour balance accurate.


4) And I was reminded not to try to photograph a quilt on a windy day! Remember when I tried to photograph Easy Street? The problem was that I cut it too close in terms of the timing for finishing the quilt and getting the photos taken for the deadline for writing the Quilty Pleasures blogpost. 

Because it is totally dark outside after 5 pm (when getting home from work) and I have poor indoor lighting for a white quilt (which makes it look yellow) the photos had to be taken on the windy day. Trying to get some decent photos in sub optimal conditions was not fun for me, but was quite entertaining for the neighbours!

Thursday, October 29, 2015

Easy Street Finish!

Easy Street is a finished quilt! But it was not an easy quilt in any way! This was the 2012 mystery from Bonnie Hunter. It's a large quilt, with over 2,300 pieces that I cut and sewed together over the past 3 years.  And it's an on point setting which was challenging at times. 
But it's DONE! 
I was so pleased with my finished quilt that I convinced a couple of friends to come with me to do a photo shoot at the lake. The convincing process took some time and included some chocolate bribery, but the actual photo shoot took much longer! 


During the complex series of attempts to get a photo of the entire quilt, great gusts of wind came out of nowhere, and the quilt became a sail! There are three strong women behind that quilt holding it up, while at the same time trying to prevent it from blowing away. This was the best shot I could get.
How do magazine photographers do this?!?
Well, I guess they don't go to the lake for ambience!


This photo shows the gorgeous fall leaves and what a wonderful sunny day it was. The lighting of the quilt isn't great, but the leaves are perfectly lit!

A huge thank you to Bonnie Hunter for this fun mystery project, and hugs all around to my friends who are such good sports and are up for any kind of crazy adventure.
To see more quilts that have been finished in the month of October, hop over to A Lovely Year of Finishes. And then hop over to Jo's to see how the mystery quilters are getting along with their pre-mystery finishes.

Wednesday, October 28, 2015

Another Finish - "Times Nine"


While resting my back last week, I hand quilted a 12" block that has been waiting to be finished for almost 4 years. It was in a blog post I wrote in January 2012
The block is called "Times Nine" and was in the 100 Quilts magazine volume #4. The pattern is by Jo Morton so I used some reproduction prints to make the blocks. I was drawn to making this pattern because I like how each of the 9 blocks look different depending on the placement of the light, medium and dark values.


Once the blocks were together, it waited. I pondered adding a border for a while, and then it drifted into the UFO closet due to lack of a decision. But when looking around for something to work on last week, I rediscovered it, chided myself for it's UFO status, and went to work to remedy that.


Every single seam on this block was hand quilted. Maybe a bit of "overkill" on the quilting? But I just love the texture that all this quilting gives. And the amazing thing about hand quilting is that no matter how many stitches you put into it, the quilt does not become stiff like it sometimes does with dense machine quilting.


I even found a Jo Morton fabric in my stash that was perfect for the binding!


And now it's a finished quilt ready to be enjoyed!

Wednesday, October 21, 2015

Country Roads Finish!

The link up has started for the Country Roads quilts so I had to hurry up and finish it.
This is the latest mystery quilt along project from Lori at Humble Quilts
I used the red and teal fabric that was leftover from my most recent Scrap Squad quilt because it was laying around my sewing room. The hardest part of making this quilt was picking the grey fabric for the setting squares. Having too many choices often makes the decision making process much lengthier.
I machine quilted this one in straight lines using my hera marker and walking foot. Quick and easy.
This quilt is sitting in the middle of my table with my favourite candle. 
Maybe I should call it "Peaceful Country Roads".
Click here to go to the link up party and see over 30 finished Country Roads. Thanks again Lori for another fun quilt along!

Tuesday, October 13, 2015

Cozy Afternoon Finale!

Today is the release of the last step of the Cozy Afternoon free block of the month project. Click here to get to Jacquelynne's blog post with all the details (click here to sign up to receive the pattern).
What a fun quilt it has been to make! My version is a soft, light version of Jacquelynne's pattern. I made my quilt smaller by eliminating all the alternate squares, and just using the 5 stitchery blocks on point.

It measures 34" square, which is the perfect size for a wallhanging.

I would have liked to use more of the blue colour in the quilt top, but didn't have enough yardage, so I added a little blue flange around the edge using this technique. I'm so happy with that bit of blue peeking out there to interrupt all that pinkness.


The free motion quilting was a little tricky at times because I did not want to quilt on the embroidery, so I tried to slow down and quilt as close as I dared to the stitching.


Here is the list of my quilty friends who are blogging today about their version of Cozy Afternoon:

The Crafty Quilter

44th Street Fabric

Red Letter Quilts

Lily Pad Quilting

A Quilt and a Prayer

I hope you can hop over and visit them to see what their creativity has produced. Each quilt is so different that it's hard to believe they are made from the same pattern!
Have you started your own version of Cozy Afternoon? Don't forget to add a label to your quilt.  I usually just tuck a little triangle into one of the corners under the binding. I try to remember to write the name of the pattern designer, and of course my name. If you don't want to make your own label, you can order the official labels here.


A huge thank you to Jacquelynne for sharing this wonderful pattern with all of us! And not only did we get this free BOM, Jacquelynne is also giving away these patterns to a few lucky readers. Just leave a comment on the bottom of this blog post and tell me if you have already started your Cozy Afternoon, or have you printed the instructions to make in the future. I will randomly draw the winning blog comment on October 19th. You can enter to win the draws on each of the participating blogs listed above.

Friday, September 25, 2015

Finished Quilt - Long Post


My fourth Scrap Squad quilt is finished! For this assignment I made a pattern called "Blue Bayou" by Kate Colleran. It is from the September/October issue of Quiltmaker magazine.
Deciding on the layout was the highlight of making this quilt. There are so many possible options in setting these blocks together. Of course I tried out all of the layouts in Quiltmaker magazine on my design wall to see what would happen when each block was twisted, turned, and set differently beside it's neighbour.
Option 1 - love what the darker teal/blue is doing but didn't like the light/blah 16 patch blocks that emerged.

Option 2 - a little frenetic for my liking

Option 3 - I like what the red pinwheels are doing in this layout

Option 4 - This is a variation on option #1 and again I don't like the light/blah 16 patch blocks.

Option 5 - This is fun...I just noticed that the top left corner block isn't turned properly!

Option 6 - I really like this layout and it was my second choice.

Option 7 - Fun zigzag layout.
After all the block play, I loaded the photos on my computer and after viewing them several times, finally decided that I really liked option #1 the best. And if I pulled the third and fourth columns down one block, it got rid of the light/blah 16 patch block that I didn't like, and gave it a zigzag look that I loved. Perfect!
Option 8 - my favourite!


Confluence at the confluence
I call this quilt "Confluence" which according to Mr. Webster means "a coming or flowing together, meeting, or gathering at one point". The design is a confluence of two of the possible layouts, and of course I had to do a photo shoot at the confluence of the two rivers in my town.


While trying to get a good photo of the quilt, the clouds started to clear away, and the sun came streaming through which made my camera very unhappy. Makes for interesting photos though :)

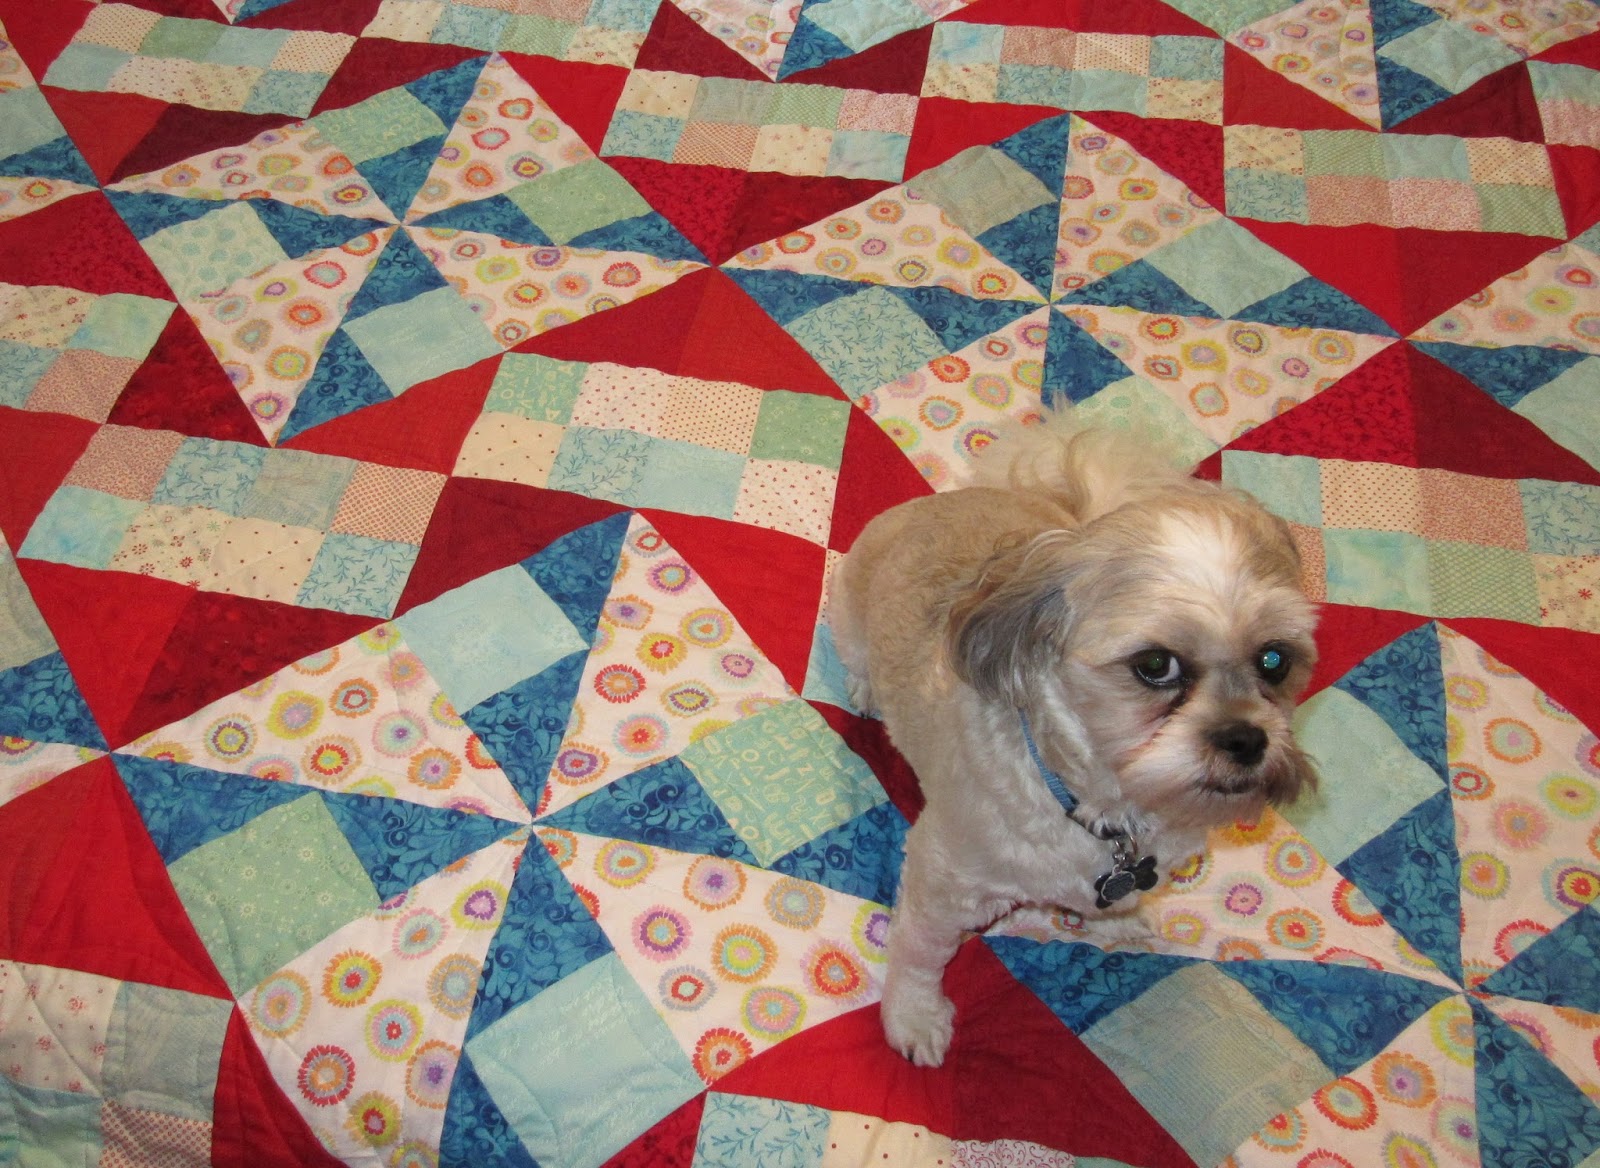
And then when Mr Max (the granddog) came to visit, I had to try a photo shoot with him. He had forgotten all his posing skills that I had taught him previously. But just look at this cheeky fur baby - does he look guilty or what?!? And his left eye changed colours to match the quilt... that's kind of wierd!

One last photo - the back of the quilt is just chunks of leftover fabric sewn together to use it up. You can maybe see here that I have adopted 
Martha Schellingerhoud's idea of using the same colour of thread in the bobbin as you are quilting with. I like how it makes the back of the quilt more interesting.

Friday, August 28, 2015

Finished Quilt!

Big announcement today... 
drum roll please.... 
the braid quilt is finished! This quilt has been "in progress" for about 15 years. And it has finally become a useable quilt.
Finished size: 57" x 72"
I machine quilted it on my domestic sewing machine in horizontal squiggly lines following the braids. Using this quilting design prevented lots of twisting and turning of the quilt, but still gives it the zig zag effect.


I extended the quilting lines across the border right to the edge of the quilt, so I didn't have to figure out another quilting design in the border. That was genius if I do say so myself!
The backing is just a boring piece of sale yardage pieced down the middle. 

To see more finishes, hop over to A Lovely Year of Finishes and Crazy Mom Quilts.

Sunday, July 26, 2015

Slow Sunday Stitching Finish


The "Tiny Tumble" quilt is finished!
It started out as a leader/ender project, but was so much fun to work on that I just couldn't leave it alone. I started and finished this little quilt within the same month... now that is a rare occurrence! 
It measures 8" x 8.5" and is made of 108 tumbler patches. My favourite patches are the 3 teal tigers that were fussy cut from a scrap of fabric.


There are so many seams in this quilt, with very little area for quilting without having to go through a lot of seams. So I just hand quilted right across the middle of each row.
This was such a fun project that I'm kind of sad that it's finished. Now that's crazy!


What are you hand stitching today?
I'll be making more appliqued seed blocks since the tiny tumble is done.
Link up your blog post below and share your project with us.


Friday, July 24, 2015

Scrap Squad Quilt #3

Today is the big reveal of my scrap squad quilt over at the Quiltmaker blog, where you can read all the details about the creative process.
The biggest surprise for me when  making this quilt was how much I disliked it when I was sewing the rows together, and then how much I liked it when it was done! My feelings went from one extreme to the other, and that has never  happened to me before when making a quilt.
The thing about this quilt is that the farther away from it you are, the better it looks. It's true. 
And that's weird, right?
Anyway, it used up almost all of my Kansas Troubles fabric scraps and emptied an entire tote bin.
You know what that means?
I'm going fabric shopping!
I also want to announce the winner of the Cozy Afternoon giveaway from Jacquelynne. There were 89 comments on that post, and the random number generator picked #39, which is Margaret! Congrats to you Margaret, and check your email because the patterns will be emailed directly to you.
Have a great weekend everyone!

Thursday, July 09, 2015

A Finished Quilt!

"Always Home" is a finished quilt!
started this quilt with the hand embroidered strips in December 2012.  The piecing of the houses was challenging since the pieces are 1" finished, but it was fun for me. The only change I made to the pattern was to make some of the windows light instead of all dark. It measures 18" x 44" so it hangs on the wall at the end of a hallway.
The hand quilting began in January 2014. The project then had a brief 'time out' while I was deciding how to quilt the background space, but I am happy with how the free hand designs turned out. 
This quilt took about 2.5 years to complete. It travelled a lot while being quilted, as all my hand quilting projects do. It was at the beach, went camping, visited my cousin's farm, attended QuiltCam (which is on tonight BTW), saw two Masters golf tournaments (on TV), was one of my projects at Quilt Camp North last summer, and was shown on many Slow Sunday Stitching posts.


I am happy with this quilt, although the right hand border curves out half way down the quilt for some unknown reason. I'm saying it's part of it's plaid charm!
Woohoo for a finished quilt full of curves and charm!

Monday, June 01, 2015

A finished quilt on the design wall!

What a great feeling to finish this UFO on the last day of May! Scrappy (Carolina) Chains is on the design wall, and it is done, done, done!


These quilt blocks were started in 2010 to use up scrap polka dot batiks. The block pattern is by Bonnie Hunter and was in the Quiltmaker magazine. 
The project get stalled by the challenge of making a layout decision.
I'm quite happy with it now that it's all said and done.


And I am quite tickled that the batting, the backing and the binding all were made from leftovers. Nothing was purchased in making this quilt!
It even has a label, which is kind of lame, but it is there!

Hop over to Patchwork Times to see more design wall postings.

Friday, May 22, 2015

Scrap Squad Quilt #2 - Under the Sea

 Today is the day for my the big reveal of my second scrap squad quilt.

I chose to recreate the pattern by Scott Murkin called "Sea Glass".I picked this pattern from the May/June issue of Quiltmaker because I have a lot of blue in my stash (doesn't every quilter?) and because my daughter is a diver and I thought it would be fun to make a quilt for her.

I needed a bit of extra time to make my quilt because I wanted to add in two design elements - photo transfer and paper piecing. 
Thankfully fellow scrap squad member Pam Snow came to the rescue and was able to switch reveal dates with me. Just look at her gorgeous quilt! It features machine embroidered flowers in the grey squares. You can hardly see the resemblance to the original "Sea Glass" design, right?


And here is my version of "Sea Glass" which is called "Under the Sea". I stayed with a similar colour palette as the original pattern. Using the block construction method in this pattern was really fun
I also added a few photo transfers of my daughter diving, and a paper pieced sting ray block.


Here is one of my beginning photos when I was making blocks and putting them on the design wall.  As I was looking at the blocks, I was asking myself "what would help me like this quilt more"?  The quilt really came to life for me when I decided to try putting the blocks on point and it started to look like an underwater scene.  I arranged a light to dark layout from top to bottom to look like the ocean does when you're diving, and the water gets darker as you dive deeper.


Machine quilting this was so fun. Most of the quilting was wavy horizontal lines, but in the larger blue sections I experimented with quilting fish tails and swirly waves.
I had a blast making this quilt and am delighted with the outcome! It is so rewarding to look at a finished quilt and remember the journey from your first glance at the pattern, to looking at a finished quilt!