Saturday, October 31, 2020

October Mini Finish

Most of my October accomplishments occurred  because I cleaned the quilting room at the beginning of the month. New windows were installed, so space had to be made for the workers to walk through. It's amazing the treasures that were (re) discovered!


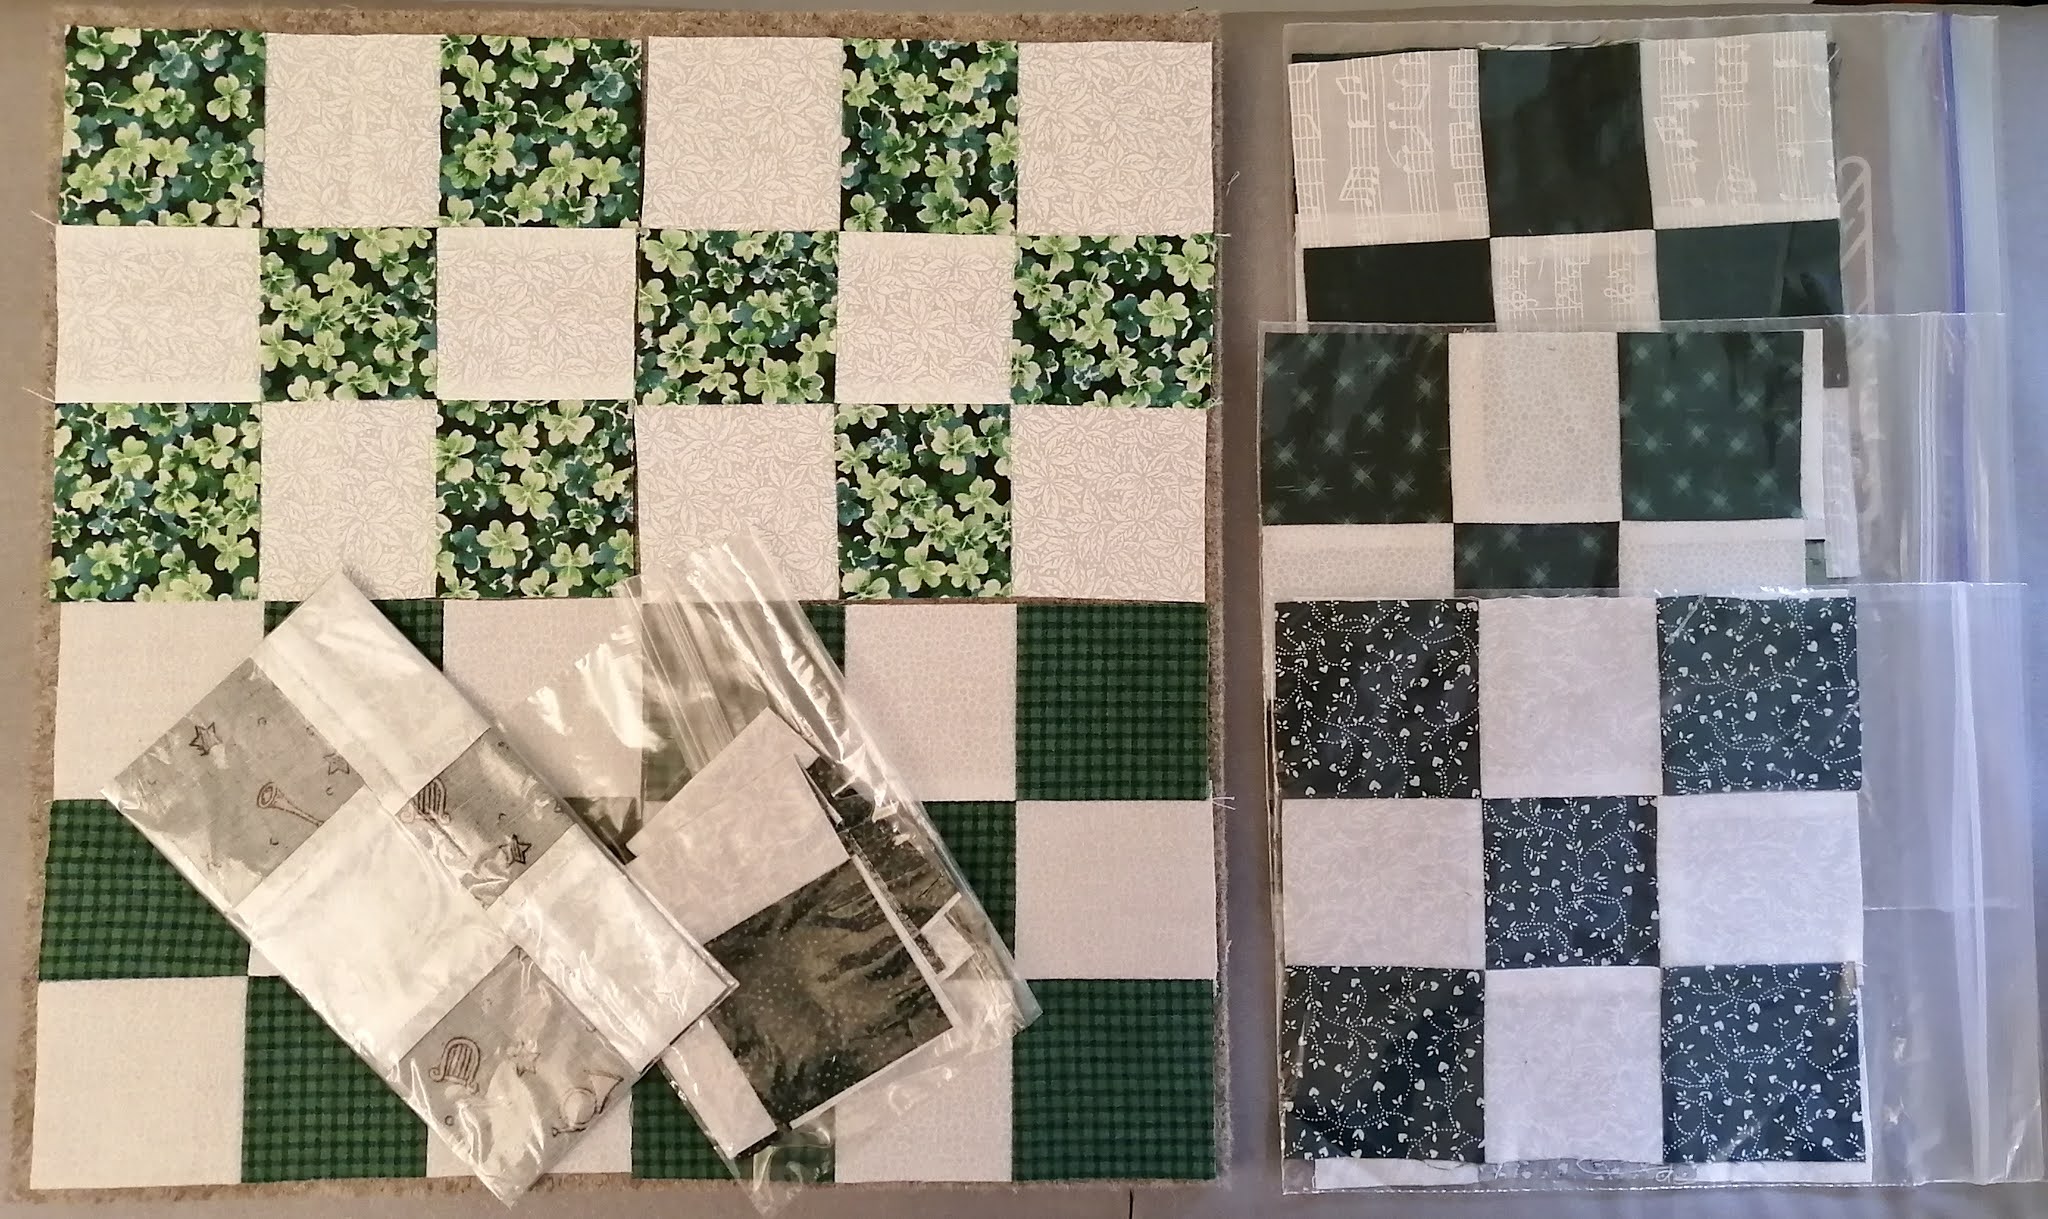
I found two 3" finished blocks and lots of strips and couldn't wait to sit down and sew more blocks. Sewing the blocks together was the challenging part and lots of pins were required. 


If you haven't made anything yet with 1" strips, this is what it looks like from the back. It's all seam allowances, which I press open to try to get it to lay flatter.


While I was sewing the 9 blocks together, I decided to turn it into a pillow. I made the Peace  block to go on the other side of the pillow, and bordered both blocks with the same batik fabric.


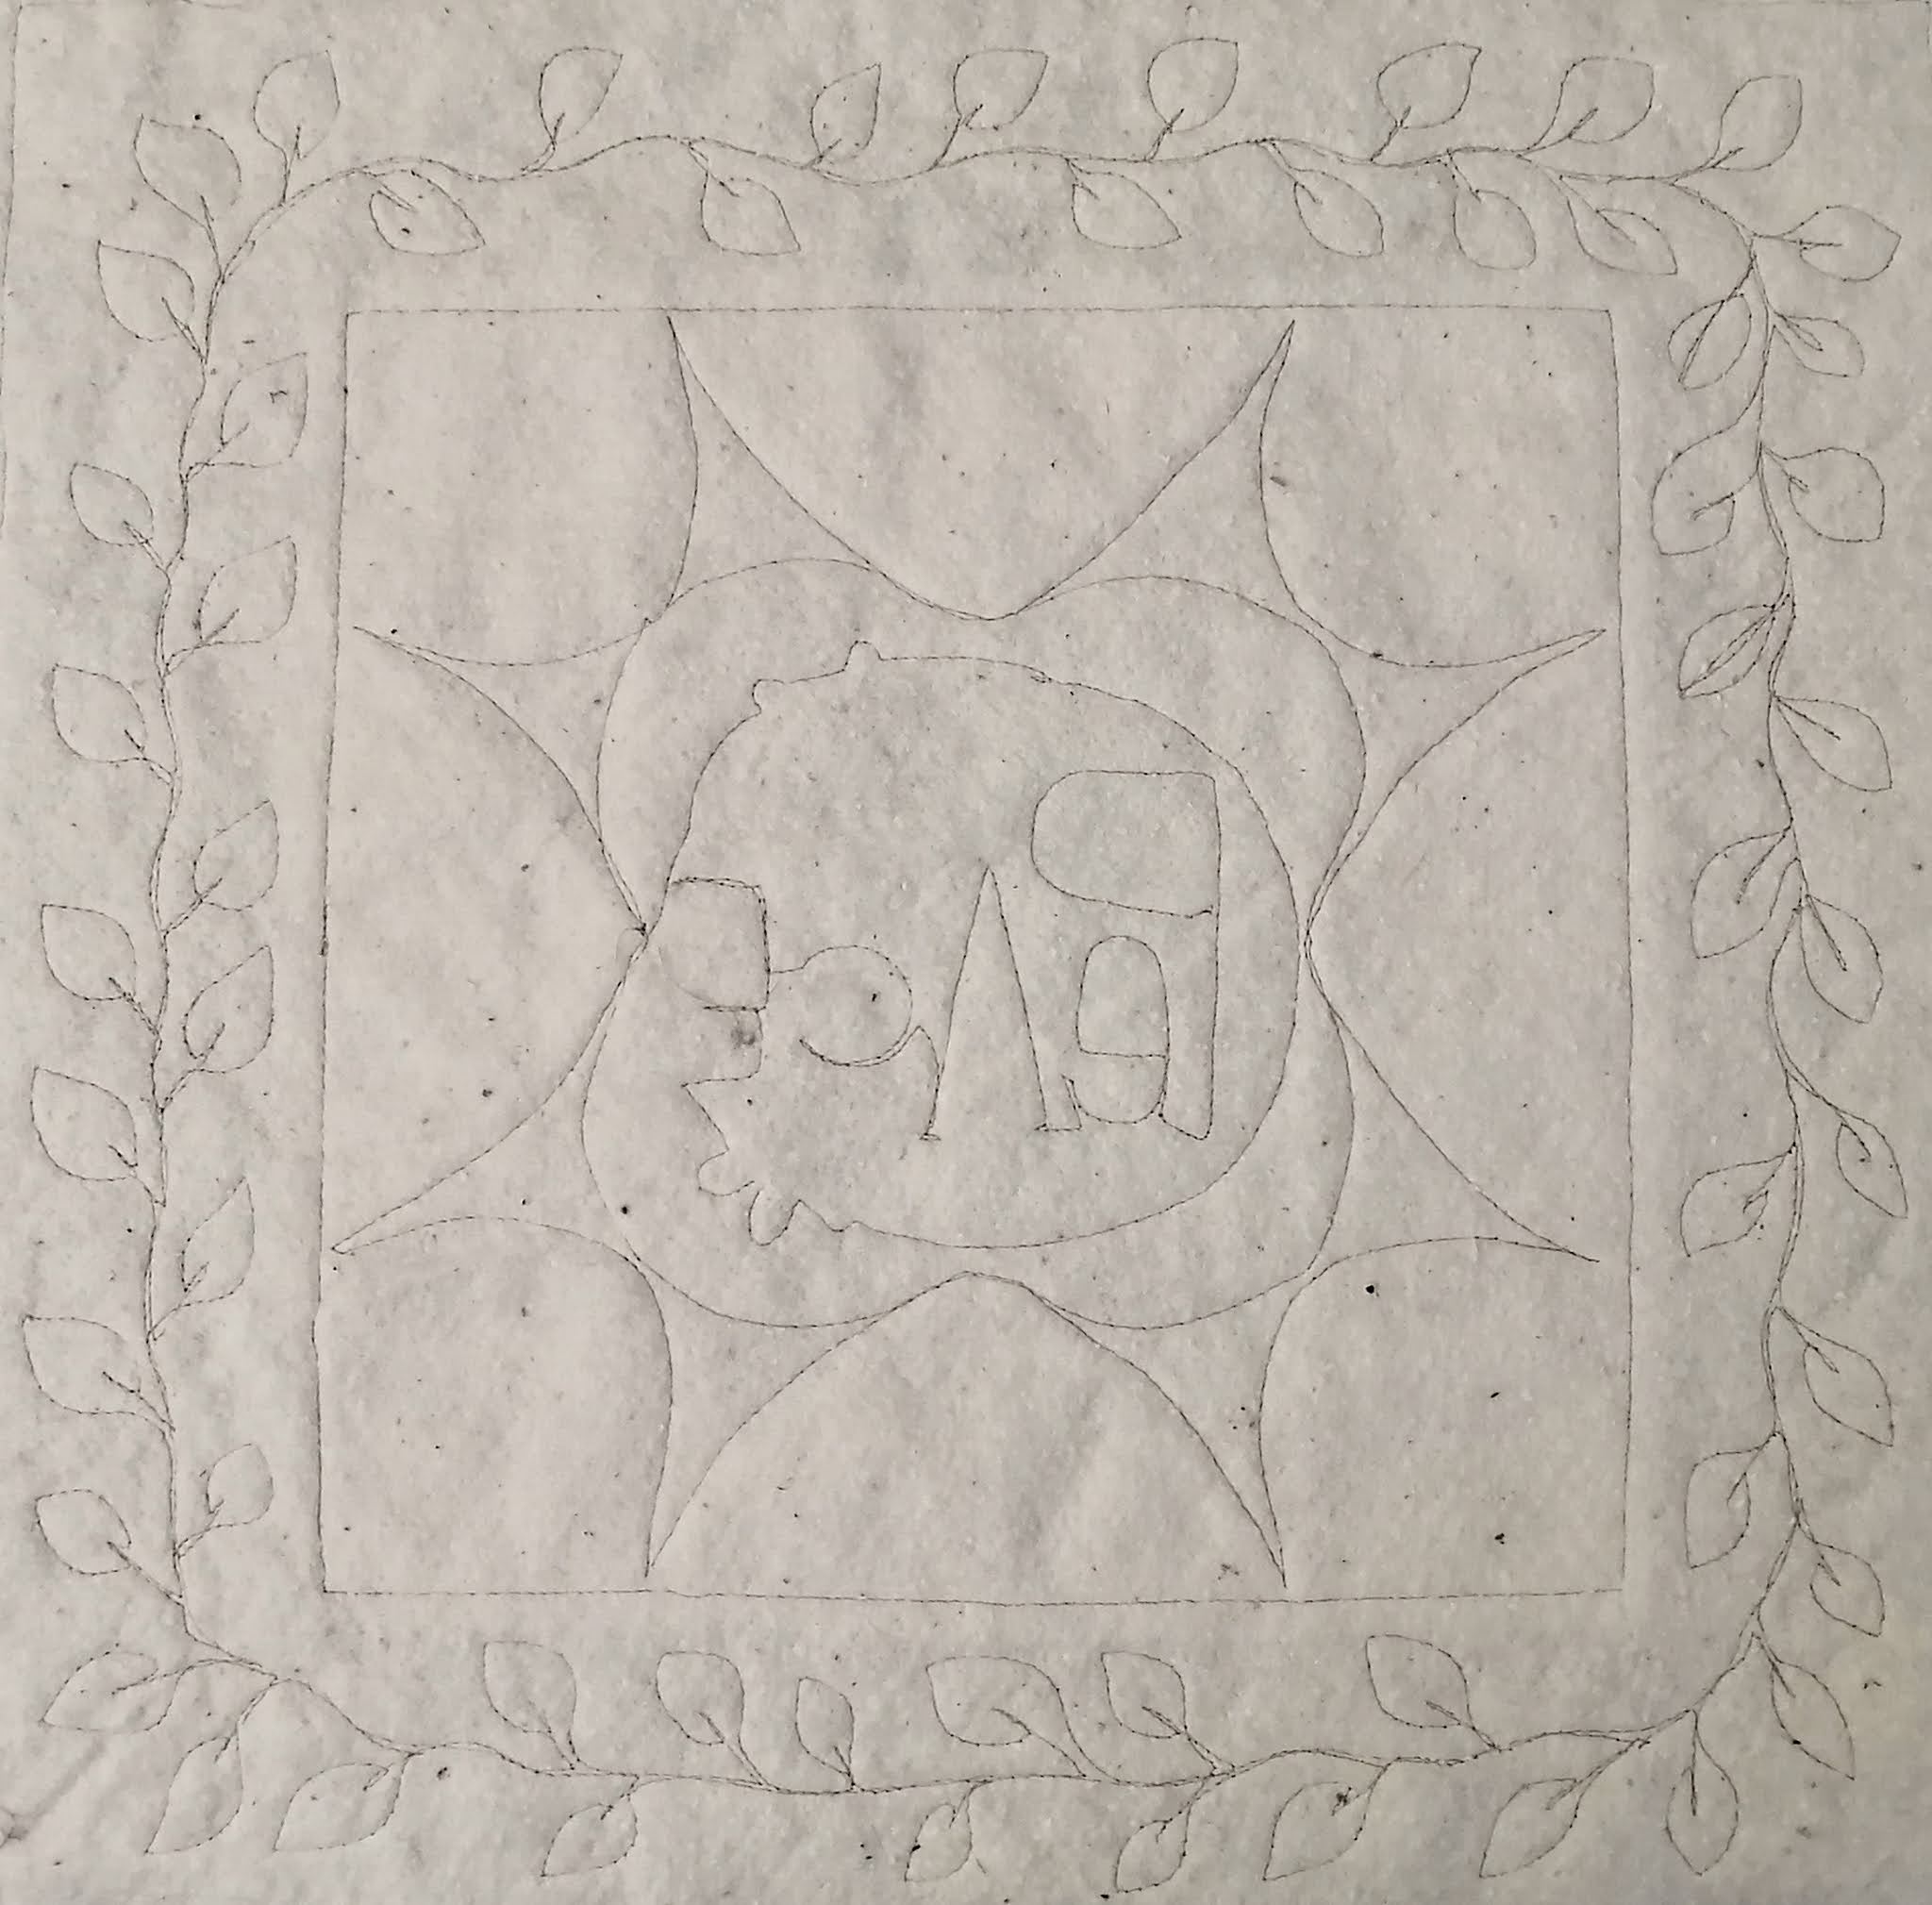
I machine quilted both blocks with just a piece of batting underneath. I quilted random leaves around the Peace block. This is how it looks from the back.


There are 225 1" squares in the mini quilt which finish at .5". I was really proud of that piecing, and think that the large print border and feather quilting takes attention away from the centre piecing. That's okay... I still love my finished pillow!

This is where my new pillow lives - in my reading corner with the library book I am enjoying and the beautiful shawl my friend Louise made for me. 

Hop over to The Constant Quilter to see the other mini quilt projects made this month.

Wednesday, October 28, 2020

Finished UFO

I'm so excited that I met my UFO goal this month! It was really busy and that I managed to complete a quilt feels terrific!

This quilt top was made in a mystery quilt class with Deb Beirnes 2 years ago. I sewed the top on my 1953 Singer 301 which still sews like a dream.

I machine quilted this project on my 1995 Brother 1500 which also still sews like a dream. You can read more about the "loose feathers" quilting design I tried in Friday's post.


Here is the finished quilt measuring 50" square. The original pattern is by Larisa Key.

I put a little panel of the Eiffel tower on the back just for fun, with a Riley Blake black and white print and a strip of tan Kim Diehl fabric
.


I was disappointed that the feather/hearts quilting design is sideways to the Paris panel on the back. I didn't realize I did that until I took the photo of the backing just now. Oh well, that's the way things go sometimes.
Linking up to One Monthly Goal

Monday, October 26, 2020

Scrappy Quilt Top on the Design Wall

When I was gathering the supplies for my UFO of the month project, I found a few more hidden treasures in the closet. In one bin I found some very old orphan blocks and became captivated by the challenge of putting them into a quilt.

1) The pinwheel blocks were from a class I taught several years ago on unique block construction ideas. These were made using charm squares. You can see a tutorial from Missouri Star here. These blocks are the actual practice blocks of the students and some are a little wonky and incorrectly trimmed, and they are spinning every which way. But that's how we learn, so all the good, bad, and ugly are in this quilt!

2) The bowties were from a 2011 class I taught showing 3 different construction methods - connecting corners, set-in seam, and 3D.

This is how the quilt centre looked with the bowties set around the hourglass blocks.


3) In the 1990's when I was a new quilter and the internet was new (do you remember back that far?) I participated in a 9 patch block exchange by mail. Every month we made 9 patches in a certain colour and put them in the mailbox. About a week later we would receive
9 patch blocks from all over the US. I was usually the only Canadian in those swaps. I have a lot of 9 patches still waiting to jump into a quilt. For this project I used up the gold and green blocks.

The sashing and outside border was leftover from the backing of this month's UFO. This quilt top truly is an old school scrappy quilt! Now it's off to someone else in the guild to finish the quilt to donate to the comfort quilt collection.

Finished size: 52" x 70"

Linking up to Design Wall Monday

Sunday, October 25, 2020

Slow Sunday Stitching

 Welcome to the weekly hand stitching party!

Lots of hand stitching is going on here. I finished the machine quilting on my October UFO yesterday and enjoyed some late night hand stitching on the binding. This photo shows 2 of the backing fabrics. I'm so happy to be able to meet my quilting goal this month and will enjoy the binding each night until it's done.

And I'm still on that cloth knitting craze that Gail got me addicted to! I finished 3 cloths that I gave to my daughter for her birthday - the seahorse, the whale and the octopus. I felt like each one was a little miracle when it was done. And my daughter loved them, so that was doubly wonderful!

I got a new tool to measure needle size and discovered that when I knit the green octopus cloth I was using 2 different sized needles! It turned out okay anyway, but a little smaller than the others (which were knitted on circular needles). This brown cloth is for an American Thanksgiving gift ... bet you can't tell what the design is!?
For those of you who were interested in taking a Siddi quilt class which I mentioned last week, Sujata opened a class registration. You can find her at "therootconnection" on instagram or go on the eventbrite site, search for Sujata Shah and sign up there.

What are you hands creating today? We love to see your projects so link up your blog post below. 

Congratulations to all you blogspot bloggers who have weathered the system transition and didn't give up - way to learn new things and be resilient!! I'm proud of you!


You are invited to the Inlinkz link party!

Click here to enter

Saturday, October 24, 2020

Scrappy Saturday

 Throughout October the Rainbow Scrap Challengers were sewing our yellow scraps. It has been refreshing to play with these pretty pieces.

These are the yellow Easy Breezy blocks (Quiltville's leader-ender blocks) that are being added to the collection from this month.  I fussy cut some words for the block on the middle left which made me smile :) I am enjoying sewing these blocks and have a stack beside my machine at the ready at all times. 

I also sewed 2 more waffle blocks. There are parts for more, but they haven't been finished yet... maybe today.

Hop over to the RSC linkup

Friday, October 23, 2020

Machine Quilting

This month's UFO is a mystery quilt that I made in an in person class (remember the good old days?!?) almost 2 years ago. It really isn't my usual kind of quilt to make, with all the fabrics matching and looking so beautiful! LOL

It takes a lot of thought and preparation to work on a UFO. These are some of the tasks: look for where you carefully stored (hid) the quilt top, find lots of other projects you want to finish up, refocus on the UFO, measure the quilt top, cut a piece of batting to the needed size, gather some yardage to piece a backing, press top and backing, select threads, wind bobbins, pin baste the quilt, and then finally, you're ready to quilt.

I tried a new quilting design this month and I'm excited about how it is turning out. 


I was inspired by a design posted by Melissa who blogs at Happy Quilting when I first saw it more than 2 years ago. She calls the design "loose feathers".

Instead of making the feathers go both directions, I tried to have all the feathers going the same way. It was a good challenge for my brain to quilt one row of feathers from top to bottom, and the next row from bottom to top. But I don't think it was worth the effort and next time, I'll probably stitch the feathers in all directions like Melissa does, since it looks just as nice and is much easier to quilt.

One more week before the end of the month to finish the quilting, get the binding prepped, attached, and hand stitched.

How are your UFO efforts coming along this fall?

Monday, October 19, 2020

Design Wall Monday

On the design wall today is a finished quilt top! This is a mystery project that my local quilt guild hosted to encourage the members to keep sewing over the summer. One of the best things about this quilt is that it is completely made from stash scraps. I am so delighted with it! 

We had lots of practice with adding borders in constructing this medallion quilt. It's basically a star block with 9 borders! I always measure my quilt top through the middle and at the edges before attaching the next border. If you're lucky (and cutting and sewing accurately!) all measurements will be the same. I measure the strip and mark it with a pin, cut the edge straight with a rotary cutter and ruler, and then attach the border strip to the quilt top using a lot of pins. The more variance there is in the measurements between the border strip and the quilt top, the more pins I use!

I had fun taking photos of the quilt top outside on a lovely fall day. AND do you see the dandelion? One brave, lonely, yellow spring flower has somehow survived to the fall!

I love the border fabrics I used up on this project. There are 13 pieces in the green border and 15 pieces in the last black border. Some of the black strips were leftovers from the backing of Angel Solstice finished in 2014... these scraps have been waiting a long time to jump into a quilt!

Can you see that most of the pretty leaves have fallen from the backyard tree? Now it's time for raking leaves and machine quilting!

At the end of the mystery project we were told that this is a pattern by Robert Kaufmann and if you want to make one, the free pattern is called Gazebo Medallion (click on the link to get the pattern).

Linking to Design Wall Monday at Small Quilts and Oh Scrap!

Sunday, October 18, 2020

Slow Sunday Stitching

Welcome to the weekly hand stitching party! 

It has been a spectacular fall here in Southern Ontario with a display of colour like I can't ever remember. I have taken many photos to enjoy over the winter to remember these beautiful sunny days.

Last weekend I took a class with Sujata Shah of The Root Connection

My Kawandi quilt was inspired by the beautiful fall colours. It was my first online quilting class and I really enjoyed it. 

This kind of quilt making is all by hand and I loved that about it! I didn't have the right needle, but I made it work for the class. You can see that my first row of stitches (which goes through many layers of fabrics) was much bigger than my second row.

Here is the corner of the quilt with the "fula". The Siddi quilt is considered naked without them, so there's my version of a fula. You can see that my stitches are starting to look a little less like they were made by a drunken sailor!

It made me feel like my old (pre-2020) self again seeing beautiful quilts, learning something new, hearing about Siddi quilt makers, and doing some hand stitches together with other women around the world. 

Leave a comment and/or link up your blog post and share what you are hand stitching today. Then make yourself a cup of tea or coffee to enjoy while visiting the blog links and being inspired by what other people are creating with their own two hands.

You are invited to the Inlinkz link party!

Click here to enter

Friday, October 16, 2020

Mystery Progress

Everyone knows I am a total "mystery quiltaholic". On occasion (usually due to a state of project overwhelm) I can say 'no' to a new mystery, but not very often! 


I currently have several mysteries on the go in various stages of production and am pleased with the progress I made this week. First I finished trimming down the HST blocks from the September step for the Meadow Mist mystery quilt called "Morewood".

Then I started sewing the October step and sewed half of the blocks incorrectly. I wondered why I didn't have the needed strips and cut more, only to realize I did have the strips already and didn't read the instructions correctly. UGH! I'm blaming COVID brain! Luckily I could fix it by trimming and didn't waste all the fabric for 30 blocks!


It was fun to sew with these bright colours and I look forward to working on this project in the dead of winter. I label everything as I sew each step or I become totally confused working on a project over several months. Some of the numbers are blurred so I don't give anything away on this mystery. These are some of the pieces and parts for the mystery that are going back into their project box to wait until the November step is posted. This is the most fun a quilter can have in COVID times! LOL

Wednesday, October 14, 2020

Clean and Find


In the continuing (lifelong) effort to clean up in the quilting room, I keep finding treasures that I have hidden for myself. A little baggie was hidden in the back of a drawer and when I found it, I knew this would become my October miniature quilt project. There were 2 finished blocks and a collection of lovely fall colour strips 1" x 5".

It's the perfect October mini project don't you think? This is very fiddly sewing as each of the little squares finish at .5" and each 25 piece block will measure 2.5" in the quilt. When working this small, there is no wiggle room and every step from cutting to sewing to pressing has to be exact.

Here are the first 4 blocks. Oh my goodness... be still my quilty heart! 💖 
I'm loving it so far!
When the strips are used up, that will be how big the quilt will become. Total swoon!

Monday, October 12, 2020

Design Wall Monday

Progress has been made on the new "squirrel" that took over my sewing time last week. I enjoyed each step of working with these scraps.

It was a challenge to sew the rows together due to all the seams that are pressed open. SO MANY SEAMS!
(Nann asked in the comments about pressing the seams open. When I work with small pieces like these that finish .75", I usually press open due to the bulk, trying to get it to lay flatter.)

Not all of the seams cooperated and after a while, I stop fussing about everything laying flat and decided to let the iron sort it out!

Here is where the project is today with 25 blocks pieced and attached together. I'm waiting to decide if I'm done with this and this is the size it will be, or if it wants to be larger.

Linking up to Design Wall Monday

Sunday, October 11, 2020

Slow Sunday Stitching

Welcome to the weekly link up for hand stitching enthusiasts! It is Thanksgiving weekend here in Canada and I am thankful for so many things, including this international community of enthusiastic and talented hand stitchers! I wish we could have had the second annual slow stitching retreat this year, but COVID 19 has made that impossible. I am pondering whether I have the technical skills to host an online hand stitching event. Would you be interested in such a thing?

As I have mentioned many times over the past few months, the revamped blogging platform has presented many challenges and frustrations to us "golden oldie bloggers", but I am persevering and finding humour in the random issues... like the way the font doesn't stay consistent throughout one blog post for some unknown reason! So weird!

I have done a lot of hand stitching this week. I finished a placemat to donate to "Meals on Wheels" and enjoyed hand stitching the binding. 

I started a new knitted facecloth this week.  I'm trying a new kind of yarn and a new circular Nova needle but I don't like it because it's too short for my hands. If anyone wants this needle let me know and I'll mail it to you. I know I won't use it and it would be perfect for someone with smaller hands.

Do you see the difference between the needle (on the top) that I was using and this new one on the bottom? It was just not comfortable, so I pulled the stitches off and started over on the larger needle.


Also this week I took a fantastic class by Sujata Shuh on making Siddi quilts. It was a wonderful class and I highly recommend it if you enjoy hand stitching. I will write more about it next Sunday, but let me just say for today that it really filled my bucket! And those needle pullers were a life saver for my hands.

What are you hand stitching on this Canadian Thanksgiving weekend" Are you enjoying the beautiful fall colours where you live? Are you trying to soak up the energy of the last few days of outdoor stitching? Link up your blog post below and share your October project with us.


You are invited to the Inlinkz link party!

Click here to enter

Saturday, October 10, 2020

New RSC selvage project

Do you save your selvages?

I have saved mine for about a decade and have made a few small items over the years. 
When I made my Christmas mug mat out of red selvages, I fell in love with these things again and started saving them more enthusiastically. The box has begun to overflow and it was time to either stop saving them or use them up.

I reviewed Melissa's tutorial for working with selvages and decided this would be my new RSC project.

Instead of piecing the blocks on fabric or paper, I decided to use the quilt-as-you-go technique. The strips are sewn to a base of a backing square and a batting square. When the blocks are sewn, the quilting is done!

Melissa's tutorial reminded me to check under each seam to ensure the most recent strip covers the one before it, which is an important step in this type of block making. That seam had to be made larger on the left.

I chose 3 block  sizes that correspond to my batting scraps. My yellow selvages were enough to make a large, a medium and 2 small blocks.

Here are the back of the blocks, using yellow scraps as the base fabric. The yellow on the right was leftover from the backing of a quilt I made in 2010!

I'm looking forward to using up all my selvages in 2021 making blocks each month using the RSC colour.