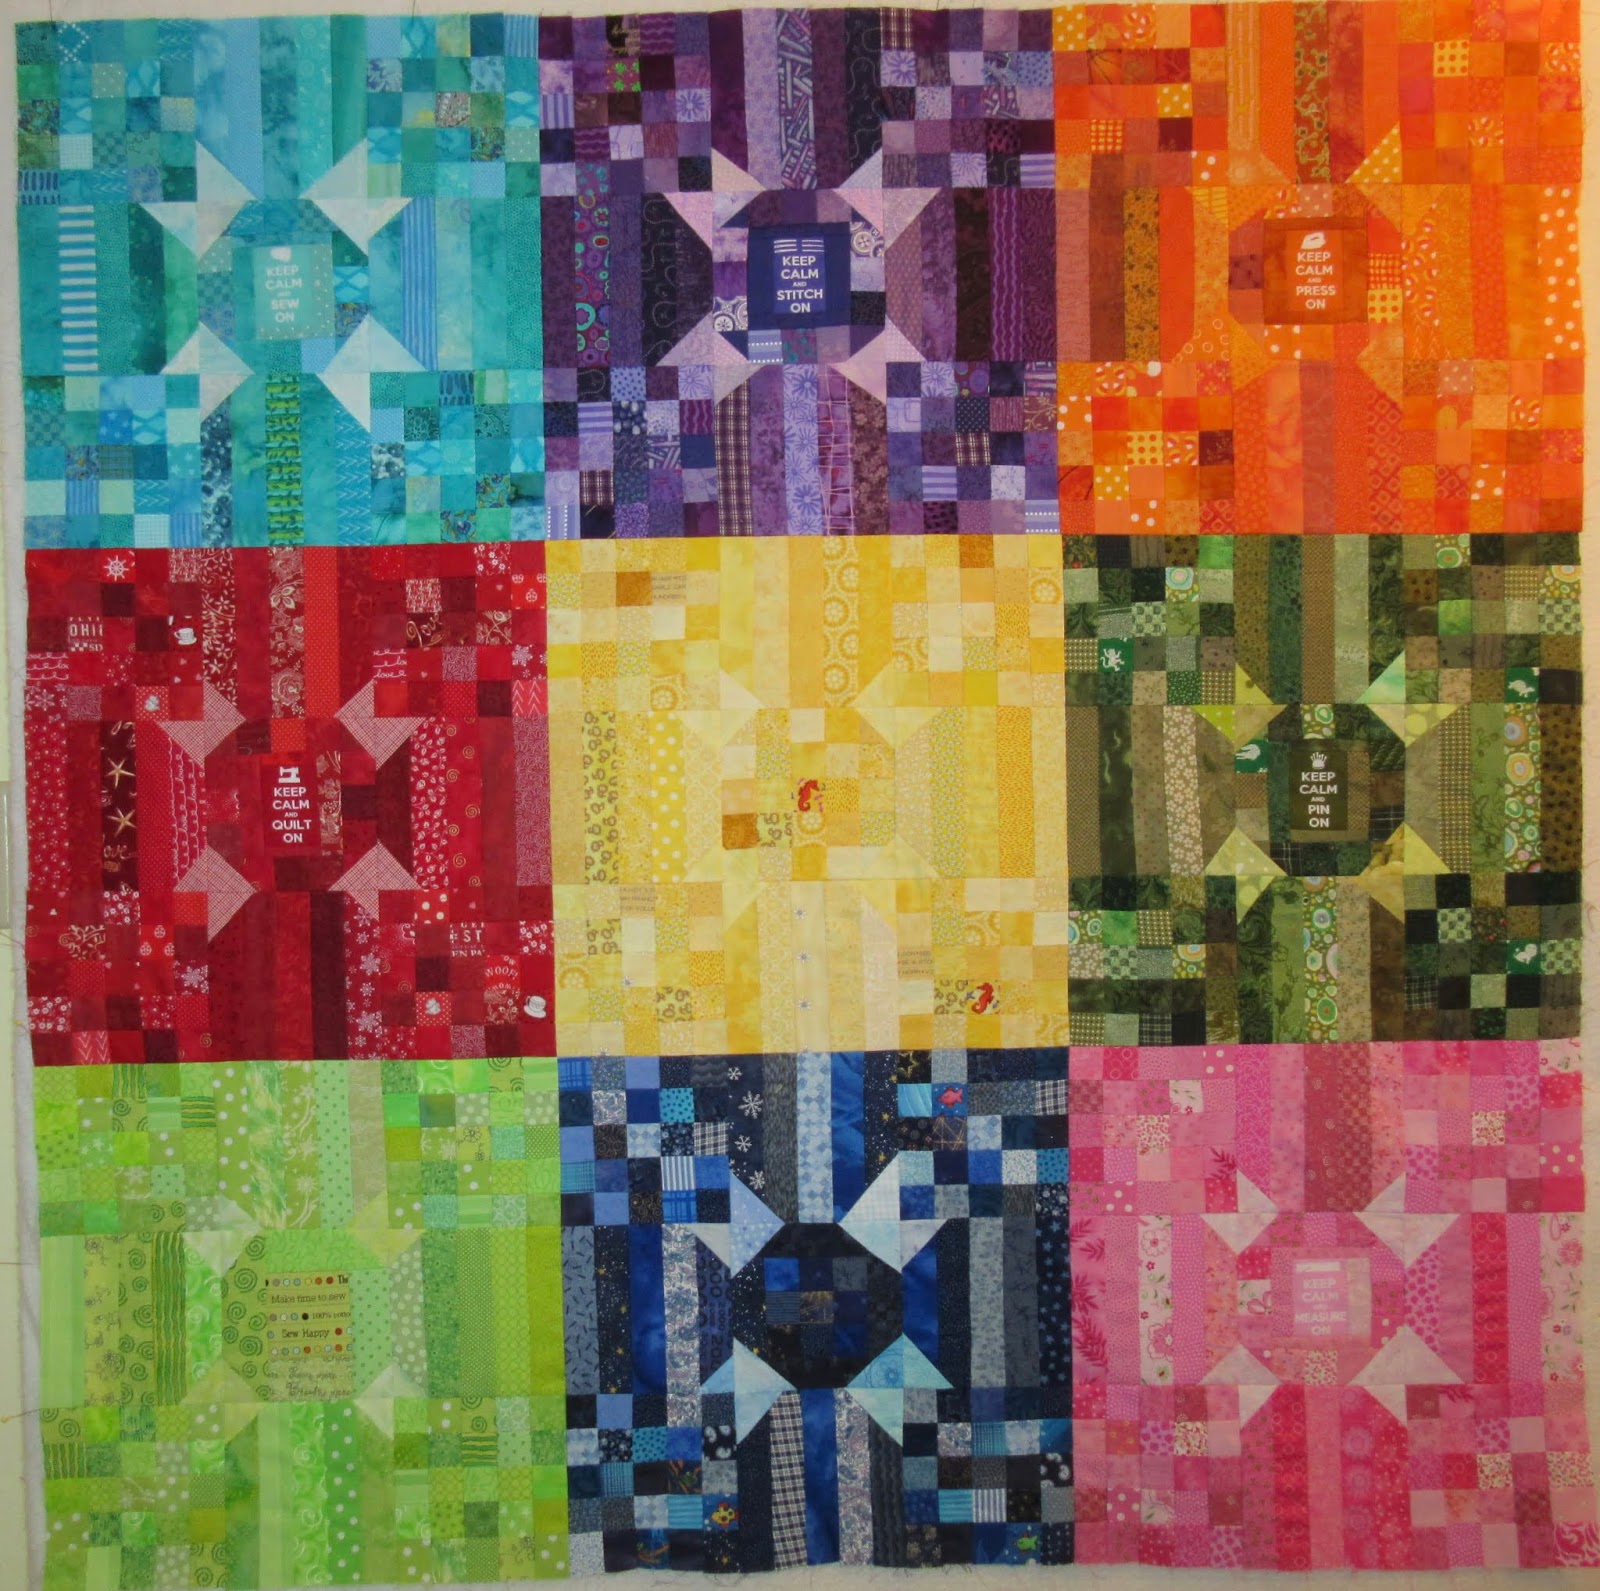
Thursday, December 13, 2018

Machine Quilting En Provence

My UFO goal for December is to finish En Provence which was the Quiltville mystery started in November 2016. I have my Brother 1600 machine set up for machine quilting and other vintage machines set up for piecing projects. That way I can work on the quilting a little bit at a time. I am having some pain in my right shoulder so shorter quilting sessions are a good idea.


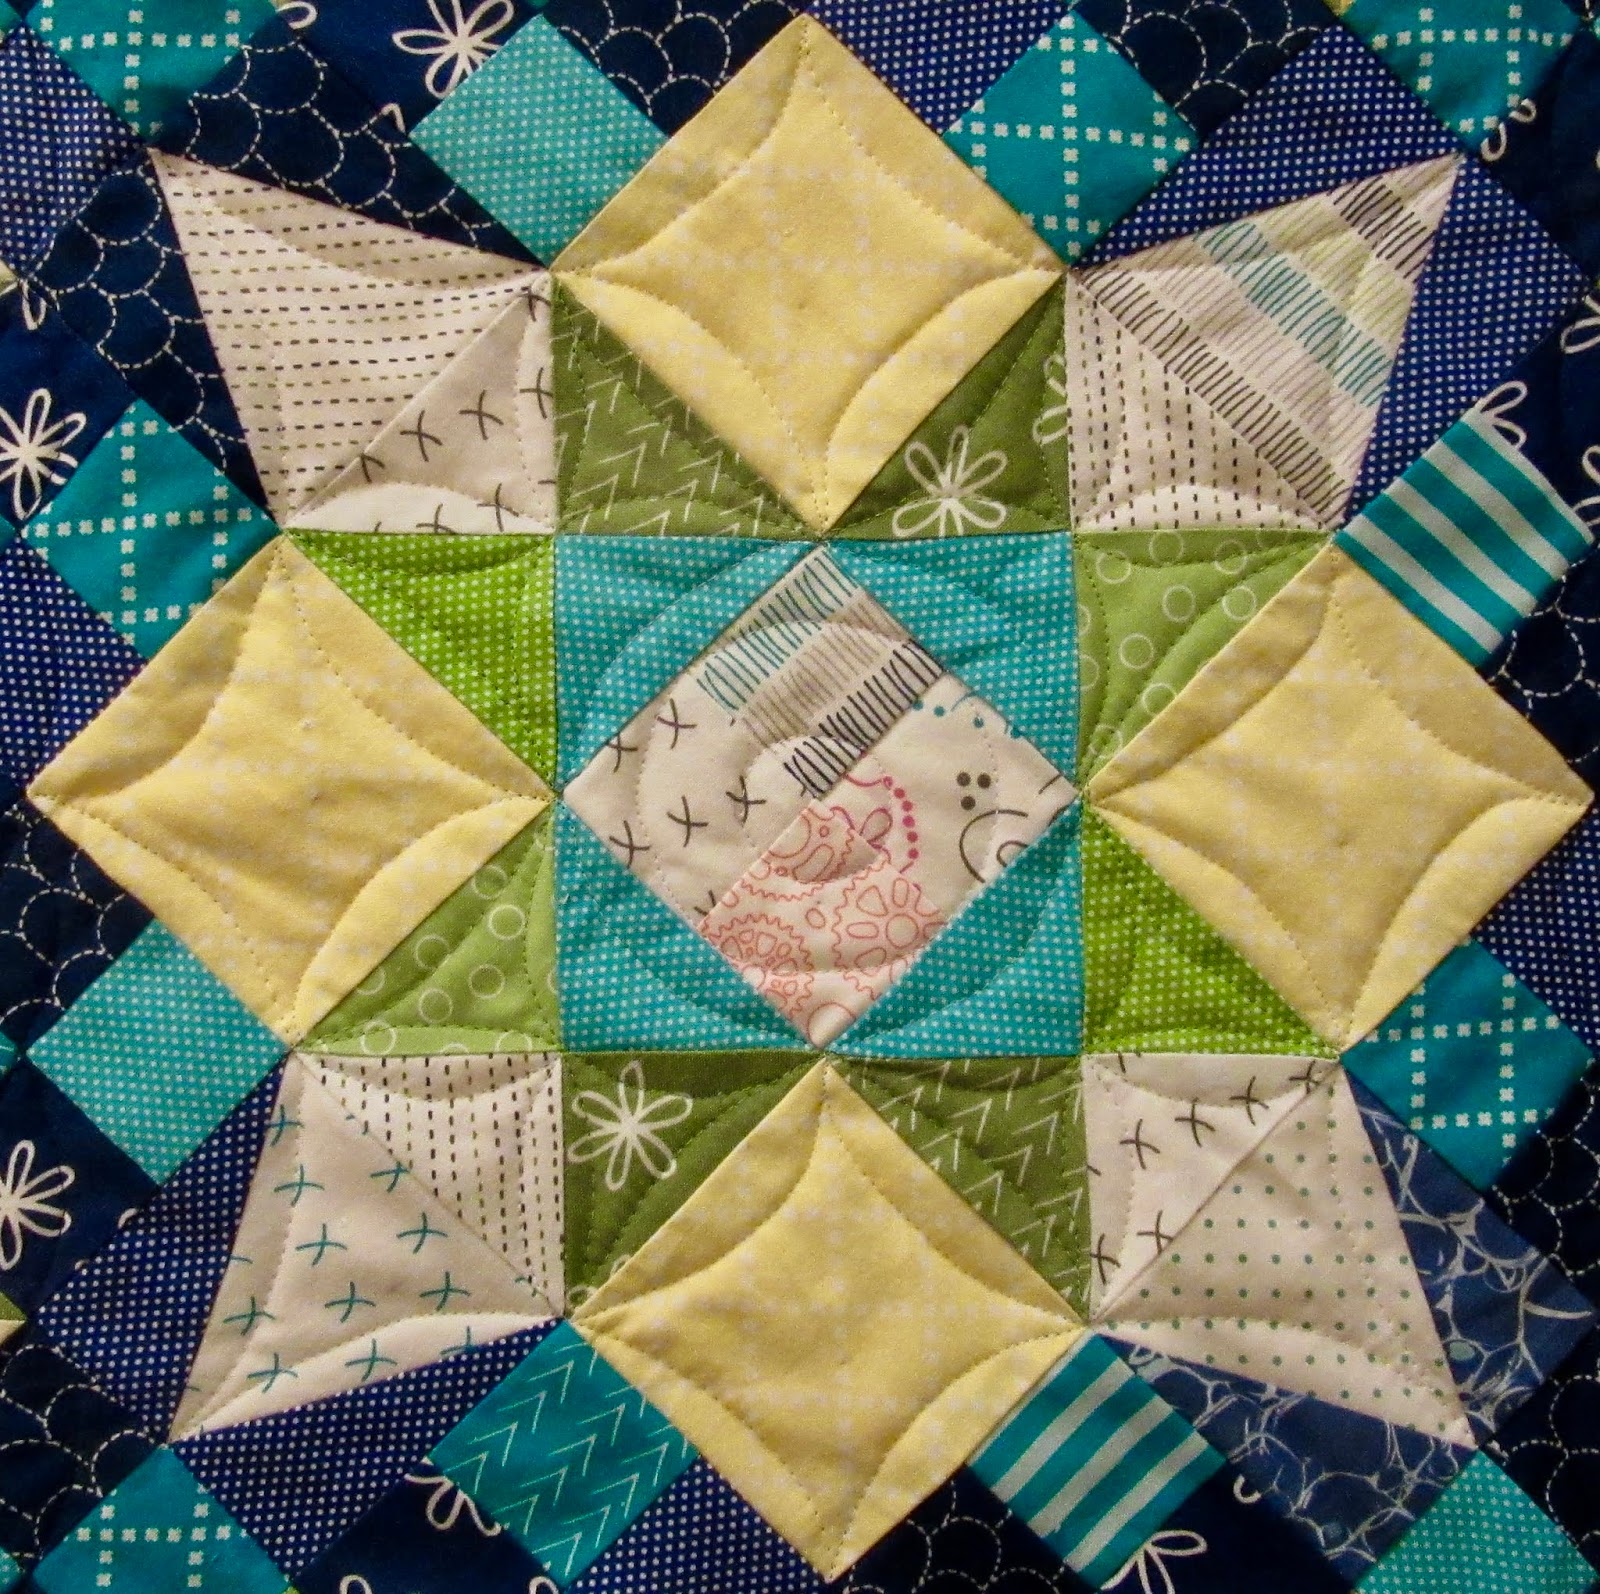
I decided to quilt two small circles in the middle of all the blocks. The smallest circle is traced around the base of a spool of Aurifil thread, and the larger circle is the size of a canning jar lid. As I come to each block, I trace the lines with an "air erase" marker and stitch it right away as the lines disappear fairly quickly!


This is how the quilting design is turning out - 2 circles in the centre, and arcing lines around the other block shapes are stitched in blue, green and yellow threads. I like changing thread colours frequently. I put the green thread in and stitched all the green blocks in each of the 9 alternate blocks. Then I put the blue thread in and quilted the 4 blue triangles in the 9 blocks. Yellow thread was last and was stitched in the yellow squares and the white diamond shapes. It's a lot of stopping and starting but that's okay with me. It's looking even better than I had hoped! 


Next I will be quilting the light spaces around the pink stars. I procrastinated that decision because the stars extend into the borders and I haven't decided on a border design yet. Feathers? Stippling? Grid?

I am hoping to have the machine quilting finished by Christmas so that I can enjoy hand stitching the binding during quiet family times over the holiday, and maybe even finish the quilt in 2018!

Tuesday, December 11, 2018

Step #3 of Good Fortune

The blocks this week for the Quiltville mystery were half chevrons and bonus triangles. 
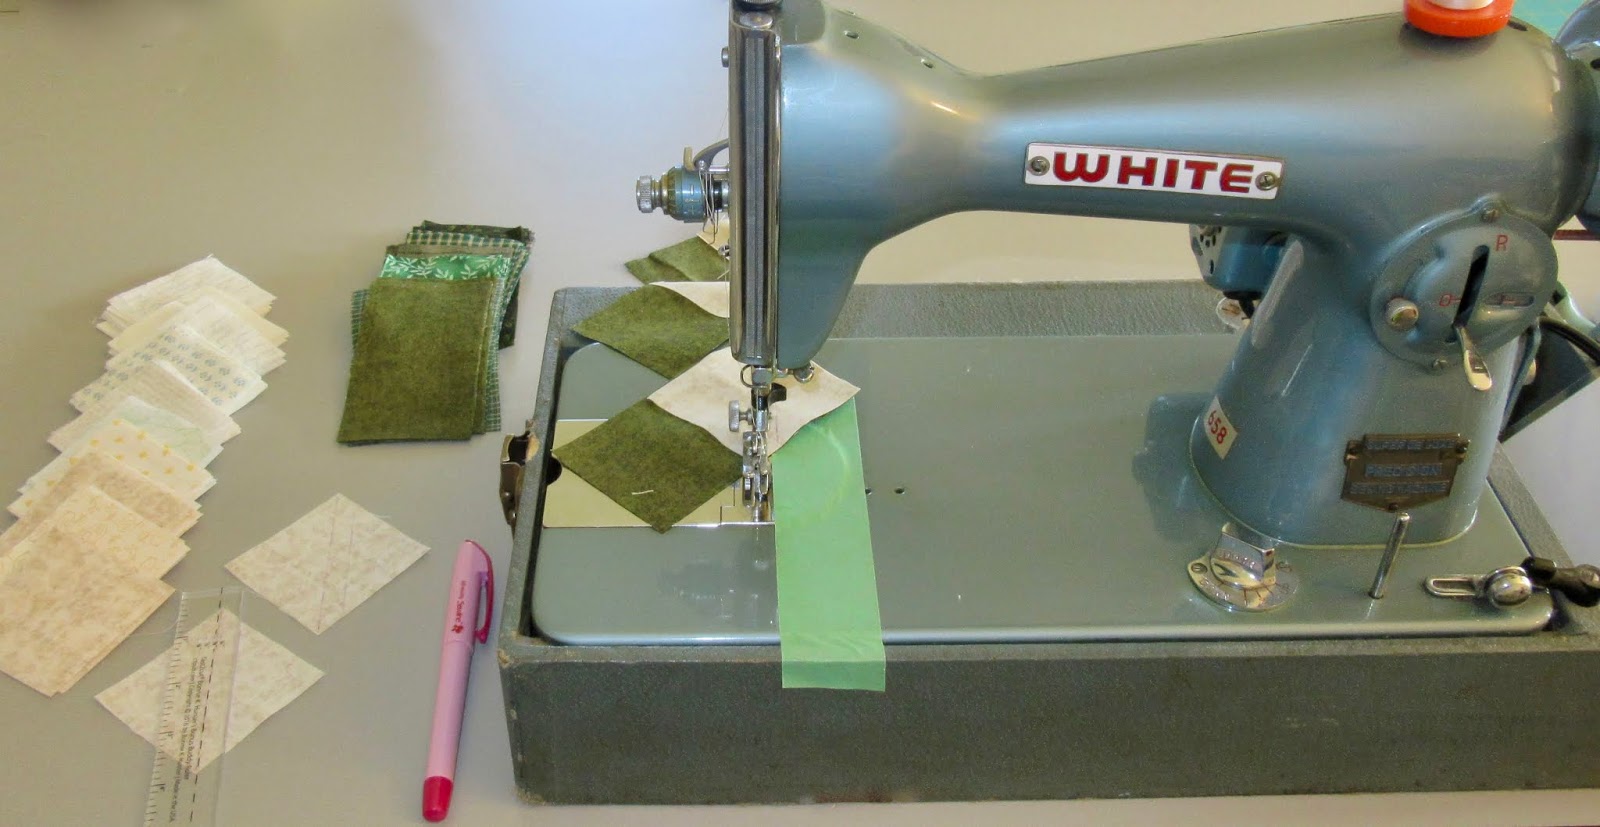
I am using my vintage sewing machine collection to sew my Good Fortune blocks and decided to use my blue White machine this week. It really needed some sewing time... it was so long since I had sewn on it that I couldn't remember how to thread this poor thing!
I watched the video again to jog my memory.


Luckily everything worked well and with a little sewing machine oil, it started to sound as sweet as it was stitching. Here's a tip for folks who collect vintage sewing machines - I have a little laminated card in each of my sewing machine cases to remind me how to wind the bobbin. With each machine being so unique, some wind the bobbin clockwise and some are counter clockwise. If you have a little visual reminder with each machine you never have to guess which is which.


I am sewing half the blocks for this mystery since time is tight for me this year but I still wanted to play along. I used Bonnie's Bonus Buddy ruler and followed her instructions exactly, and my units came out to the perfect size with only very tiny bits of sliver trimming required.


I like to draw a few lines, sew a few, press a little, trim a few, and repeat until the pile of pieces magically turns into finished blocks. 

Here are all my green blocks for step #3. I used a few of my favourite plaids in these blocks. 
I'll be sad when they are used up.
It's a sickness, I know! LOL


Here are all my mystery blocks in their storage bin. It's fun to think that this is a quilt in the making right here! I don't know what it will look like, but so far so good!
Hop over to the Quiltville linky party and see all the beautiful blocks being shown. 

Monday, December 10, 2018

Design Wall Monday - Arrowhead Blocks

Since finishing 2 quilt tops this month (Save the Bees and Secret Santa) my design wall was left empty for a moment. So I searched for my blue Anita's Arrowhead blocks (pattern here) and got to work on those. I have sewn the 9" blocks into 3 long panels that are 2 blocks wide by 8 long. 
As first this quilt was going to be 30 blocks, but I liked the project so much, I had to keep going. I've made over 50 blocks, and have decided I need to make just a few more! 
The plan of the moment is 7 blocks across and 9 blocks down for a total of 63. That will make a quilt that is 63" x 81". I have enjoyed working on this project from start to finish and am already thinking about how I will quilt it.
Hop over to Small Quilts to see more design wall posts.

Sunday, December 09, 2018

Slow Sunday Stitching


Welcome to Slow Stitching Sunday where we make time to slow down our lives, to breathe deeply, to pick up a needle and thread, and take some slow stitches. 
I traced another Gail Pan embroidery pattern to stitch this week and then just didn't feel like working on it. It's cold and wintery here and as cute as it is, I just didn't feel like stitching flowers and a birdhouse. All I wanted to do was get out my oldest UFO and do some hand quilting.


This quilt has been in storage since the weather turned too warm to be sitting under a large, heavy quilt. This quilt is about 22 years old and I still really like it!  I have enjoyed every slow stitch over the years and know that one of these days I'm going to be quilting the border, and then putting on the binding. 


But it won't be happening this month, and probably not even this year.
This month I'm going to enjoy sitting under a warm quilt and working on a project that has no deadline. I'm not making it for anyone, or to gift for a special occasion. It's just an old quilt with a long history, with lots of hours of stitching put into it, under the supervision of my granddog Max who loves to snuggle in a quilt. 
Such happy memories!

I've dug out my circular wooden hoop, quilting thread and needles, my favourite scissors and my quilting glasses. I'm ready to start the winter hand quilting season!

What are you hand stitching today? Do you find that your hand stitching preferences change with the seasons?
Link up your blog post below and share your slow progress with us.


    An InLinkz Link-up
   

Saturday, December 08, 2018

Rainbow Scrap Challenge December Year End Goals

I started participating in Angela's Rainbow Scrap Challenge at the beginning of 2011. You can read my first post here, and the hilarious thing about that post is... the quilt I was working on then... is still a UFO! 
I have enjoyed 8 years of being inspired by Angela to sew up my scraps and have been linking up regularly over the years. A few wonderful projects have been finished (my favourite finish this year was "Tied up in Knots") but dozens more have been started!
When playing with scraps I like to have several projects on the go so that there is a use for every size of scrap. Block construction is my favourite part of quilting, so I tend to make a lot of blocks and then start to lose enthusiasm for projects as they approach the layout phase. I usually try to be more focused on finishing some RSC projects in  November and December.


Mad City Mama
In December last year I finished Mad City Mama quilt top and the year before I finished Scrappy Spools quilt top.
My goal this December is: 
1) to quilt Mad City Mama and 
2) to assemble 2 Rainbow Challenge quilt tops - Circle of Squares and Carrie Nation. It's a totally ridiculous overly ambitious goal, but I really want to see some progress on these projects. 
Hop over to the RSC link up and see what other quilters are trying to finish up this week.

Thursday, December 06, 2018

No Longer a "Secret Santa"!

Webbed block
Secret Santa, a Temecula mystery quilt sewalong has come to an end, and since it's not a mystery anymore, I'm making a long blog post about it. This block pattern is called Burgoyne Surrounded. Here is one block in progress (measures 11 3/4" when sewn). The block is webbed, which means all the vertical seams are sewn together. You can see Bonnie Hunter's instructions on webbing a quilt top here. I used this same construction technique to make these blocks with 97 pieces! I never thought we'd be making such a complex design with so many pieces in this mystery. 
Mistake!
Even in spite of webbing each block and being extra careful, I still got one block wrong. Do you see it?!? I was very happy to discover the mistake while working on the sashing (instead of finding it after it was quilted!) It should be an easy fix at this stage.


I put the "pedal to the metal" to finish this quilt top and just love how it turned out! I especially like the bits of darker neutrals, the tiny fussy cut Santa faces, and how well the sashing fabric worked.

No WAIT!
Did you notice that I forgot to fix that @#$% mistake?!?!
  
via GIPHY
How is that even possible!?! I can't believe it!
Now it's a harder thing to fix, but still easier than after it's quilted. 
Will I remember to do the repair before I start quilting it?!? UGH!

I found six blogging friends that have posted their finished tops and 2 of them have even finished their quilts! Here they are:

*Check out Nancy's version over at Where's The Dude? The sashing and the border fabrics make it so fun!

*Jeanne at Spiral also has her quilt top done, and even made a little mini quilt from the leftovers!

*Cathy at Sane, Crazy, Crumby Quilting used gold background fabrics and her version just glows!

*You must see Carol's quilt at Artless Fabrications. She has lovely wintery photos to enjoy!

And I found two overachievers who have finished their entire quilt:


*Karen at Moose Bay Muses has the whole thing done... quilted, bound and even labelled!


*Joanne at Thread Head also has her quilt completely finished! Love the photo of it on the ice!

Congratulations to all of you! I know how much sewing went into this project and you guys are mystery quilt rock stars!
Have you seen other photos of the Secret Santa quilts posted in blog land? If so, email me so I can include a blog link in this list.
Now... where's my seam ripper?!?

**Just found Beth's version of Secret Santa posted here.

**And hop over to see Nann's lovely version with grey sashing at With Strings Attached.

**Look at Chantal's miniature version which uses 4 blocks....so adorable!

Tuesday, December 04, 2018

Quiltville Mystery Step #2

1953 Singer 301
I decided that a fun challenge would be to sew all my Good Fortune blocks on vintage machines. Step #1 was sewn on "Charity" a 1953 Featherweight, and Step #2 was sewn on "Lucy" my 1953 long bed Singer 301


In between sewing together my Save the Bees quilt top, I used the HST's for the Quiltville mystery as leaders/enders (as Bonnie taught us to do). It's like making progress on 2 quilts at once! 
Once the Bees quilt top was finished, I went into full triangle production mode. 


Here are my blocks from the first 2 steps, all counted and organized in their storage bin, waiting for a future step to sew them together in some kind of amazing design!

Hop over to Quiltville's link up to see the blocks that other folks are making for their mystery quilts.

Monday, December 03, 2018

Save the Bees!


Today is the day for the reveal of Save the Bees! You can read all about it and find out how to get your copy of the free pattern over at Jacquelynne Steeves' blog.
This has been such a fun project to work on. I have enjoyed every step from collecting the fabrics, sewing the blocks using various techniques, and putting the whole top together.


This gold honeycomb fabric is one of my favourites in this quilt. It's called "Bee Creative" by Deb Strain.  It is the fabric that I bought for the large border.


I took this picture while attaching the side honeycomb border because I noticed that during my sewing time I had somehow managed to nick my thumb and two fingers by the knuckles. 
Can you see that?!?
Quilting is a dangerous sport!!
LOL


The hardest part of sewing the inside of the quilt together  was picking which fabrics to use for the HST blocks. I put a dark bumblebee square in the centre instead of a QST block. And I put the QSTs in the centre of the borders (instead of the corners) because I only had a small piece of the white fabric left and due to the vertical lines on the fabric, it would have been challenging to piece together long border pieces. So I used smaller border strips with the HSTs in the middle.
I loved how it was coming together.


This next step involved working with fusible applique, which I haven't done for quite a while so it was a bit of a challenge for me. I felt happy tracing and cutting the letters as the activity felt similar to playing with paper dolls when I was a child.

Here are the steps:
trace the letters onto fusible web, peel off one side of the paper, stick letter to wrong side of fabric, cut out shape following your traced lines, peel off other side of paper (this step was not included on the fusible directions so took me a while to remember!) and lay on the border. Then iron letter to border using a hot iron for 10 seconds. 
Here is my ironing board work surface. I use a mylar non stick pressing sheet so that my iron doesn't get sticky from the fusible. You only get one chance to get each letter attached correctly, and if you screw it up, you have to start the border all over again! So I recommend working slowly and carefully in order to get each letter fused just right. 


And here is my finished quilt top which measures 40.5" x 56.5". I didn't add the last pieced border as the pattern shows, and went with a narrow yellow one instead. I can't wait to get quilting and finish the quilt for the wrap up post in January. I'll be adding some hand and machine quilting, stitching around the letters to make sure they stay put, and adding the antenna to the pieced bee block. Also, I may add another appliqued bee in the borders too. SO FUN!


This month the draw prize giveaway is generously donated by Sarah J. Maxwell. You can win either a fat quarter bundle of Studio 37 fabrics for a US winner or a pattern collection for an International winner (one prize per person per month).  You can enter the draw by leaving a comment below. The draw will made next Sunday Dec. 9th.
The draw is now closed and the winner has been notified.

And be sure to visit all the featured bloggers and enter their draws too!
Hop over Jacquelynne's facebook group Sew Quilty Friends to see other Save the Bees projects being made.
Linking up to Small Quilts and Let's Bee Social.

Sunday, December 02, 2018

Slow Sunday Stitching

Happy Sunday! 
It's a day for rest, renewal, and stitching! 
We hope you will join us as we slowly stitch creative projects using needles and threads.


Here is the embroidery block for Gail Pan's 2018 BOM that I was working on this week. The December patterns have been sent out to us and I'm way behind in keeping up with stitching 3 designs per month. But that's okay, because I will continue working on this next year. 
Gail will be releasing a new BOM in the new year with a Christmas theme, but I am going to exercise great restraint and finish the 2018 BOM first!! 
Really, I am! LOL
I have about half of the blocks stitched (see many of them here) including this little cute heart. 


I put stitches into this heart in 3 different cities, including while waiting for my son's return at Pearson International Airport, at the November quilt guild meeting, and while visiting a friend recovering from surgery. When I was stitching, I was reflecting on the loving relationships with the amazing people in my life who fill up my heart. The world is full of people who are angry, self serving, and destructive. But people who are loving, kind, and generous are hard to find, and I was feeling very grateful as I was stitching, remembering all the relationships that add something special to the design of my life.


And what about you? 
Are you enjoying the benefits of hand stitching today? Link up your blog post below and share your projects with us.


    An InLinkz Link-up
   

Saturday, December 01, 2018

Goals


I can't believe it's December 1st!

There hasn't been much leisure time this week, and this weekend every spare moment will be spent finishing my Save The Bees quilt top to post for the blog hop on Monday. Part 2 of Bonnie's Good Fortune mystery was posted yesterday and I have cut all my triangles. Here they are on top of the lid of the storage bin for sewn units. They are ready to feed through the sewing machine as leader-ender units while sewing the bees together.


My One Monthly Goal for December is to finish En Provence. In November I became obsessed with finishing one of my previous mysteries before the new mystery started. Obviously the finish didn't happen, but lots of progress has been made. I'm really enjoying the process of machine quilting this wonderful quilt. All of the 16 pink stars have been quilted and ideas for quilting the alternate block are coming together. It would be great to have another finish in 2018 but December is quite a busy month, so we'll see how it goes!

Tuesday, November 27, 2018

The Beginning of Good Fortune!

I really dragged (drug??) my feet on making my fabric selections for the Good Fortune mystery quilt. It was a perfect excuse to go fabric shopping, but I couldn't justify the expense when I have so much in the stash. But truthfully, it's just not as exciting to sew with old fabric sometimes. So I gave myself a stern talking to and reminded myself that I have loved all of Bonnie Hunter's mysteries and even old fabric can look terrific in her complex quilt designs.
Good Fortune fabrics
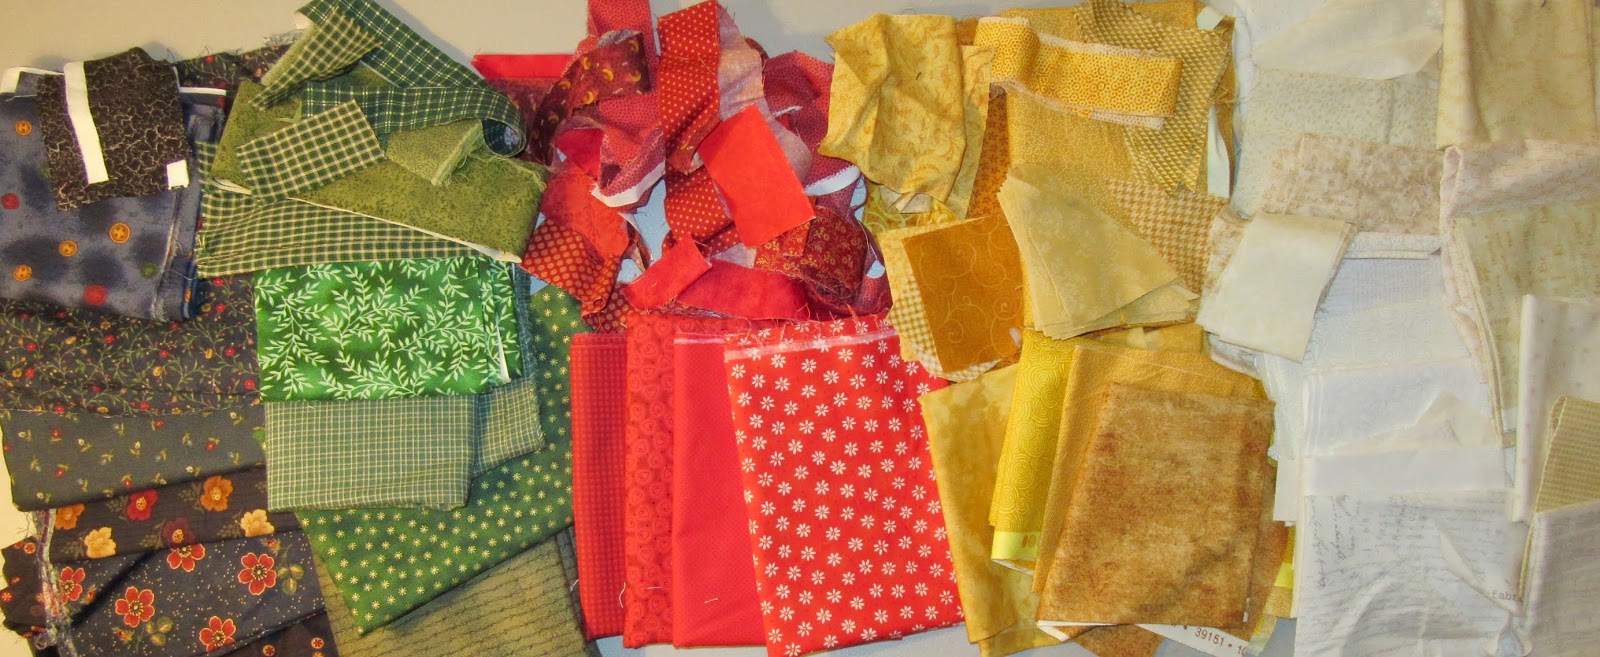
This is the fabric that I pulled from the stash. There are scraps, strips, partial hunks, and some fat quarters. The blues on the left are much prettier than they look on the computer screen. They are mostly "Kansas Troubles" scraps I bought a long time ago and haven't used up.
Bonnie is using blue, green, red, orange, and neutral. I am substituting gold for orange but don't think I have enough of the gold, so I will get to buy some new pieces to mix in after all!


My regular machine is set up for machine quilting En Provence, so I decided to make the blocks for this quilt on my treasured vintage sewing machines. It's important for these old gals to have regular workouts in order for them to stay in good working order. This project is a good opportunity to give all the machines some attention.
Step #1 was sewn on Charity my 1953 black Featherweight. It started off sewing a little bit loud, so I opened up the spool pin cover plate and added some oil to the 6 recommended locations on the top of the machine.


It sounded so much better after it had a good drink of oil and was running more smoothly. 
Step #1 involved a lot of easy strip sewing to make 4 patches. Since I had decided to try to keep up with the mystery posts by sewing half of the units, it was finished in no time. 


Here are my blocks pinned together in sets as Bonnie taught me. It's such a great tip to easily keep track of the sewing progress. 
Hop over to Quiltville to see the first link up for Good Fortune. 
And PS... I ordered one of Bonnie's newly released books for myself for Christmas!

Monday, November 26, 2018

Design Wall Monday

Am I crazy to have 2 mystery quilts on the go at this busy time of the year?!? 
Don't answer that!
First up is the Temecula Secret Santa mystery. The final step was posted on Friday and I am not even close to finishing my blocks. I am sewing these blocks on my 221K White Featherweight. Everything is more fun to sew on this lovely machine, and although she is 53 years old, she still sews like a dream! 


This has been such a great project to work on and I'm really happy with how my fabric choices are working out. It's a labour intensive undertaking since here are a lot of pieces in these blocks - 97 pieces to be exact! 
Here are my first 3 blocks on the design wall. I just need to sew 9 more of these and figure out the sashing. Sharon told me that this block pattern is called Burgoyne Surrounded, so I looked it up. Yes indeed, that is what we are making! 
Tomorrow I'll update the Quiltville mystery that I've also started working on.
Hop over to Small Quilts to see more design wall posting.

Sunday, November 25, 2018

Slow Sunday Stitching

Happy Thanksgiving to our American friends who are celebrating this week! Where I live here in Canada, this is just the worst time of year. Our Thanksgiving is in October, so there are no happy holidays in November, the beautiful colours of fall are gone, there is less natural light due to "daylight savings",  and the cold winter weather descends.

In the cycle of life, it's the time for hibernation, when we crawl into our caves, try to keep warm, and sleep until better weather returns.
Our modern day life does not allow that cycle, and we have to work just as much in November as in any other month of the year. But we can be sure to follow the healthy practice of having one day of rest each week.


Sunday is our day to rest and be thankful.
And stitch.
This is a terrible photo (taken late last night) of the embroidery block I'll be working on today. You can see that my pink Frixion pen died while I was tracing the design, and I had to finish  with a blue pen.


I look forward to relaxing, stitching and visiting the link ups below to see what you are hand stitching today.


Thursday, November 22, 2018

Quilting En Provence

The goal of finishing my En Provence quilt (before the new Quiltville mystery starts tomorrow) has been abandoned since there are still only 24 hours in the day! I guess you all saw that decision coming. The quilting does continue, but at a much less frantic pace with an end goal of finishing it in 2018!


Plan ahead!
It seems to me that people usually quilt in the same way they live, and complete other tasks like driving or shopping, etc. Some  folks always have a detailed plan based on a lot of thought, research and discussion. These types of quilters study their project, think about the options, practice their ideas, and create a design so they know how it's all going to turn out before they even start to quilt the project. That approach often makes tasks (including quilting) seem too overwhelming to me and has prevented me from even starting to quilt a project in the past.

Now, I just start quilting when I know what design I want to start with. I don't have to know the entire plan... just the beginning step. In doing this I recognize the risk of making errors as shown in the "You had one job" pictures above! I may run out of thread, do things upside down, turn straight lines into wavy lines, etc. 
I'm fine with that! After all the quilts I've made, I have learned that all of the mistakes I've made are mostly only noticed by me. 
Now I just quilt wherever I am inspired to do so...
I knew that I wanted to quilt curves along the navy blue diagonal chains, so I just started with that. 
My approach is to do some thinking and planning. I'm not totally impulsive, but I do not make the entire plan or get attached to any specific idea or outcomes. I know many people like to quilt straight lines either in the seam lines or beside them, but I'm at a stage now of preferring to stitch curved lines using my free motion quilting feet.

When the blue chains were finished, I was drawn to work on the pink stars. I changed to pink thread and quilted some curved lines on the pink stars. There are 16 stars and one is already done!
I'm not sure yet about the inside of the star and the outside neutral pieces. I am hoping to figure out how to create a continuous line design to quilt both areas with only 1 start and stop.
What do you prefer to do with your machine quilting? Are you a methodical "plan ahead" quilter, a "figure it out as you go" quilter, or a "quilt by cheque" quilter?

Wednesday, November 21, 2018

Mysterious Decisions

As my regular blog readers know, I never miss a Bonnie Hunter mystery. She has posted the fabric requirements for her new mystery called "Good Fortune" and the first step will be released on Black Friday.
I have been assessing what my current stash situation is, what fabrics would I like to use up, and considering what colour combinations I feel like working with for the next several months.

"Double Delight" border print on the right  

Here are the things I have learned from sewing the mysteries over the years:

*One of my favourite ways to start a mystery quilt is to pick a fabulous border print and pull the mystery colours from that print. I did that with Double Delight and loved the outcome (you can see it here). I was nervous about putting the yellowy green with the aqua, but the border print had them both and looked lovely together, so I trusted that combination.


"En Provence" fat quarters


I also like starting with a special collection of fabrics that I love, and then add in scraps from my stash. I did this with En Provence starting with the Good Neighbors fabric line and adding in scraps from my stash. That method also turned out great.


"Grand Illusion" yardage
*I learned from making Grand Illusion that I am a scrappy quilter and am not happy when working with chunks of yardage. It's the same quilt making process, but my enjoyment is directly connected to having a lot of variety in the fabrics I am using. The more scraps there are, the happier I am. So no more yardage mystery quilts for me!


"On Ringo Lake" blocks


*It usually takes me a year to get the entire top together and sometimes another year (or more!) to finish the quilt. I mostly enjoy the piecing stage, and I adore making complex blocks with tons of little pieces which Bonnie's patterns usually have.


*The mystery quilts I have actually finished are the ones that are smaller in size and easier to quilt on my sewing machine. 
Finished "Angel (Celtic) Solstice"
This photo is my version of Celtic Solstice and it's one of my favourite quilts that I made from start to finish.
If the project becomes too large, I think about sending it out for quilting. But then I think about that decision for many years and don't actually follow through, and it doesn't get finished!
This year's mystery pattern is 72" square and I'm predicting that I will be able to finish that size within a year. And am also predicting that I will want to make it into a rectangle instead of a square quilt.

Are you planning to join in the Good Fortune mystery that starts on Friday?!? Stay tuned to see my fabric decisions!