Monday, October 01, 2018

Save The Bees Block #3

Save the Bees - block #3


It's time for the reveal of the next block for the Save the Bees quilt.... drum roll please... 
it's bee hive hexies! 
Click here to see Jacquelynne's block and get the instructions. 


There are many ways to sew hexagon blocks, and for this block I used the hand piecing method. I enjoy all types of hand stitching and host a weekly linkup for hand stitchers called "Slow Sunday Stitching".  Because I enjoy it so much, I am always looking for opportunities to incorporate hand work.


Hand piecing the hexagons


These blocks were a delight to piece together! I chose a few golden honey fabrics for my hexies, cut freezer paper templates and ironed them to the back of the fabrics. Then I traced around the freezer paper with an air erasable pen to get my stitching line. 


Then I removed the templates, and with right sides of the hexagons together, I stitched on the drawn lines using a running stitch. It's such a relaxing way to sew the seams together without sewing any Y seams. This photo shows the first 4 hexagons joined together. I finger press the seams as I go along and don't use the iron until they are all sewn together. There are so many bias/stretchy edges that I don't want to risk wonkiness developing at the ironing board!


Appliqueing the hexagons to the base


When all the pieces were connected, I folded under a  1/4" edge all the way around, and thread basted with large stitches. This gives a nice crisp edge to stitch, although you could also use needleturn or other applique methods.
Then I appliqued the whole section of 8 hexagons to the base fabric.


Cutting away fabric from the back of the block

The last step was to remove the excess fabric behind the hexagons. This makes it easier to quilt with one less layer of fabric. But safety is crucial here. My advice is to go slowly and make small cuts, being very careful you only cut the background fabric and not your hexagons! I make a tiny snip and place my finger as a barrier between the backing and the hexagons. When the cut is larger I put my whole hand in there to prevent any accidental cuts.


If you press the seams carefully where the hexagons are joined it will form another tiny hexagon. Here is my block from the back. Those tiny hexie shapes made me smile :)

I am excited to visit the other featured bloggers to see how they made their block this month. It's so fun to see the variety of techniques and fabrics being used in each of the  projects. Here's the line up of blogs to visit: 
Remember to enter the draws being held at each blog when you visit. The terrific prize this month is the Valori Wells collection of Aurifil thread. Everyone knows I adore Aurifil thread and just look at those vibrant colours! If you enter at each blog, you have 8 chances to win one of the thread boxes (one prize per winner). The draw is open to quilters in any country, so be sure to enter before midnight of October 7.
To win my draw for the thread box scroll down to the end of this post and click on "comments". Draw is now closed
Leave me a comment telling me how you feel about hexies. Do you make and collect them? Are you addicted to hexies? Are you trying to resist their charm? Have you made hexie quilts? Do you dislike hexagons? I do like them, but not as much as my friend Debby does - click here to see some of her collection. 

To see even more photos of Save the Bees blocks being made, hop over to Jacquelynne's Facebook Group. 
⬡⬡⬡ Happy Hexieing! ⬡⬡⬡
Save The Bees - my  first 3 blocks on the design wall
Linking up to Design Wall Monday.

Sunday, September 30, 2018

Slow Sunday Stitching

Welcome to the weekly hand stitching party! Pull up a comfy chair, make yourself a cup of your favourite tea, and join us while we add a few stitches to our multiyear projects!


I put the blocks for my Life Is Beautiful project on the design wall this week to assess where I was with this and how far I had to go.

Here are the project stats: 

*31 embroidered patterns (there should be 32 but 1 appears to be MIA!)

*29 embroidered blocks have been appliqued to a background 4 patch block 

*19 of the embroidered blocks have been quilted

*13 of the alternate blocks (no embroidery) have been pieced and quilted

*14 alternate blocks have the 4 patches sewn and the circle appliqued, and are ready for quilting

So much work has been completed and yet, after 4 years of work, there is still so much to do!
Oh well, what can you do?!?
Just keep swimming stitching (video here). 

I maintain my enthusiasm for long term projects like this by taking occasional breaks from it. I pick up other hand stitching projects, usually embroidery or other small projects. The key to working on these long term projects is to never let it get completely "out of sight" so it doesn't drift toward "out of mind"! 
Today I will put in a few more stitches and focus on this thought: 
Everything is accomplished one slow stitch/step at a time.


Tomorrow I will be posting another little hand stitched project - a hexie block for my Save the Bees project. Hope you can drop by my blog to see it and enter your name in the giveaway draw!


What are you slow stitching today? Are you feeling a tad bit discouraged about your progress? Just keep on stitching... and link up your blog post to share your project with us.


    An InLinkz Link-up
   

Saturday, September 29, 2018

Scrappy Saturday - Maverick Stars

Over at the Rainbow Scrap Challenge it's the last week for working with navy and dark neutral scraps. 
To finish up the blue month I made a few more Maverick Star (pattern here) blocks.  These have dark backgrounds to balance out the layout a little more. They were made in leader-ender style while working on other projects this week. I am especially liking the plaid background stars and feeling the draw to work with more plaids. Maybe this is an autumn thing? Perhaps with the arrival of lower temperatures the desire increases for cosiness and comfort associated with plaids? I haven't seen any scientific studies to prove that, but it feels true! 


This is the growing pile of Maverick stars. Click here to see the entire star block collection on the design wall. 

Hop over to the RSC weekly link up and see how the quilters are finishing up the blue month.

Friday, September 28, 2018

Getting Organized - True Confessions

You may have noticed that I juggle many quilting projects all the time. It's hard for me to say "no" to more fun! That is true in all areas of my life.
One of my "areas of personal growth", previously known as "flaws", is the tendency to overwhelm myself. I can be very organized, and have adequate skills, but I fill my life with too many activities (the "why" is a whole other discussion!) As a result I sometimes feel overwhelmed and run chronically late.
I am really trying to say "NO" more often to invitations that really do not make my heart sing (and to do more actual singing). I am proud of all the projects I wanted to start this year ("squirrel") but was able to resist. I tell myself "if you feel sad and still want to make it next year, you can". I have found over time that usually the desire dissipates and another project becomes more appealing.

One of the things I really want to do is to clean up my fabric stash and be more organized. I love scrap quilting, but am not satisfied with the different organizational systems I have tried over the years. There are many bits of fabric around that look like this. 

And my cutting table is a mess because I would rather sew than clean. If I have a half hour in my day, I want to sit at the sewing machine, not tidy, fold, organize, vacuum, etc. I wish it were otherwise, but that's the way it is. I took a picture of my cutting table, but after looking at it I decided it's just too embarrassing to post.
Eventually my mess feels like it's too much, even for me, and everything has to be cleared. So I'm putting it on my calendar for this weekend and am committed to spending time doing nothing else. It's not fun and I'll be a crabby quilter until it's done I can sew again. 
And my reward for doing all that work (besides enjoying being more organized) will be to attend my local quilt guild's show this weekend!


A Gathering of Quilts is being held in Aberfoyle this weekend. You are welcome to come and visit, be inspired by over 300 amazing quilts, win one of the 150+ mini quilts being raffled, vote for your favourite quilt (for a CQA award) and buy some new fabric treats from our favourite vendors. Click here for the show facebook page. It's a lovely drive in the Aberfoyle area especially in the fall, it's a great venue, and it promises to be a fabulous event. 
Hope to see you there... and if you hear me being totally inspired and wanting to start a new project, please remind me of the above!

Thursday, September 27, 2018

September Aurifil DOM


The designer of the month for Aurifil's September block is Sharon Holland and her block is a fun version of a red/pink pieced apple - click here for the pattern. Pat Sloan made her version of a white apple which inspired me to make a two colour apple from light and aqua fabrics.

The cutting and piecing of the 42 pieces was complex, which is exactly the kind of quilt block I enjoy sewing. I was totally in my happy place! But because it was complex, I couldn't even listen to music while working on it... silence was required for concentration, and that hardly ever happens in my quilt studio. 


My 2018 Aurifil DOM blocks


Part of why it was complicated was because I had two sets of apple pieces (half white and half aqua), and two sets of background pieces (half light aqua and half black). I made it into a harder challenge than it needed to be. 
That's okay because it was FUN! 
And it gave my brain a welcomed relief from all the other regular worries of life while I was immersed in this construction project. That is just one of the many things I love about quilting!

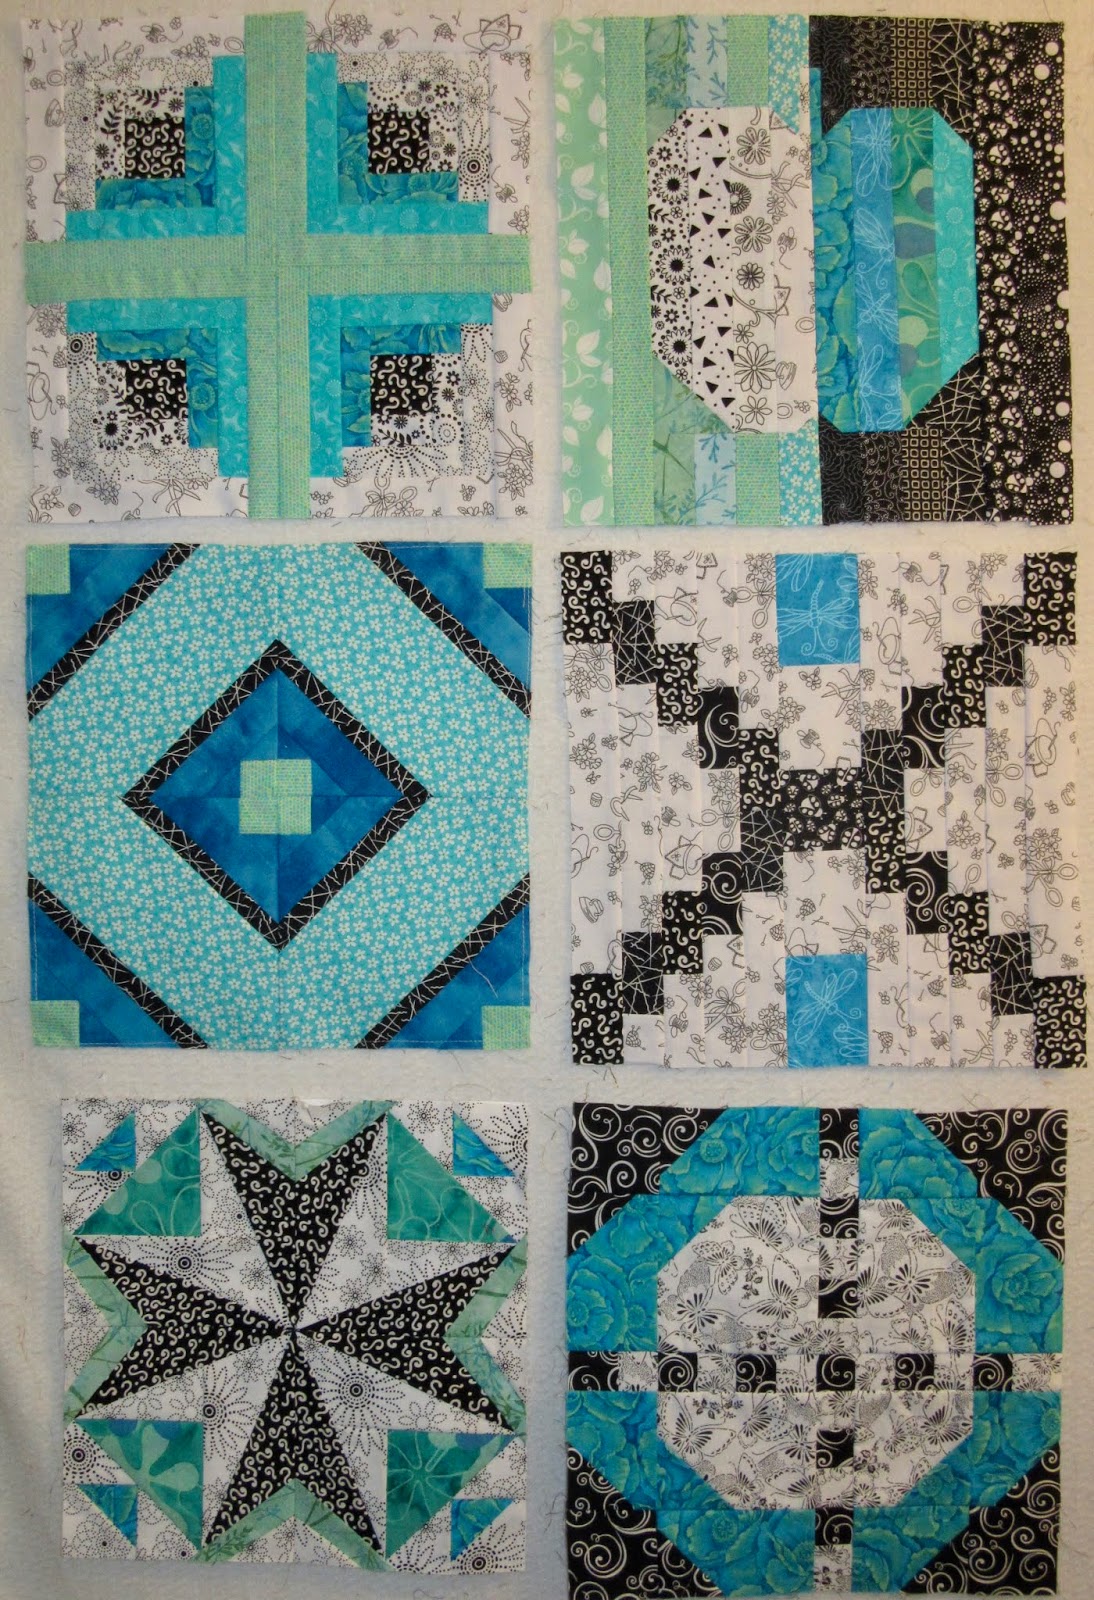
Here are my Aurifil blocks on the design wall. The paper pieced block on the bottom left is too small... it will get some kind of border to make it larger when it's time to build the quilt.


I love 💙 love 💙 love 💙 love it even more when, after all that cutting and sewing and pressing, the block turns out to be the right size!

To see more September Aurifil blocks click here to go to the linkup.

Wednesday, September 26, 2018

UFO of the month

The big reveal of Kevin's mystery project called Sapphire Stars happened on October 1st last year. My version (that I am calling "Emerald Stars") got stalled at the border stage, which is typical for me when sewing a mystery. Once the mystery is revealed, and the fun sewing is done, it's harder for me to push to the end to finish the "boring borders"!
Well these borders were not boring at all, but they did involve a lot of sewing and measuring. Look how much bigger my borders were than my quilt top. I'm pretty sure that wasn't supposed to happen! LOL 
Oh well... just chop off the extra and call it "done"!
And it is done!
Almost 1 year to the day of the end of the mystery, it's finally a finished quilt top. Thank you again to Kevin for the fun mystery experience and for designing such a dynamic quilt pattern to share with us!


The clothesline photo has the sun shining on the back of the quilt which makes it look "see through", which it's not in real life. The sun does give the quilt a pretty, luminous quality though!

This is the largest quilt top I have made in a while and I think it's the only quilt I've ever made that touched the ground for the clothesline photo! It is the perfect size for my son's bed but it will be a real challenge for me to quilt on my domestic machine. 

I'm getting ready to piece a backing using a chunk of wide backing fabric that isn't quite big enough, and some of the blocks leftover from making the quilt top.


I'm very happy to share that I met my "One Monthly Goal"! 
Hop over to the September finishes link up to see the other accomplishments that happened this month.

Monday, September 24, 2018

Design Wall Monday

Julie is hosting a log cabin loonie sew-along. I have started two projects - one project uses Julie's pattern with 1" strips precut to accurate size (click here to see my first 8 log cabin blocks) and one project uses 1.25" strips using a "cut as you go" technique. 
Here are my 1.25" log cabin blocks on the design wall. I'm using a more loosey goosey kind of approach to building these log cabin blocks. Add a scrap, finger press, chop off the end and keep going around. The blocks don't all end up the exact same size with this technique, but I'm okay with that. 
I wasn't really paying attention when I started to build the blocks but realize now that some have a dark centre/light last round, and some have a light centre/dark last round. This makes them go together in a pleasing way, so I'm going to be more purposeful about getting an even balance of the light or dark centres.
I'm loving the fall colours to work on at this time of year, so I'm cutting more strips to make more blocks.
Linking up to Design Wall Monday at Small Quilts and the Log Cabin Loonies over at Julie's.
Happy Monday!


AND just because this made me smile... I remember going to work on a Monday morning to work at a desk that actually looked like this! 

Sunday, September 23, 2018

Slow Sunday Stitching

Fall has arrived on the calendar and the weather here has finally taken a turn for the better. It has been a long hot summer here, and since fall is my favourite season, the drop in daily temperatures is a welcomed relief. We can throw open the windows, enjoy the fresh cooler air, and spend more time outside.
Yippee...quilting weather is on it's way! It's almost cool enough to get out my big hand quilting project... soon.

Gail Pan "I Stitch" blocks
For now I am working on my "I Stitch" embroidery blocks by Gail Pan. I posted my most recently finished block as my blog header photo (scroll up). And here are the blocks I have stitched so far. I am using up small pieces of leftover muslin as a base for these little embroideries which measure about 3" x 4". These blocks will be either appliqued or pieced to fabric some day. I haven't decided what I want to do with them. That's how I do prefer to do things... just start stitching (or driving, or shopping, or chatting, etc) and see what evolves. The best laid plans never work out as you think they will, so developing complex plans and expectations is just a waste of time. It's called the "go with the (creative) flow" approach to life!
Gail has sent out 24 blocks to the project subscribers so far (3 per month) so I am a bit behind. That's okay... I'm loving every slow stitch!  I have traced out a little owl design to work on today.


What are you hand stitching? Is it comfortable weather where you live and are you able to stitch outside? Link up your blog post below and share your hand stitching project with the slow stitching community. We love to see what you are creating!


    An InLinkz Link-up


Saturday, September 22, 2018

Scrappy Saturday

In case you were wondering why I am not showing my September Squared Away blocks, this is why...
at the beginning of this RSC BOM  project, the very first block was supposed to be light blue. And for some unknown reason, I made my first blocks dark blue. So then September rolled around and these blocks are supposed to be dark blue, but I had already made dark blue blocks in the first month. So what to do?
There is one month left in the project so I decided to wait to see what the remaining colour will be, and then determine what colour to make my September blocks.... maybe light blue, dark green, brown, or grey.


And in the meantime, I made a dark blue Circle of Squares block while sewing at my friend Gayle's house. 

I took a "glamour shot" of the block in her beautiful  backyard. Do you see the cute little knitted monster (sitting right above my block) that Gayle was making while I was sewing? 
So cute!

It was very relaxing to sew beside the fountain and hear the calming water sounds. It was almost like being at a spa!


Here are all the blocks on the design wall. The new dark blue block is second from the left on the top row. I think I'll make 4 more blocks for this project. I'm trying not to see these blocks as ferris wheels because that makes my creative brain want to add pieces to the design to make the blocks look like wheels. I hope that thought goes away!

Anyway, that's where things are at with my RSC projects this week. To see what others are working on, hop over to the weekly link up.

Friday, September 21, 2018

Mystery Top

Here is my finished Scrapdash mystery top.
It has a 3D centre which should have used the same fabric as the light background, but I prefer it with the gardening fabric in the centre. I'm planning to quilt it using the ideas on the mystery instructions for rolling the 3D edges.
I'm so intrigued that I can't wait to get this pin basted so I can start quilting! 
Anyone else sew this mystery project?!? It's a nice table topper or wallhanging sized quilt.

Wednesday, September 19, 2018

Mid month UFO Report

My UFO project for September is Emerald Stars. I have been working on sewing the border pieces together and have made great progress. Here are the four borders ready to attach to the quilt top! 
As with all scrap projects, it makes me happy to look at the pieces and remember what the fabrics were originally for. For example the dark reds are mostly leftover from BeAttitudes, and Angel Solstice.
Although I wasn't sure about these colours together at the beginning, it has really grown on me.  My favourites are the dark green plaids (mostly leftovers from Always Home), but I've even come to like the bright green fabrics (leftovers from En Provence and Easy Street) and think they add a nice sparkle to the borders. 
It's very cool how the top and bottom borders (on the left) are different from, but similar to the side borders (on the right). I now have about 10 days before the end of the month to get these borders, plus an inner and outer dark border, attached to the quilt top in order to reach my UFO goal.
Linking up with Lorna and friends over at Let's Bee Social, and Cynthia and fellow scrappers over at Oh Scrap!

Monday, September 17, 2018

Mystery Quilt on the Design Wall


I have been working on the "Pumpkin Spice Latte" mystery quilt that started last Wednesday over at the Scrapdash blog. I didn't intend to start a new project, it just happened. I am helpless in the face of a new mystery being offered... resistance is futile. 

These are the pieces needed for one block. If you are sewing along with the mystery and don't want to know how it's going to turn out, don't read any further!


This is what the rows look like.  The pattern includes instructions for making 3D flying geese blocks, which are a little tricky but fun.

Concentration is definitely required, and the seam ripper is a necessary tool. It's so easy to get a triangle going the wrong way. The directions are great and I am following them to a 'T', including all the pressing suggestions. 


This is my first block.
Check and recheck.
I think it's all going the right way and all the pieces are where they should be.

Okay ... make 3 more the exact same.
Sew.
Unsew. 
Resew.
Press.
Repeat.


Ta da... here they are! 
All four blocks are on the design wall. There are still pieces that were cut at the beginning that have not been used yet, so this is not the final design.  It might look something similar to this, but it might not.
The last step has been posted, but I haven't looked yet, because I do love the anticipation of a good surprise! So, I will enjoy the anticipation until I have time to sew again on Wednesday. 
Are you sewing along with this mystery? Printing it out for your "some day" pattern collection?
Linking up to Design Wall Monday at Small Quilts.

Sunday, September 16, 2018

Slow Sunday Stitching

Welcome to the weekly hand stitching party!
The exciting news this week is that the winning name has been drawn for the photo challenge we had at the beginning of the month. The challenge was to post a photo of the view you enjoy when you are slow stitching.

The winner of the draw is...
drum roll please... 
blog entry #33 which is Kathy over at Kathy's Quilting Blog showing her view of the chicken yard and "How to be a Latin Lover"! Don't ask!! LOL
Congrats to Kathy! (so fun that here are so many quilters named Kathy, Kathleen, Kathryn, etc... it's a popular name!) I have 3 fat quarters to pop in the mail to you. Thanks to everyone for playing along... look for the next photo challenge in October!


I want to show you where I did some hand stitching last weekend. Isn't this a great view? Two of my friends were in those kayaks while I was stitching and this is the great view I was soaking up as I watched them paddle away. The weather could not have been better, and we had such a great time! I didn't get around to visit the blogs posted last weekend, but I hope to make up for it today.  I'll be visiting the link ups while I drink my morning tea and see what you have been stitching.


I have had a couple of questions lately about embroidery needles. This is my favourite needle at the moment. I like the size of the eye for using 2 or 3 strands of floss, and it's a comfortable needle length for me. Can you see the needle in the fabric beside the drawing of the needle?
This is the new pattern by Gail Pan that I plan to finish embroidering today.
So what are you hand stitching? Link up your blog post and share your progress with us. We love to see what you're working on!


    An InLinkz Link-up
   

Saturday, September 15, 2018

Log Cabin Loonie Blocks


Did you know that today is "Sew a Jelly Roll Day"?
I had hoped to get together with some friends to sew today, but it's such a busy time of year for me that I couldn't get it organized. All my spare time has been filled with fall fairs (entering, visiting and judging). And besides... I'm not really a jelly roll kind of quilter. I don't actually own one. But I thought I could cut a bunch of the stash into strips and pretend that I had one to make a quilt out of!  Instead I hope to spend a few minutes today sewing the next step of the Scrapdash mystery.

I enjoyed cutting up some blue scraps this week and sewing the pieces for 4 mini log cabin blocks. You can see the cutting instructions on Julie's blog here.

These are my first blocks for my RSC project - orange from last month and blue for this month. With the 4 log cabin blocks sewn together the block measures 8.5" unfinished. Linking up to the Rainbow Scrap Challenge and the Log Cabin Loonies.

Friday, September 14, 2018

Unusual block size


Block #13 of the Blockheads II project is a patchwork flower designed by Coriander Quilts. The finished size of the block is 6" by 18" which is a bit unusual for regular quilting patterns. There were over 40 pieces to cut out, and I made a couple of changes as I went along. 
This is the flower head which measures 6" finished. I added a little connecting corner on the blue corner blocks to round out the flower petals a little more.

Blockheads II Block #13


Here is my finished flower. I thought the bottom of the block looked a bit bare, so on my block I added another leaf to the stem on the left (the original pattern has 2 leaves).

And I gave myself a challenge by making the background from 2 slightly different directional fabrics. At times I enjoyed the challenge, and at other times (involving the seam ripper) I was not as happy with that great idea!

The photo doesn't show what the block really looks like... I think it looks much nicer (not as busy) in real life. From a distance, the background fabric makes it look like it is raining on the flower.

Sewing this block was a fun brain snack for me this week. It reminded me that sometimes I really enjoy the math and the precision construction aspects of quilt making. 

Thursday, September 13, 2018

New Mini Mystery


Uh oh... I'm having a flare up of startitis!

Because I don't have much to work on here (*snort*) I thought I'd start the new project over at Scrapdash. It combines two of my favourite things - minis AND mysteries! It's called "Pumpkin Spice Latte", so it tastes good too! The quilt will finish at 25", has just over 100 pieces to cut, and the 4 steps are posted over 4 days. 
Because it's a small project, you really don't need much fabric. I just pulled these pieces out of the fabric I received from my friend Helen's stash.


One of the keys to making mystery quilts is having enough contrast in the fabric selection. If there is not enough contrast, the intended design won't be as visible.

I did a contrast check by taking a photo of my fabrics and changing it to black and white. This removes the colour contrast and you can see the value. There's not much difference between the green and blue fabrics, but there was enough to make me happy enough to use them. You can see in the above photo that my pieces are cut and I'm ready for step #2 which will be posted today!