
My favourite episode was week 7 when the artists made hand sewn miniature pillows. This series validated my love of all tiny things, and the importance of pursuing your artist dreams. This show is casting now for the second season if you know anyone who would be interested (apply online here).
I will never use the true miniature scale of 1:12 that is used on the show. That means that a 12" block would become a 1" block which is too small for my enjoyment.
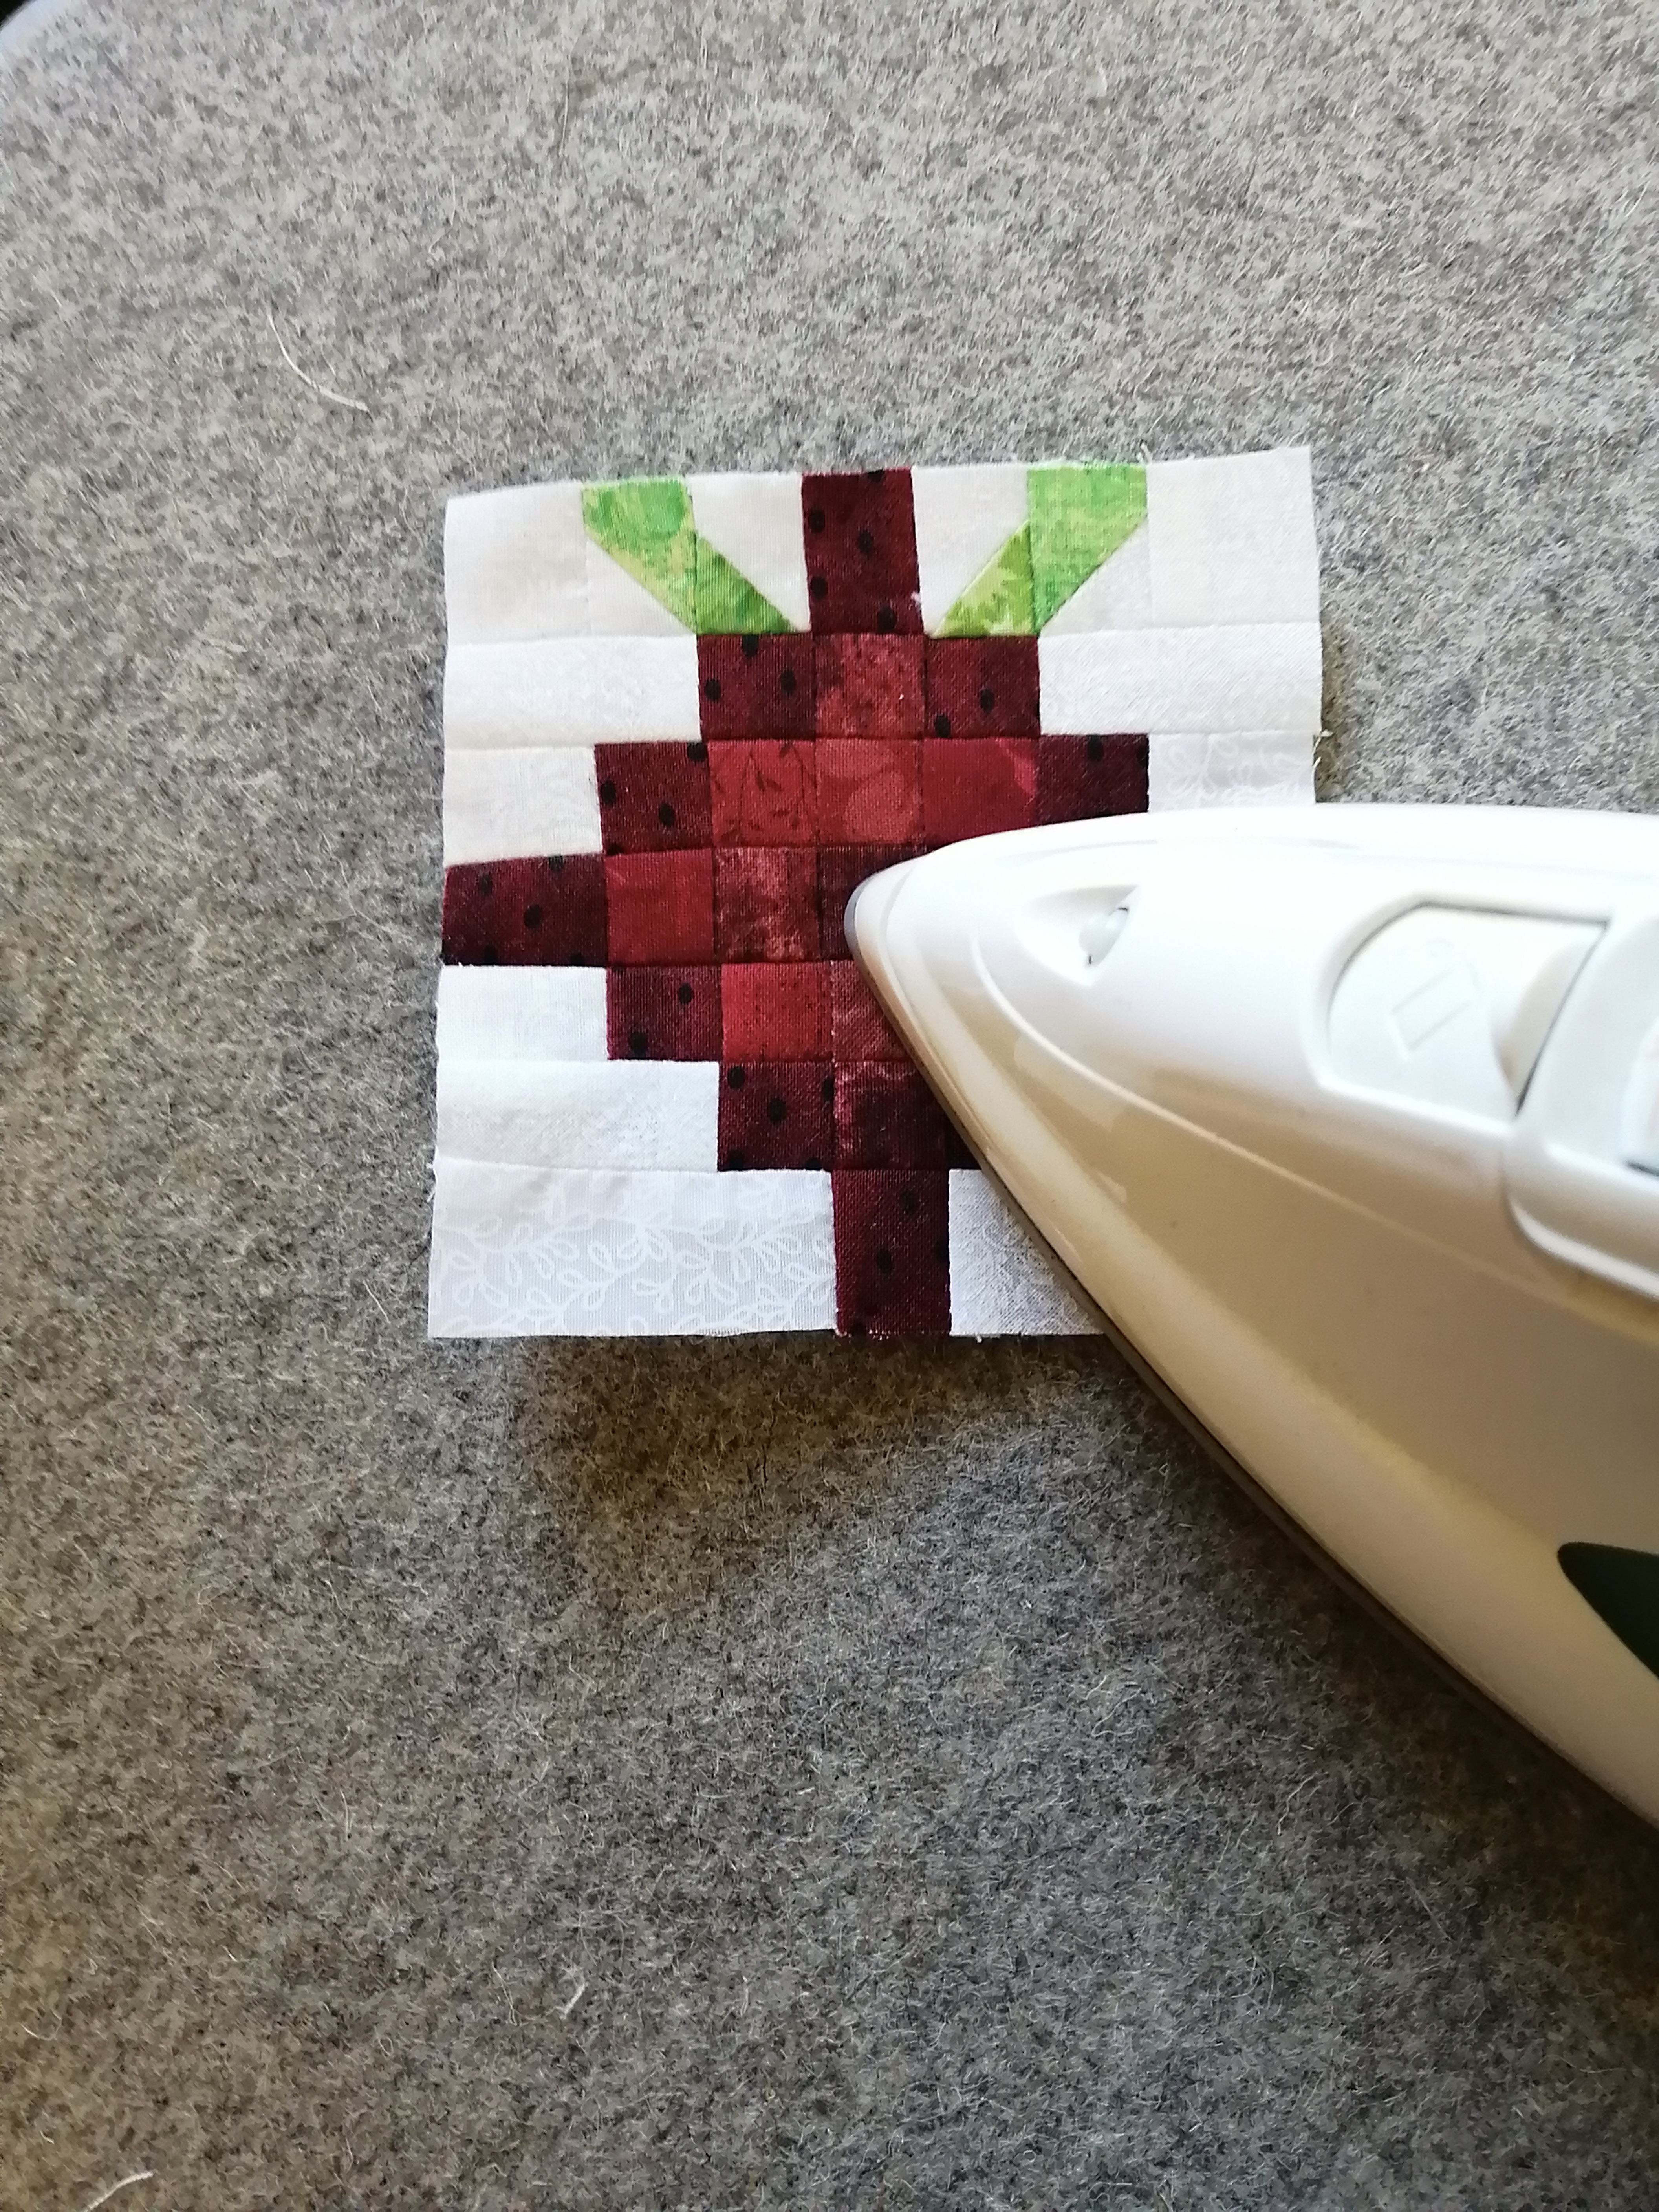
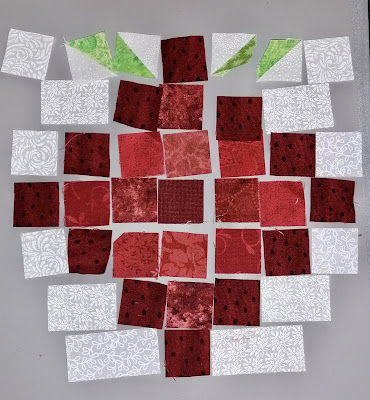 But I really enjoy making smaller projects, and this month I made a 4" berry with 49 pieces (pattern by Jackie MacDonald).

I love cutting the little pieces, and in this project the blocks are 1".
Here are some tips for sewing miniature quilts:
1) Be precise in cutting and sewing. When you need a 1" square it must be exactly 1". When you sew the seam allowance is must be exactly 1/4".
2) Use a 50 weight thread for minimal bulk in the seams.


5) Carefully check your seam allowance and fix every mistake as you go along. An incorrectly folded seam allowance is not a problem with regular blocks, but it makes a big difference with small blocks in terms of how flat the block will be. See how on the first seam the corner is folded back and the seam is pressed the wrong way?


10) For mini quilts I use a single binding strip cut 1 3/8", machine stitched to the front and rolled over to the back, folded over and hand stitched.

And drum roll please... here is the finished mini berry! So sweet!
Finished size: 4" x 4"
If you would like to make your own miniature berry, click here for the pattern in 2 sizes.

Hop over to Constant Quilter to see more mini quilts made in June.
11 comments:
That is SO cute!
Kathy. Cute strawberry block. Thank you for the tips on making miniature blocks. I really enjoy reading your posts. Have a great day.
Thank you for the very useful tips. I will try them out. I love miniatures but do get frustrated with my sewing skills.
That’s a fun little mini. Thanks for the tips. I can see I do a lot of things that would cause it to be a bit out of shape.
Kathy, what a great post! I, too, love making mini quilts, and appreciate your tips. Your strawberry is adorable!
Wow! This is mind boggling and so cute. 49 pieces! Really mini mini and yes so sweet!
Your mini is wonderful and I especially like the French knot embellishments. Thanks for the detailed description of the process.
Wow, wow, wow! Absolutely beautiful work.
Super cute! Thank you for sharing these helpful tips! :)
What a pretty little berry. I enjoyed your mini tutorial.
I also don't do the true miniature scale, but enjoy the challenge of shrinking things down.
We do so many of the same things in our mini construction, but I do tend to cut a narrower binding. Just my preference.
I like the way you used the French Knot "seeds" instead of quilting. Very clever.
Wow that's awesome.. I enjoyed your tutorial too... I've made a postage stamp quilt with 1" squares.
Post a Comment