Sunday, November 26, 2006

Christmas Decorations

Don't you just love getting your decorations out of storage? This weekend we had a family get-together so we decided to help Mom and Dad decorate their Christmas tree. This is the angel that has overseen every family Christmas for the last 47 years! Everyone would tell you that she is one of my Dad's favorite possessions! No one is allowed to touch the angel, and she is lovingly placed at the top of the tree every year by Mom or Dad. The grandchildren helped place all the other ornaments, and we found some of the ornaments I have made in previous years. In fact, there was an old felt drum that I made in grade 6 ("throw that ridiculous thing in the garbage" I say to Mom every year, but she still put it on the tree again this year), and here is one of the quilted ornaments I made 10 years ago for everyone in my family. It is a tradition now that I make something each year for all my neices and nephews...I still haven't decided on what to make this year...and now I have less than a month to figure it out!
After helping to decorate Mom and Dad's tree, I came home and started to dig out some of my old Christmas mini quilts to hang up. This is one of my favorites...it is about 8" square and was a fun project. I remember how much I enjoyed couching the garland on the quilted trees I made that year! If I were going to make these again, I would add many more ornaments to the tree and lots of beads! Oh...and I'd make sure the floor piece was not so wobbly!
You can find the full size block pattern here at Quiltaholics.

Tuesday, November 21, 2006

Monthly Miniature Class


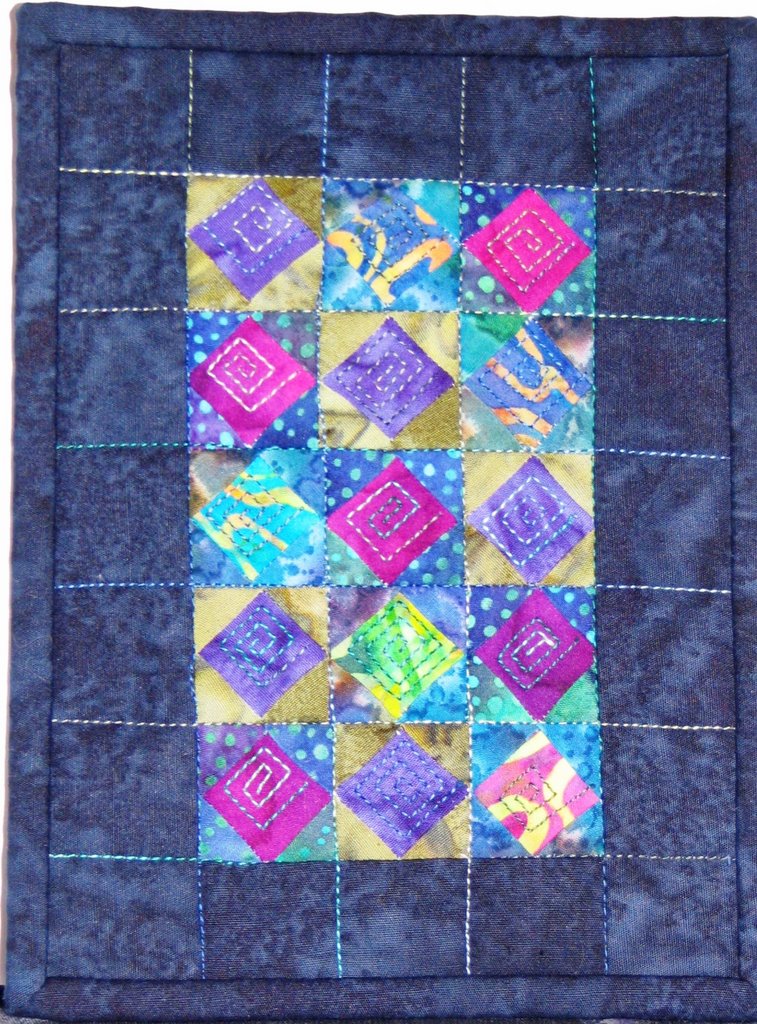
Today I taught a miniature quiltmaking class and this was the project for November. It is a very small (approx. 7" x 9") paper pieced quilt which I call "Flocks of Geese". I made the entire quilt using one of the Moda Swatch packs (excluding the binding). One of my favorite tips (which I learned from a Carol Doak book) is to use the Scotch brand "Magic Removable Tape" if you should happen to cut your pattern by accident. You can sew through the tape, and when your quilt top is pieced, the tape easily peels off from the paper.

Here is the pumpkin patch that the class pieced in October ...mini "Jack-o-Lanterns". The top three were made by Barb, the middle larger quilts were made by Lana, the bottom left quilt is Marj's and the bottom right quilt is Marion's. They all have the same centre pumpkin block, which measures 5" x 6" and then each quilter created different borders.
Check out my blog next month to see their finished "Flocks of Geese" quilts! Each student brought such beautiful fabrics in a variety of colours, so I am excited to see how they turn out!

Monday, November 20, 2006

Trip to Frankenmuth

This past weekend I went on a mini vacation with my sisters and my Mom. For the past few years we have spent our November weekend getaway in Stratford, spending Saturday night at "The Quilt" auction, but the admission price has doubled and it would've cost us $200 just to get in , so this year we decided to go somewhere new.
We chose Frankenmuth, Michigan and had a wonderful time together. We spent some time shopping, but mostly we visited and laughed, and talked until the wee hours of the morning. We don't see each other very often since my sister moved to the US, so we had a lot of time to make up for! I had a great time with my "womenfolk", but didn't get nearly enough sleep for all the driving I had to do!
One of the great stores we found is called "Bead Haven". No one else in my family is interested in quilting or beading, so I thought I wouldn't be able to spend much time in the store. But my youngest sister fell in love with the idea of a bracelet of her children's names, and spent even longer than I did in the store! Here is Mom and my sisters selecting some of the stones and beads for the bracelet, right before I got in trouble from the staff for taking photos in the store....oops! Anyway, I purchased some beautiful beads for a project I am working on, and if I had an unlimited budget, I could've spent a big pile of money there! They have three large rooms filled with an incredible variety of beads. They also offer classes, in a lovely classroom setting with large well-lit tables. For the people who don't love bead shopping and have to wait for the shoppers, they have a sitting area with large comfy chairs. My sister was very happy with the beautiful bracelet she made for her birthday...a little gift from herself, to herself, and a momento of our girls weekend together!
The staff did allow me to take this photo (on the left) of a sparkling quartz that was just remarkable...it was probably about 12" across the base and 10" high. And here is a photo of us outside the store...it was cold and windy in Michigan. Can you see my sister's bracelet?!?!?

Wednesday, November 15, 2006

Guild Meeting

I had too many things to remember for the guild meeting last night! I had myself all stressed out trying to get organized. I had to put out the historical records (I am the guild photographer/historian) which meant putting the finishing touches on last year's album, and the quilt show album. And I wanted to show two quilts at "Show and Share" so the bindings had to be finished. This is a quilt for one of my energetic nephews. The pattern is called "Tesselating Stars" and is by Cindy Thury Smith. It took quite a while to finish (okay...it was just over a year, which is not long by my UFO standards!!) and it was a real learning experience in terms of color planning. I enjoyed the block construction, but it took many trips back and forth between the design wall and the sewing machine. I had a great time with the machine quilting and made a fun design in the middle of each star....I don't know if you can see the quilting on this close up shot of one of the blocks or not? The binding is one of my favorite fabrics....a bright and happy yellow and green stripe. And the best news is that Cindy (the pattern designer) has generously given me permission to teach a "Tesselating Stars" class this winter!
The second quilt is one of Debby Kaffunger's designs called "Diamond Waterfall". I was originally sewing it for a charity quilt, but my daughter loved it so much that I made it larger, and then I had to spend way too much time shopping for more fabric to finish it! However, I was successful in finding more fabric to match and it is finished now, in plenty of time for Christmas. I had trouble initially choosing my quilting designs and still haven't quilted anything in the pink areas. I haven't decided if it is finished yet or not, however the binding is on now, so I'm guessing it's done! (I have written more about these two quilts in October postings)
So between lugging the two large photo albums, these two quilts, my library books to return, my finished blocks of the month for charity quilts, and my camera equipment...I was loaded down. And guess what I forgot? My nametag! Why can't I just keep it in a place where I will always take it along?!?!?


Sunday, November 12, 2006

Progress on my Winter Quilt

For the past 3 years I have been working on a winter quilt for my dining room wall. I already have a Christmas wallhanging and a spring looking quilt, plus my Great Canadian Fall quilt which is hanging there today. This quilt was made from a row round robin with Canadian quilters I met on the internet, and is about 55" square. I finally quilted it last fall but am seeing spaces that could use a little more quilting every time I look at it!

I have been collecting blocks for my winter quilt which I would hang up in January (if it was done!) for 4 years now. I have received many wonderful blue and white blocks in these exchanges in which I have participated. I have accumulated more than 30 blocks for this quilt, but the problem is that they are all different sizes and shapes and I cannot for the life of me figure out how to put them all together in one quilt! I have played around with EQ5 and designed several quilts and am not happy with anything so far. Finally I admitted to myself that if I continue on in this manner, the quilt will never be finished. So I just have to start somewhere and stop thinking about it. I decided that a starting place would be to make this unusually shaped block into a useable shape so I have made it into a rectangle. Then I decided that I would sew the blocks together into larger chunks/groupings. So that is what I am doing now. I am not worrying about the outcome, because that has kept me stuck for too long. I am just starting and sewing a few blocks at a time in a way that will join them together, and not thinking any farther ahead than necessary. I am hoping that by working in this way I will actually finish this winter quilt in my lifetime!

Saturday, November 04, 2006

Fabric Painting Class

Last month I taught a fabric painting class and today the students returned with their paintings - dried, heat set, and ready to quilt. They did a fantastic job learning how to work with the Setacolor paints and over the past month they have experimented with the techniques. Today we spent the first part of the class looking at the paintings, soaking up the creativity and learning new ideas from their work.
The painting on the left was made by Cathy. The class decided that it looked like a Monet painting. She is thinking about making it into a water scene. It was heavily salted when wet, which gives it the mottled texture.
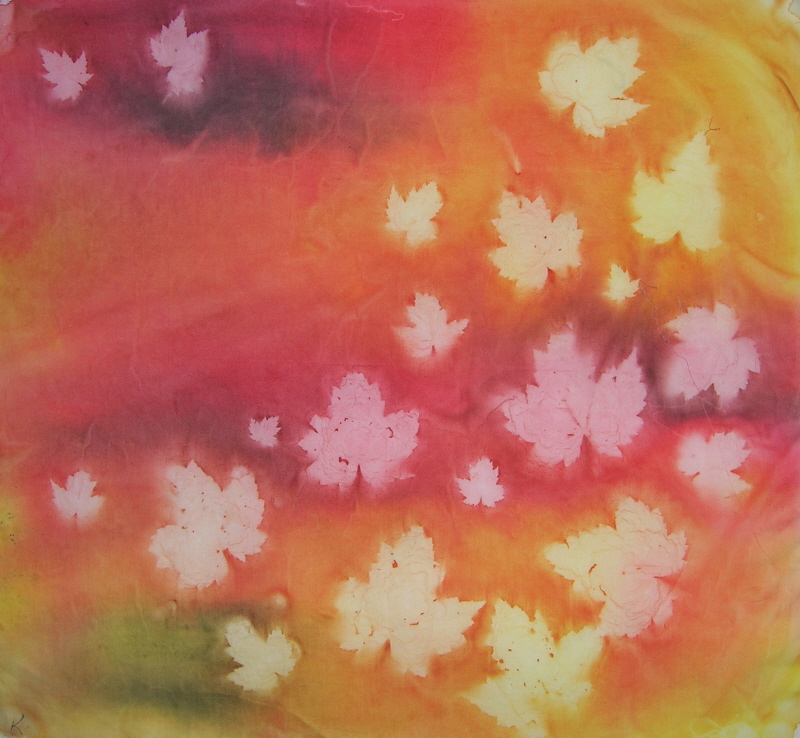
The painting to the right was made by another Kathy in the class. She made some beautiful sun prints using leaves and this one has great movement. We were amazed that she found a day over the past month which had both sunlight and no wind!!
Ruth created this blue painting (on the left) using water softener salt. I haven't used this kind of salt before and she got some great effects with it. Does anyone else see a tree that wants to be quilted in this painting? Ruth also made some creative sunprints using coins and jewelry!

The painting on the right was made by Danielle. This photo is deceiving because it is actually a large painting, with brighter colours than you see on the screen...I'm still learning how to use this camera properly! I'll try to get a better photo next class.

The painting on the left was made by Gerry and it is also a sun print, using leaves from her yard. She told us that many of the leaves blew away and had to be repositioned, but it
turned out great!

This painting on the right was made by Geraldine and she spent lots of time overpainting some of her pieces. This piece has several unique treatments in drying and painting.

This piece on the left was made by Sheila, who has experience with fabric dyeing and she tried some interesting techniques to make this landscape, including the use of Saran Wrap, and shaving cream!

As you can see the students are very creative and each are developing their own style. Next month we will meet again to further work on turning their paintings into quilts.

Sunday, October 29, 2006

Fun With Quilting Threads

It has been a cold and wintery weekend here...perfect quilting weather! I have been quilting my "tessellating stars" quilt that I made in a class with Cindy Thury Smith last fall. It was a fun quilt to piece and has been fun to quilt. It is just the kind of quilt I like to make...scrappy with lots of bright colours. When I am machine quilting, I like to change thread colours frequently.Here is a photo of auditioning threads for the swirly design that I quilted in each star. In this quilt there are 18 full stars (each made from a different fabric) and 14 partial stars (there were some fabrics repeated on the edges), so that could potentially be 32 thread changes! Some quilters find it frustrating to have frequent thread changes, but I enjoy it.
Back to finish the quilting...I'll post a photo of the finished quilt when the binding is on...I'm using a lime green and yellow striped fabric for the binding!

Thursday, October 26, 2006

Miniature Quilt Class


I taught a day long class today at Reichard's Quilt Store on how to use EQ5 to print out quilt patterns, and how to use wax paper as a foundation to piece arcs like the ones in this class sample. This miniature quilt was made for my guild's quilt show challenge this year. We were given two pieces of fabric and the theme of "celebration" - this was my entry called "Celebrating Beauty and the Beads". I had to abandon my original design idea when I realized it would be too large for the miniature category (even though the blocks are 2 1/2") and I eventually settled on this design. It won first prize for pieced miniature quilts and second prize for use of embellishments.

My class today included a pair of friends (a new quilter from Pennsylvania who was visiting her Canadian friend and decided to take a quilting class together), a mother-daughter pair, some very talented quilters that I haven't met before and an old quilting friend that I was very happy to see again! The students in the class worked really hard and did a great job on their blocks!

Monday, October 23, 2006

I am a Shop Hop Winner!

Much to my surprise, I received a phone call this week telling me that I was a Shop Hop prize winner! My name was drawn from the participating Shop Hop quilters and I won the gift basket from The Quilt Place in Shakespeare! I drove to the store on the weekend to collect my prize and this is a photo of all the merchandise they gave me...new patterns, a ruler, fabric, etc. My favorite gifts were the cutting mat cleaner (I need to use this!), a book called "Rx for Quilters" by Dr. Susan Delaney Mech (which I am enjoying reading and learning a lot), and the Omnigrid mat/ironing board. Thanks so much to Heather Stock, owner of The Quilt Place for the gifts and for organizing the Shop Hop.

Friday, October 20, 2006

A Busy Quilting Week!

I have had a very busy weeking having taught three quilting classes, given one lecture to a quilt guild, and driven over 10 hours, most of which were on highway 401, which means driving precariously, sandwiched between huge transport trucks.
This is the view I had last night, while speaking at the Oakville Quilters' Guild. A large audience full of attentive quilters, many of whom had brought handwork to do. I spoke about " Replenishing the Well: Quilting & Creativity", including obstacles or creativity blocks, and sources for inspiratio
n. I showed about 60 of my quilts and wallhangings. Here are some of the quilters viewing my quilts. I talked about the importance of filling up your well of creativity and working hard to find a balance between draining your well (thanks to Julia Cameron for teaching me this) in terms of the busyness of life and work, and taking care of others, versus filling up your well and taking care of yourself.
My favorite website about wellness and creativity is:
www.womenfold.com/creativity/index.htm
It was an interesting topic to speak about this week because I was so busy, and needed to listen to my own advice! So...this weekend I will take my own advice and make time to fill up my own well with activities that are energizing and life giving for me. I'll start that right after my on-call shift at my paying job! And after I throw in some laundry and get supper started and.......................

Thursday, October 19, 2006

Durham Trillium Quilters Guild

I spent a fun day with the Durham Trillium Quilters Guild yesterday. I taught two classes on making miniature quilts and met some wonderful quilters. The fabrics they brought and the projects they started were lovely. This is the mini quilt (which measures 5" x 7") pieced by Julia Smith in this class...thank so much to Julia for sending me this photo.
This pattern is made using a strip paper piecing technique.

Thank you to Shelley and Ann for treating me to supper... you sure know how to make a teacher feel welcome and everything was just great!

While I was away we had a water pipe break and flood the basement, so today, instead of finishing the quilting (my most favorite activity!) on my UFO, I'll be cleaning up (my most detested activity!).

Sunday, October 15, 2006

UFO of the Month

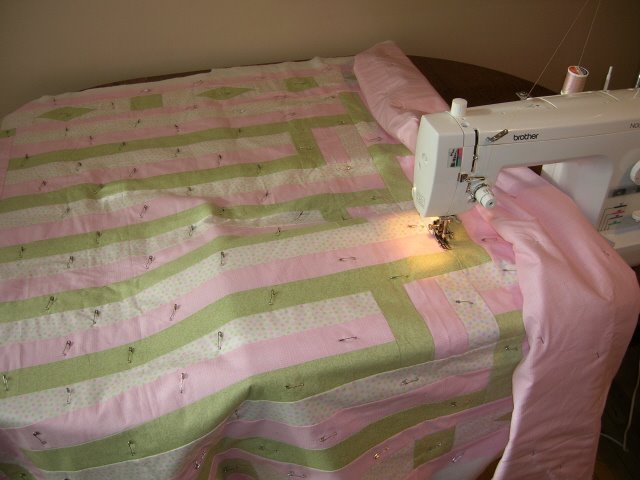
I am making progress on my UFO of this month. I went to the Centre for the Arts on "open studio" night and used their large tables to baste two quilts. This sure beats crawling around on the floor for basting...only did that once and learned my lesson! I am using a new thread from Sulky, which is thicker than I am used to. It is a 12 wt. thread and I had to do quite a bit of adjusting of the tension to get it workable. The thread has only snapped three times, when I was free motion quilting at a high rate of speed! I used to have a great deal of difficulty finishing quilts because I either had to send them out for quilting, or wait for inspiration to strike with ideas for quilting. I was tired of stitching in the ditch but didn't know what else to do and so the UFO tops piled up. Then I took a Quilt University www.quiltuniversity.com class with Myrna Geisbrecht and learned how to overcome creativity blocks. Now I usually start the quilting by stitching in the ditch in a grid format to stabilize the whole quilt. Then I start free motion quilting in whatever design comes to my mind while I'm quilting. Sometimes I really like the outcome and sometimes I don't, but at least the quilt gets finished and isn't sitting in a cupboard. This quilt is a design by Debby Kaffunger and was going to be donated to the comfort quilt charity at my quilt guild, but my daughter loved the fabric so I made the larger size quilt and, of course, ran out of fabric! I will have to go shopping for more fabric for the binding, and hope there is something still available that matches these fabrics.

Thursday, October 12, 2006

It's Snowing!

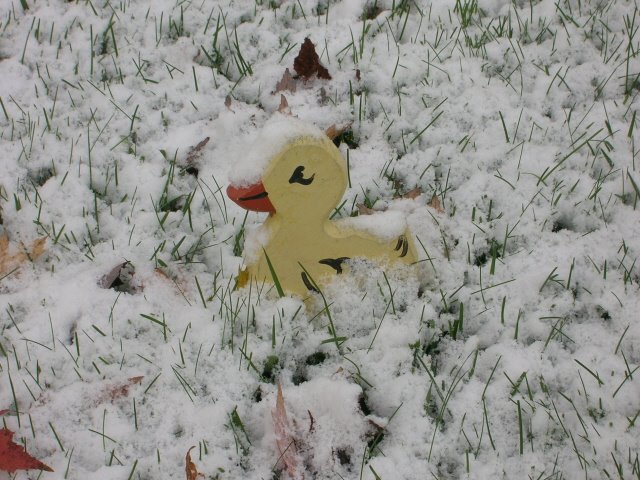
It's a windy cold day here and the snow is flying! The leaves have mostly fallen, but with the wind today they'll likely all be down tomorrow. The snow was heavy at times ...this is one of our little lawn ornaments (actually we have a whole family of ducks):

In cleaning out the flower beds, I found a little squash or gourd plant growing around the composter, which must have taken seed from the gourds we threw in there last fall.
That was a nice surprise. I was inspired to make a little sketch and have started to paint the sketch with wax pastels. I learned this technique from Holly Knott's article in Quilting Arts magazine. I love her website and her work...

http://www.hollyknott.com/artquilts.htm

When the piece is finished, I'll post a photo.
In the meantime, I'm searching for my sweaters!

Wednesday, October 11, 2006

Mending and Hemming

I am a quilter. I hate mending, and I hate hemming pants even more! Which is a problem because for the last 15 years I have had to alter almost every pair of pants I have purchased for my children. One is too thin and needs the waist tucked, and one is too short and needs the legs hemmed up. I might even describe this activity as bordering on torture for me! Here is a photo of my sewing machine where I am hemming yet another pair of jeans. I cut off 6" from the bottom of each pant leg, and force my machine to sew around each leg twice. Now, when I write that down, it doesn't sound as tortuous as it is. I procrastinate the task as long as I can until the children start getting worried about not having any pants to wear...okay I either have to do laundry or hem the darn pants!
Realistically I admit my reaction is bizarre, since hemming pants and quilting a quilt involves the same steps, the same skills, the same equipment. So what's the problem?? I don't know...I just know I hate it. After this past season of buying new pants, my husband offered to take them to the tailors shop at the mall so I didn't have to be tortured. That was very sweet, but made me think ...which do I hate more, paying a lot of money to have someone do something I could easily do, or hemming the pants?!?!?!? I hemmed the pants.
Which reminds me of a saying (I don't know the original source) but it goes something like this: Asking a quilter to hem pants, sew on buttons or mend clothing, is like asking Michelangelo to paint your garage door.
And speaking of painting....That is what I could be doing instead of hemming those jeans! These photos are from the fabric painting class I taught this past weekend. I love painting and wish I could schedule an "artist date" to paint once a week. The first piece was painted with blue and yellow and was heavily salted with course canning and pickling salt. I still need to heat set and then rinse the salt residue off before I can work with it. This second piece used the same colours, with a little purple added, and the paint was more diluted. Once the fabric was painted, it was pleated until it dried. Where the pleats were, the paint leaves a darker line. I am thankful to my first fabric painting teacher Maggie Vanderweit, who reminded me how much fun painting is, and my second teacher Michele Scott, who taught me about working with Setacolor paints and colour blending. See how much more fun this is than hemming pants!

Saturday, October 07, 2006

UFO list is ready

My UFO group had our first meeting this week. This is our third year together as a group and we always look forward to being together. We were asked to bring anything we had worked on over the summer, any UFO's we plan to work on this year, and food (of course!) for the potluck lunch. I was so happy to see my quilting friends again and talk about our families, jobs, travels, quilts,...anything we were thinking about.
I had my UFO list ready and reviewed it at the meeting. This is a photo of my selected pile of quilt tops for this year's list. One of the quilts is so old that it has a bad smell to it. It was a "Quilt in a day" project, that the group has renamed "Quilt in a decade" project!! And the store in which I took that class, has been closed for over 10 years! That is so sad! And I still really like that old log cabin quilt...except for the smell!
Hopefully these will all be finished quilts by June of 2007! So now I have one month to pick one of the projects, piece a backing, baste, quilt, and bind it.
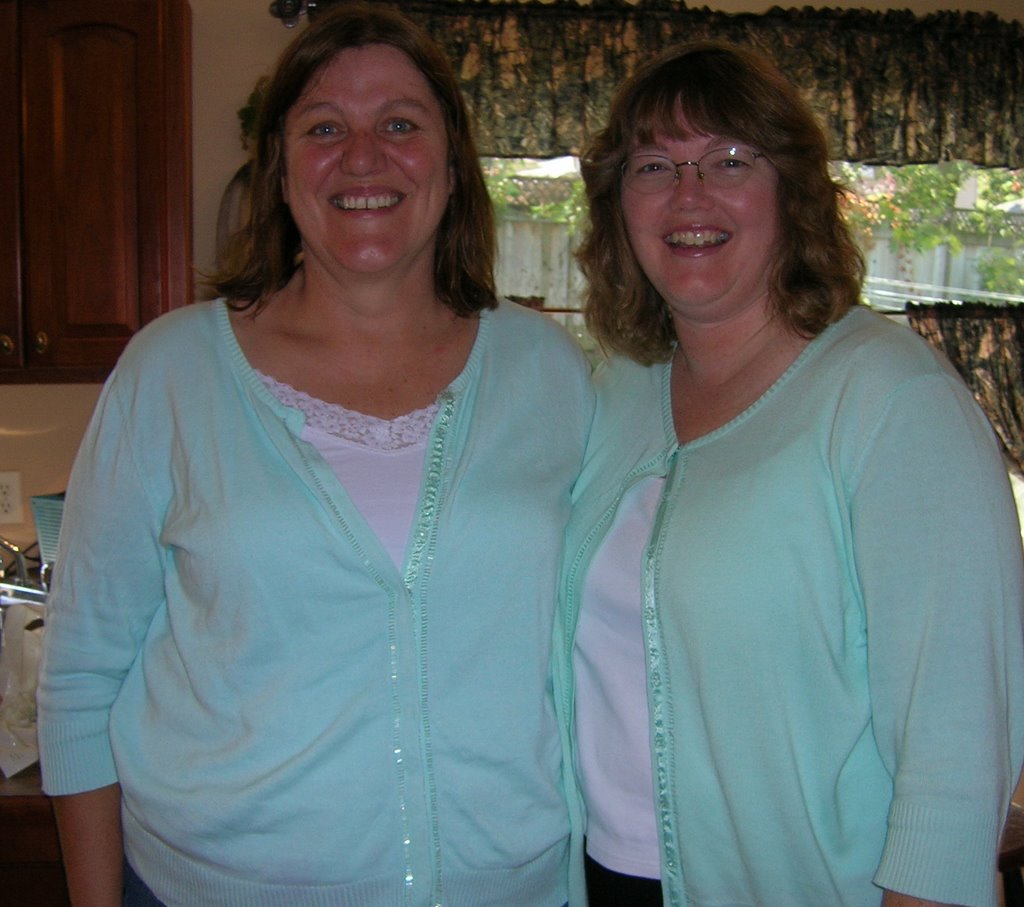
One of the funniest moments of the meeting was when I arrived wearing the same outfit as the hostess...sorry Cindy!! We took a quick photo and then she graciously changed into another outfit before the rest of the guests arrived!
So, now I have to get to work. I also renewed my goal to stop
beginning new projects until I finish some of the old ones!
Wish me luck!


Wednesday, October 04, 2006

Mystery Finished

I finished sewing the mystery quilt from the Quiltaholics website. Debby Kaffunger is the designer and she always writes wonderful directions and each quilt she designs is completely different. I have probably sewn 6 of her designs, although not all of them are finished quilts...a few are still UFO's. I realized that I hate to sew on the borders...it's boring and I have a strong urge to stop working on the quilt at that point. However, with this one, I ran out of fabric when I got to the last border. I bought expensive flannels (Northcott, etc) that shrunk to about 38 -39", instead of the regular width of fabric, which is approximately 42-44" . When you're working with large amounts, like with this quilt, that's a lot of fabric you don't have (5" less on each 2 1/2" strip). So now I have to go back to the quilt store in Stratford and buy more fabric. This is dangerous because we all know I won't just buy enough fabric to finish this quilt!!

Friday, September 29, 2006

A Mystery and a Shop Hop in one weekend!

I just completed the "shop hop" in my area...6 quilt stores participated. At each store they give some fabric and at the last store, you receive a table runner pattern to go with the fabric. What a deal! Free lovely fall fabrics and a pattern. And I got to see all the newest fabrics in some of my favorite stores. Of course I spent too much money, but that always happens on a Shop Hop! Thank you to all the stores who participate in these fun events.

While shop hopping (this is a new verb!) I bought some wonderful flannels for the Quiltaholics weekend mystery. I plan to make a lap quilt for someone special for Christmas. I wanted masculine looking fabrics, and although the colours didn't scan well, you get the idea.
I will post the quilt top when it is finished.

Sunday, September 24, 2006

The unending problem of UFO'S

One of my quilting challenges is the huge mountain of UFO's that live in my basement cupboards. Some quilters call them WIP's (works in progress), which has a more positive energy than UFO (Un Finished Objects)...as if a WIP is still being worked on, and will be finished any minute now. But my UFO's are really just unfinished and not being worked on, and sitting in a cupboard, box, or bag.
Two years ago I joined the UFO club at my local quilt guild and this has been wonderful for my UFO pile. Each September we make a list of the projects we would like to finish, one for each month of the quilting year. We bring the UFO's to the first meeting, where we take each one out and show it to the group (8 brave quilters). Everyone "ooohh's and ahhhh's" over the projects and we remember why we started it in the first place and then we hopefully fall in love with the idea of finishing the quilts so they can be used and enjoyed, instead of sitting in a closet.
In the first year, I finished 6 quilts. In the second year, I finished 7 quilts. Here is one of my finished UFO's:

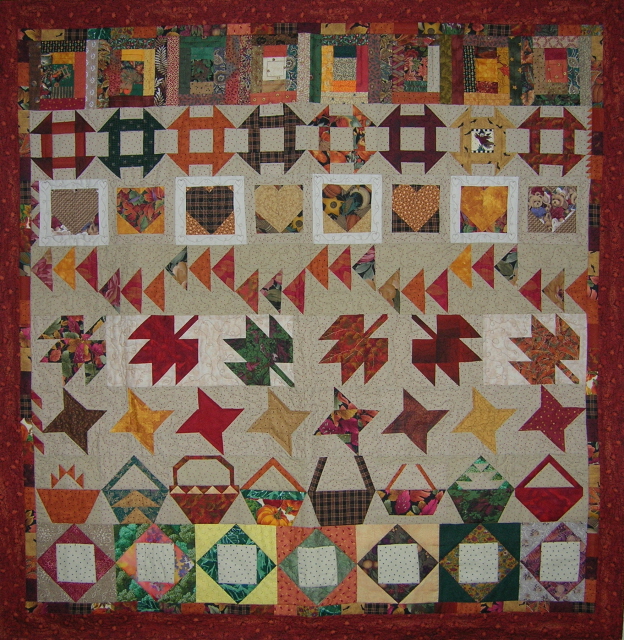
This quilt is made from blocks exchanged in a Quiltbee block swap, made and exchanged by quilters named Kathy/Cathy or some variation of this name. It was lots of fun and I enjoyed the swap. However, then the blocks sat in a bag in my cupboard for years. Finally, with the encouragement of the UFO group, I sewed the blocks together and quilted it. It is about 30" square and is a nice autumn wallhanging. In case you were wondering, my block is the 3D bowtie block in the bottom row. On the back of this quilt, I appliqued the signature squares behind each of the blocks.

So, now it is time to create my UFO list for the new quilting year. I have to select 8 projects from the cupboard. I never include smaller/mini projects on this list...only wallhangings and bed size quilts. I have two quilts that have been on previous years lists and are still unfinished...you can imagine how much I hate those UFO's!! They will top the list again this year, so now I just have to pick 6 more...no problem!

Sunday, September 17, 2006

Traditional & Steady

I am one of the most boring people I know! I have lived in the same city almost my whole life, been married to the same man for almost 23 years, lived in the same house for 16 years, and worked at the same job for 13 years (except maternity LOA's)...predictable, reliable, stable and boring. That's the way I like it!
I am always making large bed size traditional quilts, like the one I worked on yesterday. This quilt began in a mystery quilt class at Reichards in the spring. This is a photo of one of the blocks.
I always have projects waiting for me in plastic bins, all the fabric, pattern (if there is one), threads, etc together in one place. Some of them are just waiting for borders and quilting, others are waiting for me to finish sewing the blocks. I finally finished the blocks and sewed them together. I haven't decided what this quilt will become...deciding between a large wallhanging for the dining room (probably not) and a lap quilt for my mother-in-law who loves flowers and gardening (all the fabrics are florals...not my "thing").
I find that repetitive sewing on traditional blocks is very soothing and relaxing. There is no designing to do and no decisions to make. It is a great way to calm down after work or before bedtime (I often sew late at night). And in this way it serves a purpose in my life...however it is boring after a while.
That is where the quilting excitement comes in! The only place in my life where I take risks, do crazy things, waste time and resources, and do not have a plan of any kind....is in quilting!
Tonight I am working the night shift (on call) and hope to have a quiet night so I can read my new Quilting Arts magazine and decide what new technique I will try this month.
From the last issue I tried the technique of painting with tissue paper. I even had a whole day of painting with one of my quilting friends.
This was the result, and I call it "Reaching Out". It has little gold people in the netted pods...it's bizarre and not like anything I've made before but it is growing on me! I left the tissue paper on the top and quilted over it. As a result, it is very fragile and starting to rip on the sides...I won't do that again!
Well...Let's hope it's a quiet night at work so I can plan my next crazy experiment with quilting techniques...it's the only excitement I get!!

Saturday, September 16, 2006

Postcards Finished!

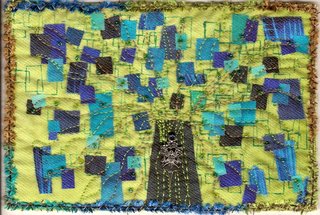
I finally finished my postcards for the "Fibreart For A Cause" sale at the International Quilt Festival in Houston. I really wanted to finish something to be at the festival...if I can't go, I wanted my quilting to be there! I used two starting points...one a "dislike" and one a "like", based on an exercise taught by Myrna Giesbrecht in her Quilt University class "Self Expression". My dislike start was a piece of painted and stamped fabric that I considered a "reject".

Using shapes similar to the stamping, I cut bits from my scraps and laid them on the fabric. When the pieces were on, I thought it looked like a communications tower and after putting a layer of tulle over everything, I machine quilted lines out from the tower. Then I added some beads radiating out from the center and couched a fibre called "Marabout" around the edge. This is the finished postcard called "Radiant Fairy Tree".

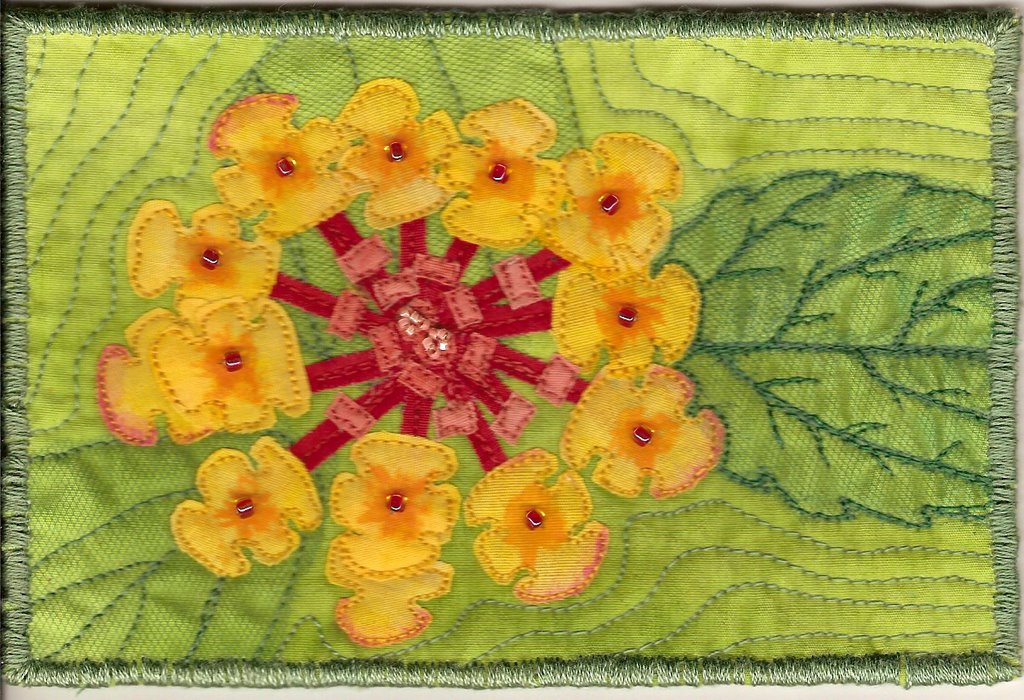
My second postcard was inspired by a photo I took in my sister-in-law's garden this summer.
I painted most of the fabric for this card using Pebeo Setacolor paints or Canon D'ache water soluble wax pastels. And I found out when heat setting the paint, that a cotton setting will melt tulle!~ This is how the leaf looked after I ironed it....
the tulle I was using for the leaves melted, so I had to sew on a second layer of unmelted tulle! And I kept the iron away from it!I had to quilt more around the edges of the card because it wasn't laying flat. I should have quilted the background before making the flower and I'll know this for next time. Then I spent some time doing one of my favorite things...beading!I added beads to the center of each of the petals and some in the center of the flower. I finished the edge of this one with satin stitching by hand using DMC floss (3 strands). This postcard is called "Lantana", which is the name of the flower.
I have mailed them away and miss them already!Hope they find a new home with someone who will take good care of them!