Welcome to the weekly hand stitching party! Take a few moments to set aside your machines, your devices and screens, and just take a deep breath... ahhh... so much better.
 Now pick up your needles and fibres, and put a few stitches into your project. You will feel better in no time!
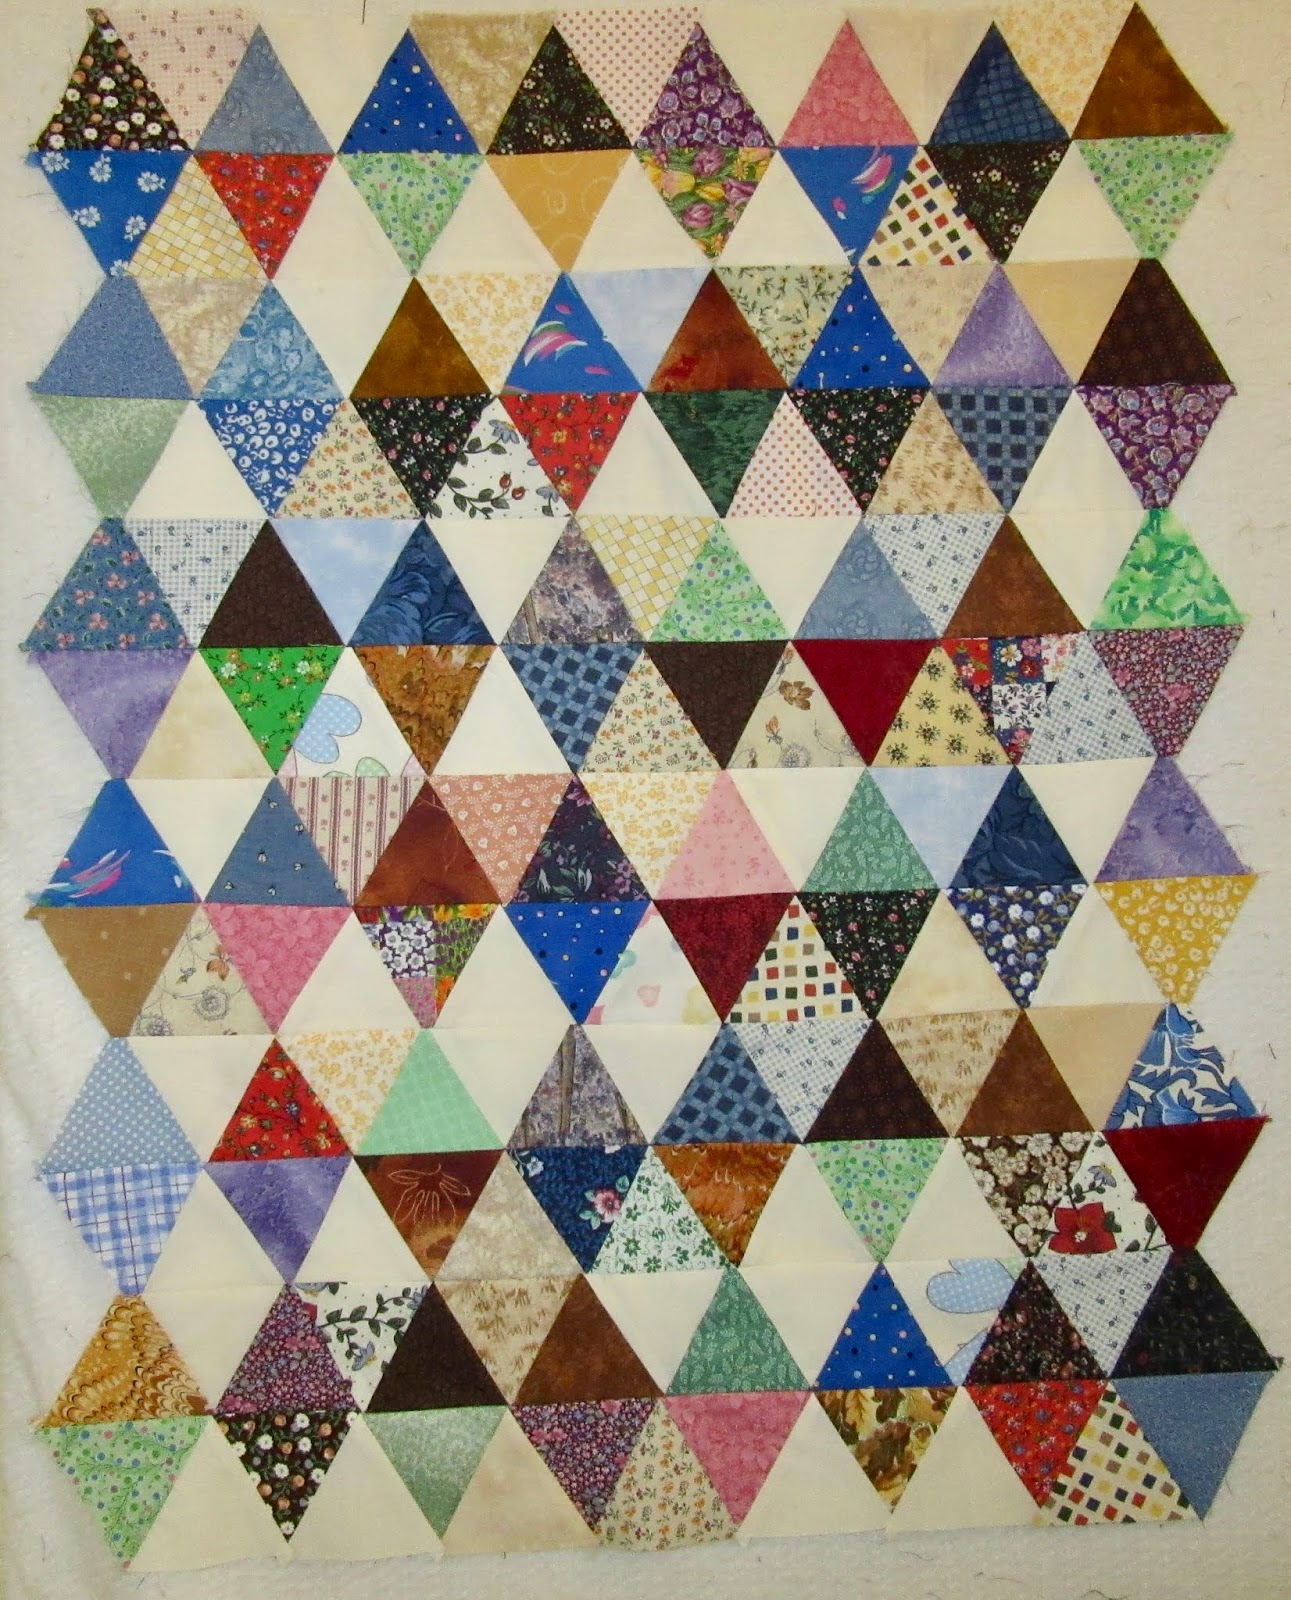
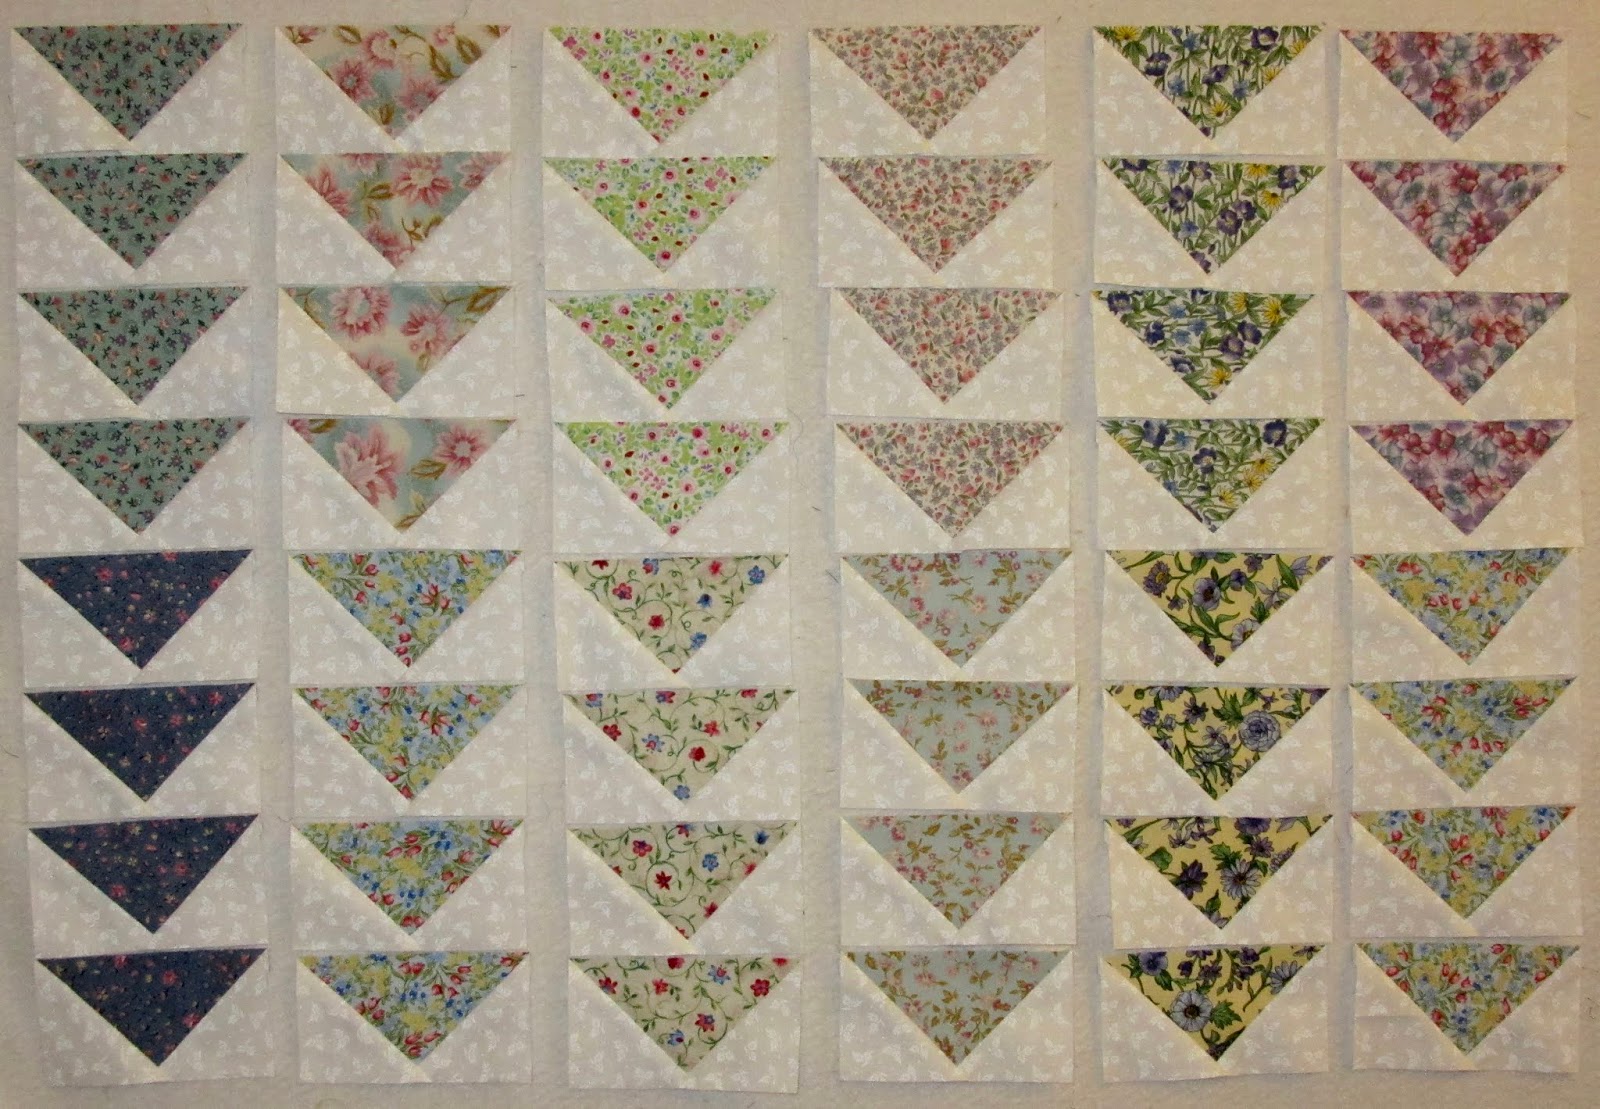
Today I am slowly working on my hand pieced quiltalong project. This task seems to require a lot of coffee and treats!
Now pick up your needles and fibres, and put a few stitches into your project. You will feel better in no time!
Today I am slowly working on my hand pieced quiltalong project. This task seems to require a lot of coffee and treats!
 There are a few holes that have appeared in places where I didn't connect the units properly. My hand stitching friends said not to worry, that "the quilting will take care of the gaps". So I decided to hope they are right and just accept the holes.
Holes happen!
There are a few holes that have appeared in places where I didn't connect the units properly. My hand stitching friends said not to worry, that "the quilting will take care of the gaps". So I decided to hope they are right and just accept the holes.
Holes happen!
 I didn't have much of the background fabric left, and the rest of the fabrics were from a charm pack, and I had nothing that suited this project for sashing. Hence, there will be no sashing. It might be a bit of a busy mishmash, but that's just the way it goes sometimes!
What are you hand stitching today?
Are you have any challenges... like holes appearing in your project, or not having the right materials for the next step? Link up your blog post below and share your miseries and successes with your slow stitching friends!
You are invited to the Inlinkz link party!
Click here to enter
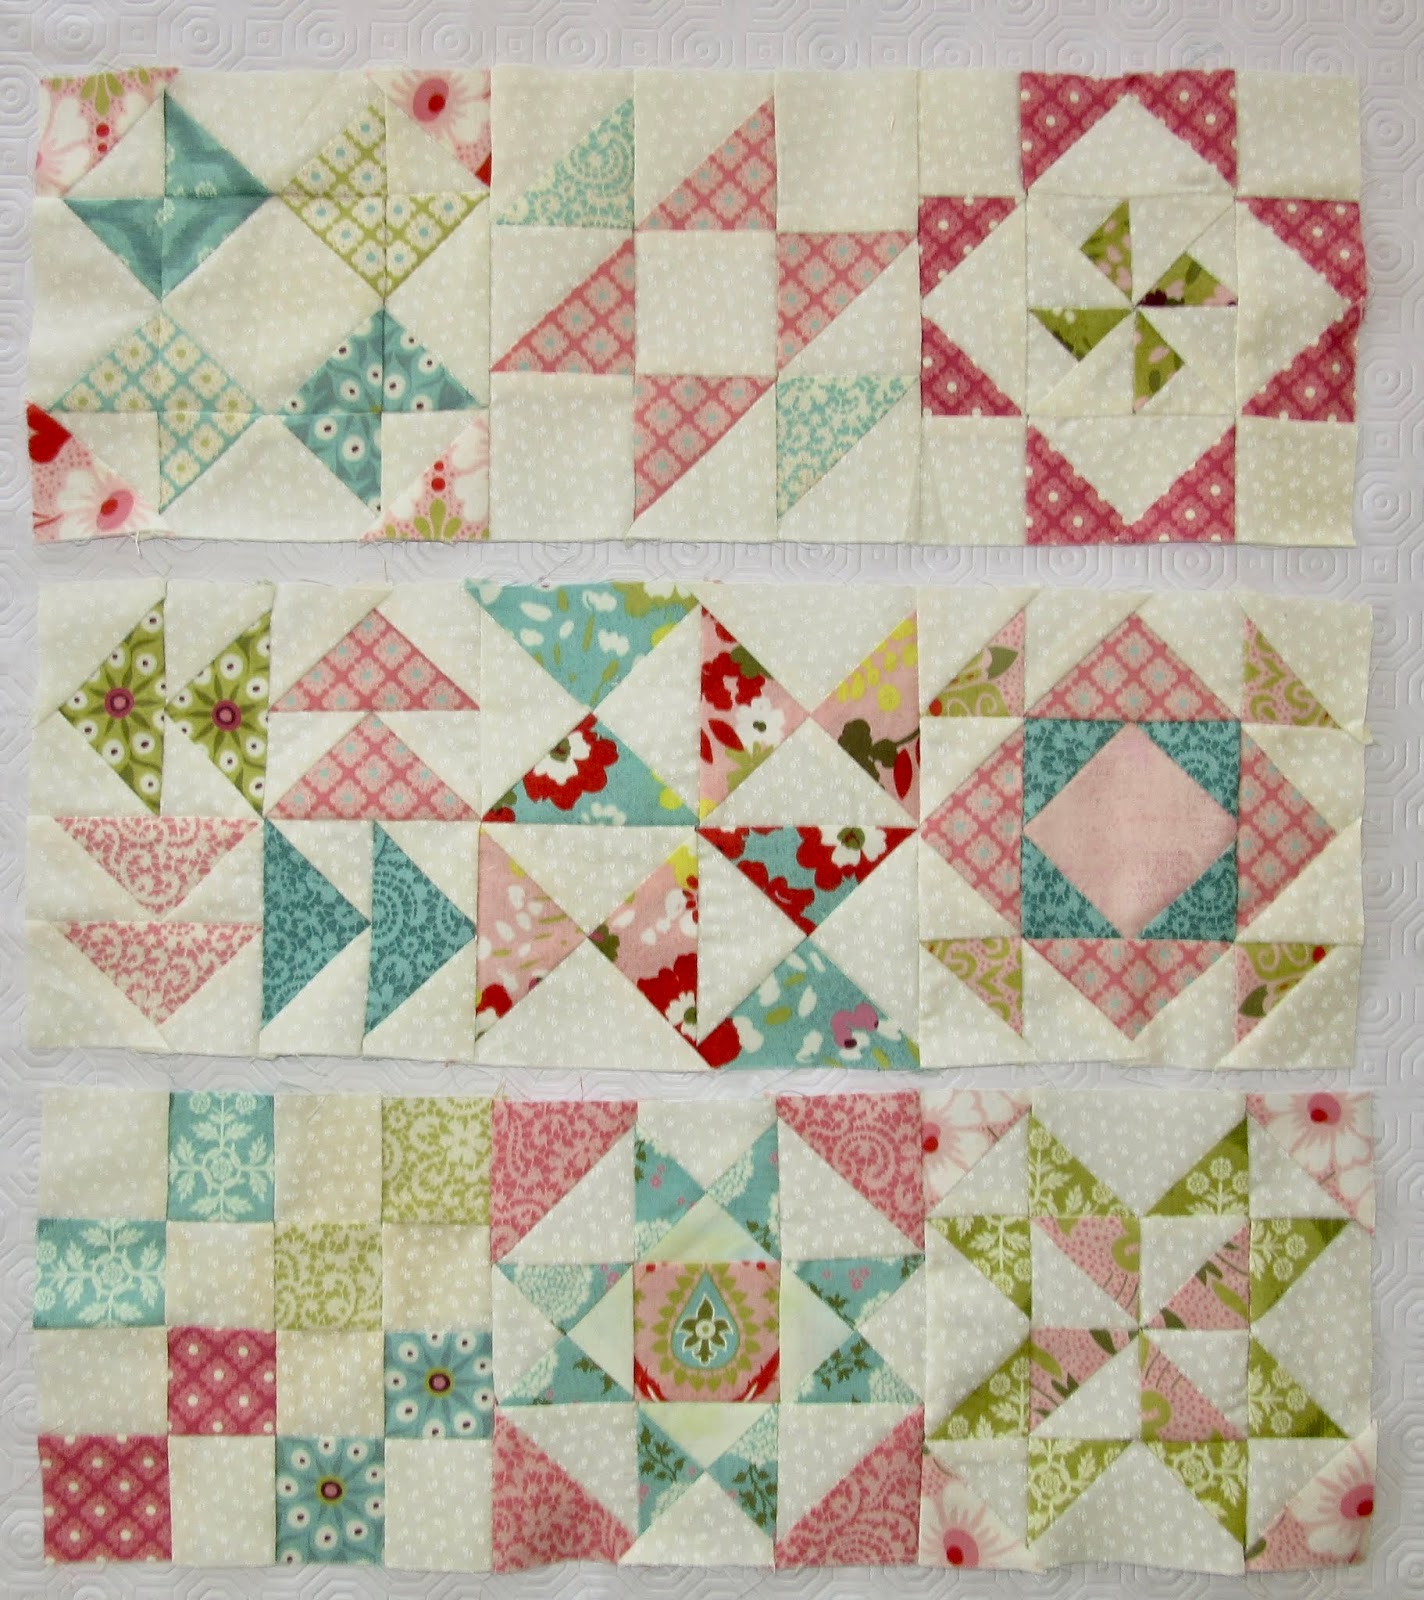
 I was so excited to get the blocks together with the sashing and cornerstones in place. When I put it on the design wall I went from satisfaction to frustration in an instant.