I didn't get myself organized enough to get this blog post done on Saturday, so these blocks are still on the design wall. In August the Rainbow Scrappers were using up their indigo scraps. I hand appliqued 12 pumpkin seed blocks which are sewn into 3 complete blocks, and finished piecing 6 alamo star blocks.
I also found a few odd seed blocks kicking around the sewing room and finished them up into blocks. So this adds 6 more blocks to the collection - 3 indigo, 1 red, 1 lime green, and 1 pink or rose or whatever colour that is.
To see more design wall posts, hop over to Patchwork Times.
Monday, August 31, 2015
Sunday, August 30, 2015
Slow Sunday Stitching
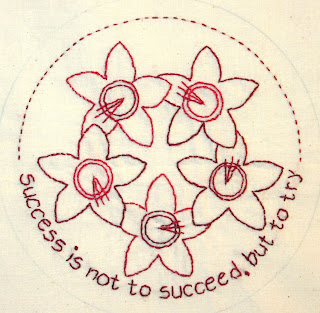
It's been a busy weekend with lots of time with both of my sisters. We have enjoyed long talks, walks by the river, lunches, and musical theatre. And of course, we all got manicures. There was not a lot of stitching time so far, but I did manage to get one more embroidery block finished for my Life Is Beautiful project.
Life Is Beautiful Block #15 |
This is probably the worst hand embroidery I have ever done, which is ironic considering the words that were being stitched! I don't know why the stitches are so uneven and messy, except to say that this block was stitched in many different places, and some locations did not have good lighting (that's the best/only excuse I can think of).
What are you working on today?
Link up your blog post of your hand stitching project and share your progress with us.
Friday, August 28, 2015
Finished Quilt!
Big announcement today...
drum roll please....
the braid quilt is finished! This quilt has been "in progress" for about 15 years. And it has finally become a useable quilt.
Finished size: 57" x 72"
I machine quilted it on my domestic sewing machine in horizontal squiggly lines following the braids. Using this quilting design prevented lots of twisting and turning of the quilt, but still gives it the zig zag effect.
I extended the quilting lines across the border right to the edge of the quilt, so I didn't have to figure out another quilting design in the border. That was genius if I do say so myself!
The backing is just a boring piece of sale yardage pieced down the middle.
To see more finishes, hop over to A Lovely Year of Finishes and Crazy Mom Quilts.
Thursday, August 27, 2015
Blueberry Report
berry picking 2011 |
This year I went with my daughter and sadly the berries were not that good. This was likely due to the harsh winter, followed by frost damage in May, and a cool rainy summer. But I did manage to get enough for the annual jam making ritual.
I have had many people ask me why I bother with all the work of making my own jam. Truthfully, you really can't beat the taste of a jar of homemade blueberry jam.
And secondly, this sign says it all. I love the mess of canning and enjoy making something with my own two little hands... I can't help myself!
Wednesday, August 26, 2015
Bowtie Swap
Did you catch QuiltCam last night? If you missed it, you can watch it anytime from the archives. This is where I was sitting while I worked on 4" bowtie blocks.
These are for a block swap that Barb is hosting. We are exchanging blocks made from muslin, and civil war reproduction prints. These first few blocks are looking kind of dull. I must add in a few cheddar blocks, or maybe some red ones to spice it up a bit. I finished about a dozen, so I only have about 70 more to go!
Tuesday, August 25, 2015
Waiting with butterflies
It's pretty quiet here in the sewing room, however QuiltCam is on tonight, so there will be lots of sewing going on then. I'll either build more rail fence blocks, or spend time in the vortex.
But first I am finishing up the last block of the Cozy Afternoon quilt along, so I'll be right here stitching butterflies while I wait for QuiltCam to start.
Oh yah... I almost forgot to announce the winner of the free patterns from the last Cozy Afternoon block release. The winner is comment #14 which is Sarah.... congratulations Sarah, the patterns will be emailed to you from Jacquelynne!
Monday, August 24, 2015
Design Wall Monday
The rail fence blocks are back on the design wall today. The number of blocks has grown from 9 to 16. I really how the same fabric functions as the light rail in one block, and becomes a dark rail in another block. Every fabrics' value is relative to the fabric that it's placed beside. Look at the three blocks with the gold fabric... it looks so different in each block.
I'll be sewing more rail blocks this week until I either run out of these old fabric strips, or I get tired of this technique. It could be a while!
To see more design wall postings, hop over to Judy's blog.
I'll be sewing more rail blocks this week until I either run out of these old fabric strips, or I get tired of this technique. It could be a while!
To see more design wall postings, hop over to Judy's blog.
Sunday, August 23, 2015
Slow Sunday Stitching - Binding
It's Sunday... time for some relaxation and slow stitches.
At FNSI the binding was attached to my August UFO and today I will be hand stitching it to the back of the quilt.
This is how I stitch a binding, with the edge of binding toward me, and stitching from right to left. I like to use lots of Clover clips to keep the binding snuggly in place as I stitch.
Just for fun, I took a poll of my quilting friends to see the variety in binding techniques.
These are the hands of the infamous Barb - she stitches her binding with the quilt towards her, the binding edge away from her, and stitching right to left. No pins.
These are the hands of Louise, and she stitches with the quilt on her right, the edge of the binding to her left, taking stitches away from herself. Lots of pins.
These are the hands of Deanna binding a quilt.
Oh look, she stitches in theright way I mean the same way as I do! LOL!
But no pins or clips.
How do you hand stitch your bindings? Do you use any of these techniques? Have you invented your own method?
We'd love to see what project you're working on today. Link up your blog post below and share what you are hand stitching today?
At FNSI the binding was attached to my August UFO and today I will be hand stitching it to the back of the quilt.
This is how I stitch a binding, with the edge of binding toward me, and stitching from right to left. I like to use lots of Clover clips to keep the binding snuggly in place as I stitch.
Just for fun, I took a poll of my quilting friends to see the variety in binding techniques.
These are the hands of the infamous Barb - she stitches her binding with the quilt towards her, the binding edge away from her, and stitching right to left. No pins.
These are the hands of Louise, and she stitches with the quilt on her right, the edge of the binding to her left, taking stitches away from herself. Lots of pins.
These are the hands of Deanna binding a quilt.
Oh look, she stitches in the
But no pins or clips.
How do you hand stitch your bindings? Do you use any of these techniques? Have you invented your own method?
We'd love to see what project you're working on today. Link up your blog post below and share what you are hand stitching today?
Saturday, August 22, 2015
Indigo Stars
There are five Saturdays in the month of August so there is an extra week for the Rainbow Scrappers to work on our dark/indigo blocks. I made a couple of Maverick Star blocks this week. It's another long term project I work on whenever I have some scrap triangles to use up.
The first block is a golden star on dark blue fabrics.
The second block is a dark star on a light background.
Love that millenium fabric in the middle! Can you believe that fabric is 15 years old this year, and I still have some of it hanging around!?!
Here are the dozen maverick star blocks I've made so far. I have a few colour gaps to fill in, especially with dark colour background blocks.
To see what the other RSC'ers are sewing, hop over to SoScrappy.
Friday, August 21, 2015
Mash or Sash?
*blink*
Where did that week go?
I got lost in the vortex of life and scraps, trying to make everything fit together into a cohesive whole. It's a lot like building a giant jigsaw puzzle... trying to make something out of a big pile of leftover bits and pieces. But progress has been made on my vortex quilt (lessons are here).
So now the question is... should I mash the mess all together in a true vortex?
Or should I try to bring some order to the chaos and put in some sashing?
What is your vote - mash or sash?!?
Tonight is Friday Night Sew In. Have you signed up? I hope to spend a quiet night hand stitching and resting up for a Row by Row adventure with my friend Barb on Saturday. I'm not participating in the rowing since I already have so much on the go, but Barb is, so I'm driving her around to wherever she wants to go. And you never know where that might be!
Tuesday, August 18, 2015
The good, the bad, and the ugly
The machine quilting of this month's UFO is well under way. I am using my free motion quilting foot and making horizontal squiggly lines across the quilt following the braids.
The good: I love quilting a scrappy UFO and visiting the fabrics that I remember from the past. See that angel print under the needle? I really liked it, and it still makes me smile when I see it.
The bad: Why did those two striped fabrics have to end up beside each other when I joined the braids together (in that first photo)?!?
And there are only 5 pieces of this funky fabric in the entire quilt, so why did they end up touching each other instead of being scattered around?!? It really annoys me that "random" layout doesn't mean "perfectly and evenly spaced".
The ugly: It gets a little tricky sometimes to follow the correct braid as I am quilting the wavy lines.
I'm hoping to finish the quilting, and get the binding on in time for Slow Sunday Stitching this weekend. But today I'm linking up to Free Motion by the River over at Connie's.
The good: I love quilting a scrappy UFO and visiting the fabrics that I remember from the past. See that angel print under the needle? I really liked it, and it still makes me smile when I see it.
And there are only 5 pieces of this funky fabric in the entire quilt, so why did they end up touching each other instead of being scattered around?!? It really annoys me that "random" layout doesn't mean "perfectly and evenly spaced".
On occasion I find myself missing a turn and I start stitching down the wrong braid. There have been a few U turns where I had to stop, pull out a few stitches, go back to the turn, and follow the correct braid. See where the pencil is? I should have stitched down the yellow chicken fabric but I missed the turn.
It's happening less now that I know to pay more attention at the turns. Oh well, you'd really have to get your eyeballs up close to the quilt to notice the places where there are U turns, and if that's the worst of my quilting problems, I guess it's not so bad or ugly!
I'm hoping to finish the quilting, and get the binding on in time for Slow Sunday Stitching this weekend. But today I'm linking up to Free Motion by the River over at Connie's.
Monday, August 17, 2015
Monday Design Wall - Rail Fence
On the design wall today are my blocks for Sujata's rail fence quiltalong. I started my blocks at the beginning of the month and found that they are really fun to sew, without a lot of concentration required.
So I put on the latest Quiltcam episode and sewed along with Bonnie Hunter. I have 9 finished blocks with several strip sets sewn, pressed, ready to crosscut and arrange into more blocks.
These things are like potato chips... you can't just try one or two!
To see more design wall postings, hop over to Patchwork Times.
Sunday, August 16, 2015
Slow Sunday Stitching - Long Term
This week I am working again on some pumpkin seed blocks. I've been making these blocks for a couple of years now, and this is one of the first long term quilting projects that I started. Stitching more seeds has led me to thinking about what it takes to actually complete a long term project. Do you have it in you to finish a project you have been committed to for a long time?
I think hand stitchers are generally a more patient sub group of the population, and therefore more likely to finish a long term project. We understand that things of value take time.
Lots of time.
We are willing to put in that time, holding on to the belief that all the effort will be worth it in the end. And we learn to trust our own creative process along the way. This quilt has taught me a lot already. But I must say that my enthusiasm is waning, and every time I add a block, new ideas bubble up for the layout and for the quilting.
I work on these blocks a little bit each month, and the structure of the Rainbow Scrap Challenge has really helped me to stay organized. Each month I sort scraps and make a few more blocks in the colour of the month. I have no idea why the orange and yellow months are so poorly represented in my layout!?! Anyway, last month was red, so the red blocks are done for now. And I finished one dark/indigo block so far in August.
Today I will be cutting more seed/melon shapes from dark blue scraps, while I reflect more about the stages of long term projects, and why I so easily take on these creative commitments, which leads to having such a lengthy UFO list!
What are your thoughts hand stitchers? What are you working on today? Link up your blog post below and share your hand stitching project with us.
140 seed blocks = 35 quilt blocks |
Lots of time.
We are willing to put in that time, holding on to the belief that all the effort will be worth it in the end. And we learn to trust our own creative process along the way. This quilt has taught me a lot already. But I must say that my enthusiasm is waning, and every time I add a block, new ideas bubble up for the layout and for the quilting.
I work on these blocks a little bit each month, and the structure of the Rainbow Scrap Challenge has really helped me to stay organized. Each month I sort scraps and make a few more blocks in the colour of the month. I have no idea why the orange and yellow months are so poorly represented in my layout!?! Anyway, last month was red, so the red blocks are done for now. And I finished one dark/indigo block so far in August.
Today I will be cutting more seed/melon shapes from dark blue scraps, while I reflect more about the stages of long term projects, and why I so easily take on these creative commitments, which leads to having such a lengthy UFO list!
What are your thoughts hand stitchers? What are you working on today? Link up your blog post below and share your hand stitching project with us.
Friday, August 14, 2015
Trying to keep up
Brace yourself, this is a complaining post. Another busy week has passed, with more tasks to do than time available in which to complete them.
My kids would say "first world problems Mom".
True. I shouldn't complain.
Don't you love this Calvin and Hobbes cartoon?!
For example, it's already the end of blueberry picking season, and I wanted to get out to the field one more time. It's a little more challenging to find good berries this late in the season, but I did find enough to top up the freezer with enough blueberries to last through another winter.
More on the to-do list...
get caught up with email.
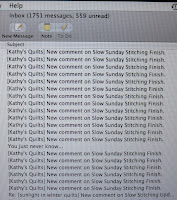
Am I the only one who can't keep up with email? This is my computer screen this morning. See that? 1,751 messages, of which 559 are unread. I'll never get through all of these. But I do like to reply to those who take the time to leave a blog comment. And I also do not like to lose important work related messages! Do you have any suggestions for email management?
And this stack of books that I wanted to read before the summer is over?
Not going to happen!
I
Thursday, August 13, 2015
UFO Report
The UFO of the month (well, the last three months actually!) is almost ready to be quilted. As all quilters know, there is a lot of prep work getting to this stage. The top has to be "de-threaded" (technical term) and pressed, the backing must be pieced and pressed, the batting has to be purchased, measured and cut, and finally the three layers are ready to become a quilt sandwich. Boring.
But then the fun part starts - pin basting. Most people dislike this stage of quiltmaking but I like it. I put on some great music and spend the basting time thinking of possible thread choices and quilting designs.
I consider where the quilt will be going (gift, donate, or keep) and what it's job will be (utility vs. heirloom). And I think about the quilting I've done lately and what technique I might want to learn, or try again. While basting this quilt I decided to try a chevron design, but wasn't sure if I was patient enough to stitch a whole quilt of straight lines with the walking foot. As soon as I sat down to quilt and realized how many times I would have to turn the whole quilt to stitch straight chevrons, the decision was made - free motion wiggly chevrons it is.
This quilt is getting done in August!
Wednesday, August 12, 2015
Rugmaking
If you google rag rugs, you will find many techniques and variations on constructions methods. Because I am a stitcher at heart, I prefer the method using a needle and thread (which is a strip of fabric). This is called a toothbrush rug or a blanket stitch rug. You can find short video tutorials at the Rag Rug Cafe using the method that I use, and you can find tons of information at the Rugmaker's Homestead on all kinds of techniques.
I made lots of progress on my rugs on the weekend.
I finished a small rug using up some fabric that was either a drapery or upholstery fabric. It is a thick rug, and it's the perfect size to sit under my Featherweight machine.
I made a little progress on this new rug that my friend Louise helped me start on Saturday.
And I made lots of progress on the dirt coloured one. I figured that since the rugs get so dirty from being walked on that I will make a dirt coloured rug that won't even look dirty :)
The google photos of toothbrush rugs have me wanting to make a pretty one next with lots of bright saturated colours. But I'll finish these two first :)
I made lots of progress on my rugs on the weekend.
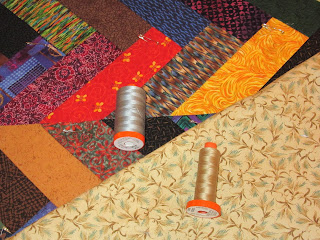
I finished a small rug using up some fabric that was either a drapery or upholstery fabric. It is a thick rug, and it's the perfect size to sit under my Featherweight machine.
I made a little progress on this new rug that my friend Louise helped me start on Saturday.
And I made lots of progress on the dirt coloured one. I figured that since the rugs get so dirty from being walked on that I will make a dirt coloured rug that won't even look dirty :)
The google photos of toothbrush rugs have me wanting to make a pretty one next with lots of bright saturated colours. But I'll finish these two first :)
Monday, August 10, 2015
Cozy Afternoon Block #4
On my design wall today are the first four blocks of Cozy Afternoon.
Don't pay any attention to my very thready design wall :)
The block at the top is block #4 and is the one I just finished. It was another fun block to construct following Jacquelynne's directions.
This is how I cut the pieced corners using my Olfa ruler that has many angles on both ends of the ruler.
I made a blue mark in the middle of the blue fabric. Then I positioned the 45 degree line on any pieced seam line on the block, while the edge of the ruler was lined up with the mid point on the blue block. 1st cut. Easy Peasy!
Then I did the same thing on the other side, placing the ruler edge at the mid point on the blue and white dots block, and lining up the 45 degree angle line - 2nd cut!
I must admit that I am a little worried about all the edges of this block being on the bias, so I used a lot of Best Press spray when I pressed the block and hope that will stabilize it enough until it get sewn to other blocks in the quilt top.
Isn't the bird pattern so cute? It was quick and easy - took about 2 hours to stitch.
Here are the other blogs to visit to see more variations on this block:
And to celebrate the release of block #4, Jacquelynne is giving away some of her patterns to our blog readers.
Leave a comment on this blog post and let me know how many Cozy Afternoon blocks you have sewn so far. The winner's name will be drawn on Sunday... good luck!
Don't pay any attention to my very thready design wall :)
The block at the top is block #4 and is the one I just finished. It was another fun block to construct following Jacquelynne's directions.
This is how I cut the pieced corners using my Olfa ruler that has many angles on both ends of the ruler.
I made a blue mark in the middle of the blue fabric. Then I positioned the 45 degree line on any pieced seam line on the block, while the edge of the ruler was lined up with the mid point on the blue block. 1st cut. Easy Peasy!
Then I did the same thing on the other side, placing the ruler edge at the mid point on the blue and white dots block, and lining up the 45 degree angle line - 2nd cut!
I must admit that I am a little worried about all the edges of this block being on the bias, so I used a lot of Best Press spray when I pressed the block and hope that will stabilize it enough until it get sewn to other blocks in the quilt top.
Isn't the bird pattern so cute? It was quick and easy - took about 2 hours to stitch.
Here are the other blogs to visit to see more variations on this block:
44th Street Fabrics
The Crafty Quilter
Red Letter Quilts
A Quilt and a Prayer
Lilypad Quilting
And to celebrate the release of block #4, Jacquelynne is giving away some of her patterns to our blog readers.
Leave a comment on this blog post and let me know how many Cozy Afternoon blocks you have sewn so far. The winner's name will be drawn on Sunday... good luck!
Sunday, August 09, 2015
Slow Sunday Stitching - Rag Rugs
Yesterday my friend Louise and I were at the Fergus Scottish Festival teaching people about making rag rugs. It was a great day! Here are some of the highlights:
**Albannach - what a great Scottish band, and the bass rhythm drummer Jacquie (on the right) is unbelievable! You can listen to their music here.
**Raymond - he is the maker of my new needles! I had been using the plastic toothbrush needle (from Aunt Philly's) but my friend Louise has this very creative neighbour Raymond who made us each a wooden needle and a bone needle.
This is what the needles look like when threaded with a strip of fabric. The bottom needle is Aunt Philly's, the yellow one Louise made from a plastic toothbrush, the white one is bone, and the brown one is wood.
These needles are amazing and are like stitching through butter. My new favourite is the bone, and Louise prefers the wooden needle.
**Steel City Rovers - another great band, and these folks are from Hamilton. To hear them, click here or come over to the festival right now!
**Students - we had great interest in learning how to make rag rugs. Most people couldn't resist touching the rugs we had on display. And we heard wonderful stories about rug makers from days gone by, who used all kind of different materials including ties, saris, bottom cuts on trousers, nylon stockings, and binder twine.
**Handwork all day long - This photo is of Louise helping to me start another rug. The beginning is the hardest part of this whole process, and between the two of us, we can usually figure it out with a minimum of swearing.
**Quilting - I snuck over to visit with the quilters and couldn't resist putting in a few stitches while I was there.
Uh oh... busted!
Get back to the rug making table!
The things to watch out for:
**this guy, who usually carries a large hatchet and is scary looking!
and
**these guys, who shoot their old (LOUD) guns right beside the heritage tent, and scare the living daylights out of people who have sharp objects in their hands!
Today is day 2 of rug making at Fergus Scottish Festival, but Louise can't come today, so if you're in the area stop by and keep me company, and make some rag rugs.
Those of you who can't come to the festival, link up your blog post below and share what you are hand stitching at your place.
Subscribe to:
Posts (Atom)