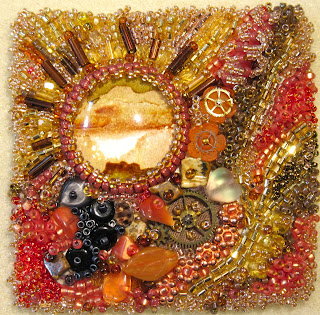
As most of my blog readers know, my granddog Max is quite a character and loves to chew things - like quilts and toys. He has a "toy graveyard" where his parents toss the toys needing repair. When the box is full, I bring it home to work on these damaged toys. I feel like I am an elf working on the island of misfit toys (reference to Rudolph movie).
Max likes to chew the faces and usually tries to remove the ears and eyes of the stuffed animals, and then tear out the stuffing.
Some of the holes can easily be sewn over. Sometimes I cut the head right off and sew it up at the neck and he will play with the body of the animal. Sometimes I remove all the stuffing and he carries around the fabric body until it's a scrap and goes in the trash. It's a "make work" project for me, and although it takes me away from the quilting that I'd rather be doing, I have to admit that I smile the whole time because Max has brought so much happiness and love into our lives!
Tuesday, November 29, 2016
Monday, November 28, 2016
Design Wall Monday
It's a boring looking design wall today. These are the neutral 4 patch blocks for step #1 of the Quiltville mystery. Bonnie recommended that if you want your finished quilt to be a smaller size (smaller than 87" square), it is a good idea to make half the blocks and that is what I'm going to do for this mystery project. So here are almost half of the recommended number of blocks.
I sewed a big pile of blocks without any thread, so those had to go through the machine twice! Don't you just hate when that happens? I can usually tell by the sound of some machines that the bobbin has run out, but I can't notice a different sound on the Singer 301s.
I have enjoyed cutting and sewing these neutrals from the Good Neighbours fabric line, but am looking forward to cutting into all the other fabrics and get some contrast going in the next step.
Linking up to Patchwork Times and Quiltville's step 1 link up.
Sunday, November 27, 2016
Happy National Pins and Needles Day
Did you know it was a special day today? Well, besides being Slow Sunday Stitching, and my baby sister's 46th birthday, today is also National Pins and Needles day!
My friend Debby recently bought a fascinating package of pins and needles from a Facebook auction. Just look at the size of these huge needles! The bottom needle is what I am using for my Life Is Beautiful embroidery threaded with 2 strands of DMC floss. These other needles are thick and long and amazingly sharp!! Would they have been used for darning socks?
Some of the larger needles were wrapped in soft cloth and tied with string. I guess that was a way of keeping a treasured needle safe and sound if you didn't have a needle book to keep it in?
Any speaking of which, just look at these fascinating needle books!
I spent a long time looking at these needles and wondering who had used them in the past. I am particularly fascinated by the "Lady Gay" book at the top where she is carrying a needle as if it were a gun, and the military figures are lined up behind her, some with red flags and some with white! And look at the book with the native chief with bright red lipstick! Both of these needle books must have interesting stories, but how can I find out about them?
And just look at these topless thimbles!
Have you ever seen these before? What would you use these for?
So many interesting finds and no background history to go with them. If you have any information about these types of needles or thimbles, please share it in the comment section.
Do you have interesting hand stitching needles that you use or collect? Link up your blog post below and tell us all about it!
An InLinkz Link-up
Saturday, November 26, 2016
Scrappy Saturday Spools #4
For the rest of the year, I am really trying to finish my scrappy spools quilt. You can read more about it in my post from the beginning of the month here. The picture does not reflect the effort, but it was a lot of thinking to get those bottom blocks right!
Once I finished the bottom of the quilt and filled in the setting blocks with spools and neutral squares, I moved over to the grey and black spools on the top right of the quilt edge.
Major progress!
Here it is so far. I am really happy with it! You can see how it is bigger than my biggest design wall! There is only the bottom right corner to sort out now!
It's hard to keep focused on this huge project and I am constantly distracted by other more fun projects I could be working on.
Wow I am easily distracted!
Squirrel!
Must keep focused!
It's hard to keep focused on this huge project and I am constantly distracted by other more fun projects I could be working on.
Wow I am easily distracted!
Squirrel!
Must keep focused!
To see more RSC finishes, hop over to the weekly linky party.
Friday, November 25, 2016
Circa 2016 Top is Done!
Here it is pinned to the design wall!
The HST border is finally done and I am happy with how it all turned out. Adding that final border was a challenge (although not as big of a challenge as putting together the centre panels).
The side borders went on okay and gentle stretching managed to ease in any excess fabric. But the top and bottom borders were out by half a block.
My choices were:
1) cut off the excess mid block (tempting!)
2) keep all the blocks but take in a few of the seams, making the seam allowances wider in some spots and thus shortening up the border
3) remove one block and let out the seams of other blocks, reducing the seam allowances to 1/8" and gradually lengthening the row until it fit, or
4) remove the side borders, add a coping border, reattach the side borders, refigure the measurements to make a similar coping border for the top and bottom borders (but actually do all this in your mind while the quilt stays in the UFO closet for a few years)
I chose option #3 and was happy with how it all turned out.
I was so happy in fact that I got it in my mind to finish this quilt in the same year it was started. Say what?!?!
I briefly glanced at my UFO of the month that is calling out for attention, and decided it can wait another month or two.
Circa 2016 has to be finished in 2016!
I got out the pins and my favourite Kwik Klip tool, and got to work on basting the quilt.
And also today I am excited that the new mystery quilt is starting over at Quiltville! I love starting a new quilt!!
Thursday, November 24, 2016
A Hand Quilted Finish!
I am so excited to show you that I finished my hand quilted bow tie quilt! It's completely done... including the label!
*Thank you to the quilters who sewed most of these blocks, made with reproduction fabrics and muslin. I made a few more full size blocks to add to the blocks I received in the swap, and made all but two of the mini bow ties to make the top and bottom border.
*Thank you to Sharon over at Vroomans Quilts who inspired the layout idea.
*Thank you to Stitch by Stitch in Kingston where I purchased the backing yardage in the sale room for $5... it just happened to be the perfect size for this project!
*Thank you to my amazing quilt holder - my niece Ellen. This is my favourite photo of the bow tie quilt, taken just as I was finishing the quilting. Here she is just getting ready to head off to Saturday morning fire fighter training classes. In the afternoon she was teaching lifeguarding classes, and during the week she studies chemical engineering. I just feel so inspired by her and I am so very proud to be her Aunt.
*And the final thank you to the Slow Sunday Stitchers for all their encouraging words when seeing this quilt week after week after week! It's finally a finished quilt!
LInking up to Amanda over at Crazy Mom Quilts.
The edges look a little wobbly but they're not. The quilt is pinned to the design wall so the waves are an optical illusion.
And now the 'thank you' list:
*Thank you to Barb who started this quilt with a bow tie block swap last fall. And now the 'thank you' list:
*Thank you to the quilters who sewed most of these blocks, made with reproduction fabrics and muslin. I made a few more full size blocks to add to the blocks I received in the swap, and made all but two of the mini bow ties to make the top and bottom border.
*Thank you to Sharon over at Vroomans Quilts who inspired the layout idea.
*Thank you to Stitch by Stitch in Kingston where I purchased the backing yardage in the sale room for $5... it just happened to be the perfect size for this project!
*Thank you to my amazing quilt holder - my niece Ellen. This is my favourite photo of the bow tie quilt, taken just as I was finishing the quilting. Here she is just getting ready to head off to Saturday morning fire fighter training classes. In the afternoon she was teaching lifeguarding classes, and during the week she studies chemical engineering. I just feel so inspired by her and I am so very proud to be her Aunt.
*And the final thank you to the Slow Sunday Stitchers for all their encouraging words when seeing this quilt week after week after week! It's finally a finished quilt!
LInking up to Amanda over at Crazy Mom Quilts.
Wednesday, November 23, 2016
Resiliency
Be resilient |
I reminded myself that this IS actually Mr. Google's house and it is a free service, and he can actually rearrange or remove the furniture anytime he wants to!
And so I try to adjust and relearn again how to use a new system in order to do something I've done a thousand times before. The choice is to adapt, bounce back and be resilient, or give it up and walk away. And we all know that just when I do start to master the new system, it will be changed again!
And now onto the regular blog content...
this week I have been working on my bow tie quilt and am so close to the finish line. I removed all of the frixion marking lines with a hot iron. Some people are afraid of these marking pens, thinking that there might be a "ghost line" (a white line might reappear in the future) or that the original markings might return if the quilt gets too cold.
I'm okay with that since the lines will be underneath and mostly covered by thread. And reapplying heat will make any of those lines go away again. If this was going to be an heirloom quilt meant to last 100 years, I might not use a frixion pen for marking, but this quilt will be used regularly and will be in shreds at the end of a couple of years.
The quilting is done, the marks are removed, the binding is attached and now I am hand stitching it down on the back....my favourite part of quiltmaking that hasn't changed much for centuries!
Monday, November 21, 2016
Design Wall Monday
Well here it is... my version of the Scrap Dance Tango quilt with the sashing and cornerstones finished. I'm loving it and happy that it is ready for the final border. I have to go shopping for that fabric, so progress is stalled for the moment. It was so fun to work on this in the midst of working on two other large on point quilts. It was easy sewing with manageable seams and everything fit together... gotta love that!
To see more design wall postings, hop over to Patchwork Times.
Sunday, November 20, 2016
Slow Sunday Stitching
Welcome to the weekly hand stitching party!
It's time to take a deep breath, pick up your needle and threads and take some stitches in your project.
Guess what I will be doing tonight?!?
My most favourite quilting activity - hand stitching a binding!
I finally finished hand quilting my bow tie quilt and it's ready for the binding. It's so exciting when you get to this stage of making a quilt. It's especially true when you have worked on a project for hours and taken it everywhere you have been for months. This is a terrible photo, but when I have time for stitching, it's always dark and difficult to get good photographs. By the way, did you see all the great comments on lighting tips at the link up two weeks ago? Click here to check it out.
Maybe next week I'll have a finished project to show!?!
What are you hand stitching today? Link up your blog post below and share your progress with us.
An InLinkz Link-up
Saturday, November 19, 2016
Scrappy Saturday Spools #3
For the rest of the year, I am really trying to finish my scrappy spools quilt. You can read more about it in my blog post here.
This week I am working on the bottom left corner. I have to make the right colour of spool block to fit in the spaces of the setting triangles at the end of the diagonal rows. Then each of those spool blocks needs two neutral squares added to either side.
I'm really tempted to put this away and make some fun scrappy blocks! Part of my challenge is that I had been working on Allietare which is also an on point layout and I am tired of tackling these long seams. I keep getting distracted by thoughts of wanting to start something new, but am really committed to finishing this quilt top.
Must. Push. On.
To see more RSC projects coming to completion, hop over to the Saturday link up.
Add caption |
This week I am working on the bottom left corner. I have to make the right colour of spool block to fit in the spaces of the setting triangles at the end of the diagonal rows. Then each of those spool blocks needs two neutral squares added to either side.
I'm really tempted to put this away and make some fun scrappy blocks! Part of my challenge is that I had been working on Allietare which is also an on point layout and I am tired of tackling these long seams. I keep getting distracted by thoughts of wanting to start something new, but am really committed to finishing this quilt top.
Must. Push. On.
To see more RSC projects coming to completion, hop over to the Saturday link up.
Friday, November 18, 2016
Circa Update
The Circa quilt is still on the radar. The HST border is being constructed this week. I decided I liked the light side of the blocks facing toward the centre of the quilt and have sewn the blocks together in four border strips to go around the quilt. I just have to figure out how the corners will be and be brave in sewing the borders onto the quilt. The last border added will be black.
Maybe it will be done by next Friday?!?
Thursday, November 17, 2016
Scrap Dance Tango Update
I have been working on my version of Carole's mystery quilt called Scrap Dance Tango. I finished sewing 20 blocks and then had to decide how to put them together. In order to avoid matching millions of points (and becoming best friends with my seam ripper) I decided to add sashing. Good decision.
But that leads to many more decisions.
What size of sashing? Narrow? Wide?
Should it be scrappy? Yardage? Neutral? Dark?
I thought about what size of quilt I wanted this to be, what sashing size looked more visually appealing to me, and played with some options on the design wall.
Finally I decided on neutral sashing cut the same size as the blocks. But then I got an idea to use square in a square blocks for cornerstones and started sewing some of these. Cute!
Here is the quilt top so far.
I love the effect of these little cornerstone blocks in the sashing.
Now I think I need to make 18 more of them to add a sashing border around the whole quilt. And then I think it's finally done!
And just in time because Carole has started another scrappy quiltalong called Scrap Dance Waltz!
And another fun event happening this week is the release of Quiltmaker's new 100 blocks magazine. You can see some of the blocks on the Quilty Pleasures blog. This is volume #14 and I can't wait to get my hands on this latest issue of my favourite magazine!
Wednesday, November 16, 2016
Local Shop Hop Project
At the beginning of November there was a local 5 store shop hop that I was able to fit in my schedule. It was a lovely day for a drive and the stores are within a workable driving distance to visit in one day. Here is the cute passport for the hop, which was stamped at each store you visited.
In addition to having lovely gift packages for draws in each store, they also hosted a free mystery project. You picked up a small piece of fabric at each shop, and when you arrived at your last store you received the pattern to go with the fabric.
Even though my unfinished Halloween project was sitting on the table, I brought this fabric home and started cutting! The project turned out to be a cute snowpeople tablerunner (12" x 41") that was fun and easy to make. The next step is pin basting and machine quilting, and then hand stitching the little snowpeople faces. In the middle of working on some challenging patterns and large projects, it was so refreshing to have a quick project to enjoy!
Linking up today with Lorna's party over at Let's Be Social.
Monday, November 14, 2016
Allietare is on the design wall!
I must start off today saying I am quite proud of myself!
I have my 2015 Quiltville mystery blocks sewn into a quilt top! And all the lines in the setting triangle fabric are going in the right direction!
Woohoo!
It measures 73" x 85" at this point and I don't know if I want to add another border or two. But for now, I am just admiring it!
This means I am ready to start the next Quiltville mystery called "En Provence". I have my fabric selection well underway and will be ready when the first step comes out at the end of the month.
To see more design wall postings, hop over to Patchwork Times.
Sunday, November 13, 2016
Fearless Slow Sunday Stitching
Welcome to Slow Sunday Stitching!
Today's topic is being fearless!
I am teaching an intuitive hand beading class at my local quilt guild next year and have had a few people ask me multiple questions about the class while trying to determine if:
1) they would like it, and/or
2) if they could realistically be successful.
Okay people... let's start the pep talk with a quote from Megan who blogs over at The Bitchy Stitcher said:
"If you make ANYTHING, you are a magician."
I love that!
If you have an interest, if you are drawn in any way to a topic, a book, a class, a quilt pattern, or a person, then trust that there is something magical about that interest, that it might be your invitation to an adventure waiting for you, and maybe a fresh new experience to learn and to grow.
So, all you magicians out there... open up your craft bins, enjoy all the sparkly items you have collected over the years because you were drawn to them, fearlessly open up your UFO closets and see what magic you can create with all this stuff! And have some FUN!!
The worst that can happen is that you hate the technique and never touch the supplies again. That's okay! I took an Indian cooking class once. It was a blast and I learned a ton. And I will never try cooking this again because it was way too much work to create something that might taste good and will be gone/eaten within minutes! I learned that my truth is... I would rather be stitching and painting and beading, and buy take out Indian food! But I am delighted that I tried to learn, because I want to be a life long learner and someone who embraces new experiences.
So here is your personal money back guarantee for any life adventures you are drawn to:
I personally guarantee you will enjoy something about the experience, have at least one interesting conversation with a fellow human, and learn at least one invaluable life lesson OR crafting technique (both are equally valuable) that interests you.
Optional: you might have FUN, even if you don't enjoy it or are terrible at it!
Be a fearless magician! Go sign up for that class you have been wondering about! Try that technique you've been interested in!
We hope you will link up your blog post below and tell us about the hand stitching project you are working on right now so that we can encourage you in your magical slow stitching progress!
An InLinkz Link-up
Today's topic is being fearless!
I am teaching an intuitive hand beading class at my local quilt guild next year and have had a few people ask me multiple questions about the class while trying to determine if:
1) they would like it, and/or
2) if they could realistically be successful.
Killarney |
Okay people... let's start the pep talk with a quote from Megan who blogs over at The Bitchy Stitcher said:
"If you make ANYTHING, you are a magician."
I love that!
If you have an interest, if you are drawn in any way to a topic, a book, a class, a quilt pattern, or a person, then trust that there is something magical about that interest, that it might be your invitation to an adventure waiting for you, and maybe a fresh new experience to learn and to grow.
Some of my beaded bindings |
So, all you magicians out there... open up your craft bins, enjoy all the sparkly items you have collected over the years because you were drawn to them, fearlessly open up your UFO closets and see what magic you can create with all this stuff! And have some FUN!!
Indian cooking class supplies |
So here is your personal money back guarantee for any life adventures you are drawn to:
Be fearless! |
Optional: you might have FUN, even if you don't enjoy it or are terrible at it!
Be a fearless magician! Go sign up for that class you have been wondering about! Try that technique you've been interested in!
We hope you will link up your blog post below and tell us about the hand stitching project you are working on right now so that we can encourage you in your magical slow stitching progress!
An InLinkz Link-up
Saturday, November 12, 2016
Scrappy Saturday Spools #2
For the rest of the year, I am really trying to finish my scrappy spools quilt. You can read more about this project in last Saturday's post.
Progress has been made and I have completely finished the top left corner. That was a lot of work filling in the setting blocks on the edges and sewing the diagonal rows together.
I think I procrastinate this stage of quilt making because it is challenging to sew the long rows together and the whole thing is just unwieldy and not fun. I am pinning every seam join as I go along which takes a long time. Sometimes I don't use pins at all, but this project just needs them.
Linking up to RSC over at SoScrappy and Oh Scrap.
Friday, November 11, 2016
Circa Update
Work is continuing on the Circa 2016 quilt project. All the HST blocks were constructed, then sewn into twosies, then foursies, and now they are mostly in sixies (not a real word!)
Time to figure out the math and see how these blocks will attach to the main quilt, and whether a coping border will be necessary. If the math is too hard, some coping beverages may also be necessary!
Today is Remembrance Day in Canada. We pause at the eleventh hour of the eleventh day of the eleventh month to remember those courageous individuals (and their families) who have fought, and continue to fight for the privilege of living in a peaceful and safe country.
Thursday, November 10, 2016
En Provence Fabric Selection
The annual Quiltville mystery is starting at the end of the month (click here to see the intro and fabric requirements). The fabric selection process is always the most challenging step. Some years I have followed the recommended colours (Easy Street and Allietare) and some years I went right off the rails (Orca Bay, Double Delight, and Carolina Crossroads).
If you are a beginning quilter, I would recommend following Bonnie's fabric choices exactly as outlined. But if you're an experienced quilter and have a stash you want to use up, have some fun and pick your own colours. I love all of my Bonnie mystery quilts and I know that whatever fabric I am inspired to use, I will have lots of fun AND her patterns will produce a great quilt.
I did discover in making Grand Illusion that I do not enjoy sewing quilts using yardage. In my heart I am a scrap quilter, so I don't like to use 1 yellow fabric when I could incorporate 10 different yellows! More = more fun!
Bonnie said: "Let your quilt make a statement that is as uniquely you as your own handwriting is."
And so... drum roll please... I present my fabric selection for 2016-2017 En Provence. I really wanted to use the Good Neighbours fabric line by Amanda Jean Nyberg, which is a bright and happy grouping of primary colours with an amazing selection of neutrals that I love. I did remove the red fabrics out of the project in favour of the dark pinks. A few other fat quarters have been added to some of the colour groupings.
Dark blue will be the purple, lighter blue will be the lilac, green is the green, pink is the magenta, and I can't decide whether the orange or the yellow will be the yellow. The yellow looks like it might blend too much with the neutrals. But the orange might compete with the magenta?
What are your thoughts?!?
Are you playing along with the mystery this year?
Wednesday, November 09, 2016
Broken Dishes Swap Blocks
Barb hosted a block swap last month and I had so much fun with the bow tie swap last year, I just had to participate in her swap again this year! This year's block was called 'broken dishes' and we made them using muslin and repro reds. It was a bit more of a challenging block to sew than the bow tie was, but I managed to get them in the mail in time.
Here are half of the fabulous blocks I received in the mail! There is a wide range of interesting red prints and they will make a really great quilt!
I picked out a pattern by Hyacinth Designs to make with these blocks and can't wait to get started on it. But I'm thinking this will make the perfect project to work on at Christmas time so you might not see it in production on the blog for a couple of weeks. Also I want to finish the bow tie quilt from last year's swap before I start the broken dishes quilt.
Thank you to all the block makers and to Barb for hosting a fun swap for us!
Linking up today to the quilting bee over at Sew Fresh Quilts.
Monday, November 07, 2016
Design Wall Monday
One of my projects that I would like to finish by the end of the year is the Scrap Dance Tango. I started this quilt in February and finished 12 blocks. Then I decided I wanted to make it bigger and needed 20 blocks (4 blocks across and 5 blocks down). Here are the blocks on the design wall. The bottom blocks are only partially finished and I need the components to make one more complete block. It's so close to becoming a quilt top!
This is such a wonderful scrappy project and there are hundreds of fabrics in these blocks. But every once in a while I come across a block I just have to fix. When I am trying to sew random scrappy blocks how is that these two fabrics ended up right beside each other?!? I remind myself that "random" does not mean evenly spaced. However, I really can't leave it like that! The seam ripper is ready to separate them!
I am linking this post to Design Wall Monday at Patchwork Times.
Sunday, November 06, 2016
Slow Stitching Sunday - Lighting
Welcome to Slow Sunday Stitching! Do you live somewhere in the world where you turned your clocks back 1 hour last night? If so, that means you have one extra hour to stitch today! However you will likely be spending more time stitching in the dark!
Do you have any lighting tips for us to make sure we can see well enough to stitch through the long dark winter?
This is a photo that shows my favourite Ikea lamp that I use for hand work. It has a solid base and a flexible neck to focus the pool of light where I need it. This is my winter hand quilting project which is great to cuddle up under on those cold winter nights. I will return to working on it once I finish the bow tie quilt.
Speaking of which, I did finish one corner of the bow tie quilt this week. It looks good in real life, but I couldn't get a decent photo of it last night. It's too dark!
My goal today is to finish the second corner and the quilting will then be more than half way done!
What are you hand stitching today? Link up your blog post below and share your project and your lighting tips with us.
An InLinkz Link-up
Do you have any lighting tips for us to make sure we can see well enough to stitch through the long dark winter?
This is a photo that shows my favourite Ikea lamp that I use for hand work. It has a solid base and a flexible neck to focus the pool of light where I need it. This is my winter hand quilting project which is great to cuddle up under on those cold winter nights. I will return to working on it once I finish the bow tie quilt.
Speaking of which, I did finish one corner of the bow tie quilt this week. It looks good in real life, but I couldn't get a decent photo of it last night. It's too dark!
My goal today is to finish the second corner and the quilting will then be more than half way done!
What are you hand stitching today? Link up your blog post below and share your project and your lighting tips with us.
Subscribe to:
Posts (Atom)